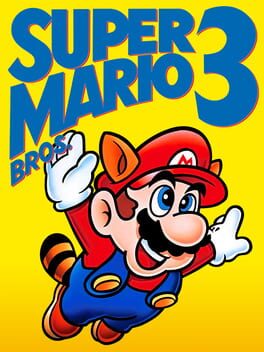
1990 · Nintendo R&D4 · platformer · Nintendo
18 sources · 76 facts · verified 4mo ago · how this was made
Why this one is in the canon, and how to start it well.
Every named code, glitch, and easter egg above traces back to one of these sources. SharkVault editorial AI is grounded in human-curated facts files; nothing on this page is invented.
Cheat-device culture exploded around SMB3. Galoob’s Game Genie code book shipped with 38 entries for the title—infinite lives, moon-jump, always-invincible, always-fly, and the legendary KKKZSPIUIPG debug code that unlocked a developer test mode cite. Players swapped Warp Whistle locations (World 1-3 white-block secret, World 1 Toad House) and debated whether the P-Wing trivializes World 8 or simply levels the playing field against the relentless Hand traps Bowser deploys across Dark Land cite. SMB3 taught a generation that mastery meant knowing when to break the rules—and that sometimes the most fun comes from a well-timed invincibility code and a pocketful of hammers.
Grab the Super Leaf in World 1-1’s first ? Block. Raccoon Mario is your core movement tech—hold B to fill the P-Meter (bottom-left), then lift off for flight. You can stay airborne indefinitely if you tap A in rhythm; use this to skip entire vertical sections and find secret areas above the level ceiling.
Collect White Mushroom Houses by ending stages on specific coin counts. Multiples of 11 (11, 22, 33, etc.) spawn Toad Houses with rare items—P-Wings for infinite flight, Anchors to skip Hand traps, Hammers to break map rocks. The coin counter resets between levels, so plan your collection route.
Crouch on white blocks for 5 seconds to drop behind the scenery. This reveals bonus rooms and warp whistles. World 1-3 has the first whistle behind the goal card; World 1 Fortress has another in the ceiling (fly up at the end). Two whistles let you warp to World 8 directly.
Hold A + B while running to pick up Koopa shells and frozen enemies. Throw shells to chain-kill for 1-Ups (8 consecutive hits = extra life). Carry items through pipes and doors—you can use a shell as a projectile against bosses.
Stock your inventory from Toad Houses and Spade Panels. The overworld map lets you hold items between stages. P-Wings trivialize fortresses; Frog Suits dominate water levels. Use Starman before entering a stage for 20 seconds of invincibility from the start.
Learn the Fortress end-boss pattern: Boom Boom telegraphs jumps with a crouch. Jump on his head three times. After the first hit he grows wings; after the second he moves faster. Stay mobile and bait his jump arcs.
Save Hammer Suit for Airships. The projectile pierces through multiple enemies and destroys terrain. World 8 fortresses and the final Bowser gauntlet reward defensive play—Hammer Suit lets you kill from range while tanking hits.
P-Meter momentum carries between screens. Sprint to fill the meter, then maintain speed through pipes and doors — you’ll emerge running and can take flight immediately without rebuilding momentum.
White Tanooki Suit appears after five deaths on the same stage. The invincibility lasts one level; grab it, clear the stage, then die intentionally to farm another if the next gauntlet has you stuck.
Duck on white blocks for ~5 seconds to drop behind the scenery. Works on specific stages (1-3, others) — you’ll fall through and can run to the goal card unimpeded. Not every white-block stage supports this; trial-and-error required.
Koopa shell kicks ricochet and build 1-up chains. Kick a shell into a cluster of enemies in tight corridors (especially underground stages); each consecutive hit increases points until you hit 1-up threshold. Works best in 1-2 and World 5 pipe rooms.
Hammer Suit blocks most projectiles and stomps any non-spiked enemy. The hammers arc high — stand close to Boom Boom or airborne threats and spam B. You can’t fly, but you can crouch-block fire and tank Bowser’s flame patterns.
Inventory management: hold items for Fortress/Airship stages. The overworld lets you stockpile up to 28 items (per matching card panels). Save P-Wings and Hammer Suits for autoscrollers and boss rushes; burn Frog Suits on water stages immediately since they’re situational dead weight elsewhere.
Warp Whistles stack — use one to reach World 9 (Warp Zone), then use a second whistle there to skip directly to World 8. Fastest route to Bowser if you’re not completing all worlds.
The walls players actually hit, and the way through each.
World 4-5 (Giant Land vertical maze) — The mid-stage vertical climb with narrow platforms and Piranha Plants punishes rushing. Wait for each Plant’s full retract cycle before you jump. The Tanooki Suit’s statue-drop (Down+B in mid-air) lets you fall through gaps without lateral drift — you bypass the tightest jumps outright. No power-up? Take the lower-left path at the first fork; it’s longer but has fewer Plants.
World 5 Airship (Sky Land) — Boom Boom’s arena has a low ceiling and Rocky Wrench spawns that wreck your jump timing. Players stomp Boom Boom mid-jump and eat a wrench. Clear the Wrenches first with fireballs (Fire Flower) or tail-whips (Raccoon/Tanooki), then bait Boom Boom’s jump by standing at mid-distance. He telegraphs with a short ground pause; stomp during his ascent, not at the peak.
World 7-9 (Pipe Land water maze) — The underwater labyrinth with Jelectros and current zones disorients because the exit pipe sits in the upper-right, but the natural current pushes left. Swim against the current in short bursts (tap A, don’t hold) to hold position. The Frog Suit trivializes this — faster swim speed and better maneuverability — but if you entered without one, hug the top boundary and navigate right-then-up in an L-shape rather than fighting diagonally.
World 8 Hand Traps — The wandering Hand icons on the overworld map drag you into forced-autoscroll levels when they catch you. Hands move after you move; they’re turn-based. Plot your path to the castle in advance, counting tiles. Use Hammer Suit or Cloud stages to skip past Hand clusters. If caught, the autoscroll stage has a P-Switch near the midpoint that turns Munchers into coins — hit it and you can run the floor instead of platform-hopping.
Bowser’s Castle (World 8 final fortress) — The statue room before Bowser has a floor that crumbles on weight. Players stand still expecting a puzzle; the floor collapses and they fall into the pit. Keep moving. The statues are decoration. Sprint right, jump the gaps, ignore the Roto-Discs. Bowser himself ground-pounds to break floor tiles — stay mobile, bait the pound away from your position, then counter-stomp or fireball during his recovery frames.
15 of 685 verified codes, free to read. The rest are in the Code Vault.
PEEULAGTPEOLAAGTAEKPTZGAZITGAGALKAESVNEANZKLLAAEKPTZGEYNKPTZGEVVOLPOSEAEXSUZPAAAXKULTAAAXKXUSZESKXPGEYEYNLLIEIAPKGELTPKLOKSLAKGameShark Labs · SharkVault Founding Membership
Unlock the full guide
9 more sections + all 685 codes in the Code Vault : boss strategies, glitches, easter eggs, and the complete archive. Founding Members get every GTA drop through launch day.
Only 64 days until GTA VI. lock in $1.99/mo for life before the founding rate closes (then $2.99/mo).
My ★★★★★ review of Super Mario Advance 4: Super Mario Bros. 3 (2003) on @backloggd.com : game so nice i reviewed it twice! bckl.gg/utzL
dille (@spacebeer.net)
My ★★★★★ review of Super Mario Bros. 3 (1988) on @backloggd.com : in a subversive move, i review a game almost everybody likes bckl.gg/utjx
dille (@spacebeer.net)
Easily Super Mario Bros. 3! SMB 1 was my first game ever, but the addition of so many zany power-ups, the various types of worlds (desert, water, ice, etc.), and more approachable difficulty just captured me fully from the start 😊 Plus the music is fire
Brink 🎮 (@brinkofgaming.bsky.social)
Surfaced from external sources, newest first. Not editorially endorsed.· 20 more in this feed.· 2 placed beside the sections they relate to above.