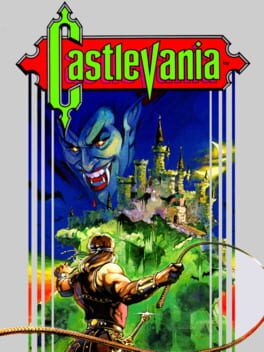
1987 · Konami · platformer · Nintendo
20 sources · 38 facts · verified 4mo ago · how this was made
Why this one is in the canon, and how to start it well.
Every named code, glitch, and easter egg above traces back to one of these sources. SharkVault editorial AI is grounded in human-curated facts files; nothing on this page is invented.
The cheat-code scene exploded around Castlevania because the game was hard in ways that made every advantage feel earned. Galoob’s Game Genie release for the NES included nine Castlevania codes at launch—infinite lives, invincibility, mega-jump, stage select—and the game became a proving ground for the code-sharing networks that later coalesced into GameFAQs and the early web. Players didn’t just want to beat Dracula; they wanted to dissect the Castle, route the optimal sub-weapon for each block, and shave seconds off the Phantom Bat fight. Castlevania was the first NES game where “beating it with codes” and “beating it legit” felt like two separate accomplishments, both worth the brag. That duality—the brutal baseline and the supercharged alternate—is why it remains a speedrun staple and why the whip crack is still iconic forty years later.
Whip every candle. Hearts are subweapon ammo, not health. Meat restores six bars. The morning star upgrade drops in Stage 2—grab it.
Hearts fuel subweapons. The axe arcs overhead; holy water freezes enemies in place. Boomerang handles crowds. Stopwatch costs five hearts and freezes the screen—save it for Medusa head gauntlets and boss emergencies.
Crouch on stairs to dodge projectiles. You can’t move while crouched, but most attacks pass overhead. Medusa heads spawn in fixed patterns—learn the timing or take damage on every staircase in Stage 3.
Commit to jumps early in Stage 2. Simon’s arc is stiff; you can’t adjust mid-air. Moving platforms have tight windows. Walk off edges for short drops—don’t jump.
Whip the fake wall in Stage 4 before the staircase. Pork chop behind it. Full heal.
Boss patterns matter more than health bars. Phantom Bat splits into two smaller bats—holy water locks them down. Mummies throw bandages in fixed arcs—stay mobile, whip between volleys.
Three lives, four continues. Game Over restarts the current stage, not the whole game. Use your first life to learn boss patterns; execute on the second.
Whip diagonally upward while jumping to hit candles and enemies above you without losing forward momentum. The arc covers more space than you expect — you can break ceiling-mounted candles mid-leap without stopping your approach.
Crouch at the edge of stairs to duck most projectiles. Enemies throw axes, bones, and fireballs in straight lines; crouching on a staircase tile drops you below the trajectory. Works on Bone Pillars, Axe Knights, and Medusa Heads if you time the crouch.
Holy Water freezes bosses in place. Toss one at a boss’s feet — the lingering flame puddle deals rapid tick damage and locks them in hitstun. Chain multiple bottles if you have hearts. Trivializes Death and Dracula’s first form.
Hearts are ammunition, not health. The HUD number is your subweapon reserve. Collecting a heart at max capacity still refills one pip if you’ve spent any — sweep every candle even when full.
Medusa Heads follow sine-wave patterns. They don’t home in; they bob in fixed arcs. Walk forward at constant speed and they pass over or under you. Stopping or backtracking breaks the rhythm and gets you hit.
Knockback always pushes you backward, even in midair. Jump toward a pit and take a hit, you fall in. Face away from hazards when the screen is crowded — getting knocked forward is survivable, getting knocked into a chasm is not.
The Cross boomerang pierces multiple enemies and returns. Only subweapon that can hit the same target twice per throw. Costs one heart but clears entire hallways if you stand still and let it loop back through the spawn points.
Stair-canceling saves frames but costs health. Jump off stairs mid-climb to skip the slow transition animation, but you take collision damage from enemies you’d normally pass safely. Worth it in speedruns; risky in blind casual play.
The walls players actually hit, and the way through each.
Stage 2 Medusa Head gauntlet before the Phantom Bat
The staircase leading to the first boss is infamous: Medusa Heads spawn in sine-wave patterns that push you off the steps. Players who try to whip-clear every enemy die here repeatedly. Sprint up the right side of the stairs with minimal jumps—Simon’s walking speed outruns the spawn cycle if you don’t stop. If a head forces a jump, tap A for the shortest possible arc; full jumps hang you in the air long enough for the next wave to collide. Holy Water trivializes this if you carried it from Stage 1, but most first-timers enter with the dagger and suffer.
Stage 3 moving platforms over the water pit
The three-block-wide platforms that shuttle horizontally demand frame-aware timing. Players who jump onto a moving platform mid-travel frequently overshoot into the pit. Wait for the platform to reach its leftmost position, then walk onto it—no jump. Ride to the right edge, then jump forward to the next platform as it approaches. Never double-jump here; Simon’s arc is too long. If you fall, you restart the entire stage. The Watch freezes the platforms in place for five seconds, but burning hearts here leaves you vulnerable in the Mummy Men room two screens later.
Stage 4 Frankenstein + Igor double-boss
The cramped arena and two-target pressure break players who tunnel-vision on Frankenstein. Igor jumps constantly and chips damage while you’re focused on the big guy. Kill Igor first. He has far less health and his jump pattern is predictable—stand near the left wall, whip him twice as he arcs toward you, sidestep Frankenstein’s lunge. Once Igor is gone, Frankenstein’s slow fireball attack is trivial to avoid. The Stopwatch deletes this fight entirely if you have 15+ hearts banked, but most players enter with daggers and no plan.
Stage 5 Death scythe phase
Death’s first form spawns four orbiting scythes that track Simon while Death teleports. Players who stand still to whip Death eat scythe damage every cycle. Walk in small circles near the center of the room—the scythes lag behind your position by roughly one second. Whip Death during his materialization frames (he’s vulnerable for a half-second window when he reappears). The Cross with double/triple-shot cuts this phase to under 20 seconds, but requires you to have farmed the candles in the hallway before the boss door.
15 of 135 verified codes, free to read. The rest are in the Code Vault.
01A9:00GSIIZZPSAALX0071:63XELNGOZOLSENGKGOEUAKPIVZPEPIVZ0070:02SLSVXUVSSZEZANSEEEATEAPSZXTLSTLVGNGameShark Labs · SharkVault Founding Membership
Unlock the full guide
9 more sections + all 135 codes in the Code Vault : boss strategies, glitches, easter eggs, and the complete archive. Founding Members get every GTA drop through launch day.
Only 64 days until GTA VI. lock in $1.99/mo for life before the founding rate closes (then $2.99/mo).
Castlevania Nocturne but Alucard knows speedrun strats 🦇 ------ Script/Editing/Alucard VA - Me! #Castlevania #CastlevaniaNocturne #SymphonyoftheNight #Alucard
JacobTJV (Video Editor and Voice Actor) (@jacobtjv.bsky.social)
Surfaced from external sources, newest first. Not editorially endorsed.· 12 more in this feed.