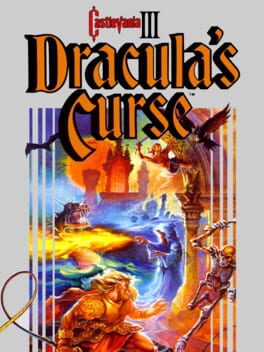
1990 · Konami · platformer · Nintendo
Why this one is in the canon, and how to start it well.

The Game Genie cottage industry exploded around Dracula’s Curse harder than any prior Castlevania release. Galoob’s official code book shipped with invincibility codes, infinite hearts, stage-select entries, and partner-swap tricks that let players experiment with companion synergies the linear design never intended. GameFAQs archives from the late ’90s are thick with user-submitted codes for damage multipliers, moon-jump variants, and timer freezes — playground-rumor tech that defined pre-internet cheat culture. Speedrunners later dissected the branching structure into discrete categories (Grant route, Sypha route, Alucard route), and TASVideos has documented frame-perfect stair-clips and damage-boost sequences that turn the 90-minute campaign into a sub-40-minute execution showcase. If Castlevania invented the Gothic action-platformer and Simon’s Quest tried (and failed) to add exploration, Dracula’s Curse synthesized both into the template Symphony of the Night would perfect eight years later.
Master the whip arc first. Trevor’s Vampire Killer swings diagonally upward from standing — crouch to hit straight ahead. Warakiya Village throws high-swooping bats at you; the forest sends low zombies. The game teaches the arc by forcing you to use it.
Always carry a subweapon. Hold Up+Attack to throw axes, holy water, knives, stopwatch, or boomerang. Holy water locks enemies in place and burns continuously — it trivializes early bosses. Axes arc upward for ceiling threats. Picking up a new subweapon replaces your current one, so commit.
Recruit Grant DaNasty at the clock tower fork (Stage 3). After the Cyclops boss, the path splits: upper route recruits Grant, lower route delays you to Sypha much later. Grant climbs walls and ceilings, attacks faster than Trevor, and turns vertical platforming from a slog into a speedrun. Take the upper path.
Stairs lock you into animations. NES Castlevania stairs trap you in ascent/descent — no jumps, no attacks mid-climb. Medusa Heads and Bone Pillars spawn on staircase screens to exploit this. Clear the screen before you commit, or use Grant to ceiling-walk past the stairs entirely.
Die deliberately to farm 1-ups. Stage 4 (Sunken City) starts with a pot-roast that refills health. At 99 hearts, each pot-roast grants a 1-up instead. Die, restart the stage, repeat. Stock 5–6 lives before the Ship of Fools (Stage 6).
Switch partners at the blue stone markers. Blue blocks let you swap Trevor’s active partner or go solo. Alucard (recruited Stage 6 alternate path) transforms into a bat for flight but takes double damage. Sypha’s lightning spell melts bosses but she’s fragile. Grant is the all-rounder for first runs.
The Japanese Famicom version is easier. US Dracula’s Curse has doubled enemy damage and reduced invincibility frames after hits cite. If you’re emulating or playing Castlevania Anniversary Collection, the Japanese Akumajou Densetsu ROM is the intended difficulty curve.
Partner choice locks for the run. Recruit Grant, Sypha, or Alucard and you’re married to them until the credits. Grant’s wall-climb breaks vertical stages; Sypha’s spells delete bosses; Alucard’s bat form skips entire sections but his damage output is tissue-paper. Pick for the route you’re running, not the partner you like.
Whip diagonally downward on stairs. Trevor angles the whip down-left or down-right while climbing—hits enemies below without eating a face full of Medusa head. Most staircase ambushes fold if you lead with diagonal cracks.
Hearts are currency, not health. Sub-weapons burn hearts per use—axe, holy water, cross all cost you. Stack hearts before boss doors; holy water spam flattens the Mummy and Frankenstein if you walk in with 20+ in the bank.
The Japanese version plays differently. Famicom Akumajō Densetsu has expanded sound hardware and rebalanced damage values. Flash cart or emulator players: the JP ROM is mechanically distinct—enemies hit harder, Grant’s knife hits harder back.
Memorize candle positions for critical drops. Pot roasts and multipliers spawn in fixed candles. Stage 4’s first candle always drops a multiplier; Stage 7 hides a pot roast in the third overhead candle. Learn the map or face bosses on fumes.
Holy water freezes bosses. The stopwatch stops time; holy water’s ground flame stunlocks Mummy and Cyclops if you hold spacing. Two bottles on-screen = pseudo-invincibility window while they burn.
Death’s second form has a safe spot. Far left edge of the screen, neutral jumps through his sickle pattern—the hitboxes don’t reach the corner if you time it clean. Turns the RNG fight into execution check.
The clocktower gears kill in one hit. Stage 8’s rotating mechanisms don’t care about your health bar. Walk under the teeth when the gap is vertical; never jump into a gear’s rotation arc or you’re paste.
The walls players actually hit, and the way through each.
Block 4-01: The Spike Pit Gauntlet The first stage after recruiting Grant or Sypha drops you into a long horizontal corridor with collapsing platforms over instant-death spikes. Grant clings to walls and ceiling-crawls across the entire sequence, bypassing the crumble timing. With Sypha or solo Trevor, whip the Medusa Heads while standing on each block for exactly one second before jumping—wait for the crack sound, then leap. Jump too early and the next block hasn’t spawned its hitbox; jump late and you fall through. Grant trivializes this; Sypha’s freeze spell stops the Medusa Heads but doesn’t touch platform timing.
Block 7: The Sunken City Water Sections Stage 7’s rising-water segments force vertical climbs with Bone Pillars spawning from the sides. The water rises in fixed intervals regardless of your position, and the Pillars have deceptively tall hitboxes that extend above their visible sprite. Stay on the left third of the screen and whip diagonally upward while climbing—Bone Pillars always emerge from the right side first, giving you a half-second warning. With Alucard, transform into bat form and fly straight up the moment water touches your feet; bat form ignores Bone Pillar collision if you’re moving vertically at max speed. Without Alucard, memorize the three safe ledges—the only platforms with no Pillar spawn points—and pause on each to let the water cycle catch up before the next climb.
Block 9-03: The Falling Platform Maze Before Death The pre-Death vertical shaft has six collapsing platforms in a Z-pattern with Harpies dive-bombing from above. Players die here because they whip the Harpies and fall through mid-animation. Ignore the Harpies. Jump from platform to platform without attacking—Trevor’s jump arc lands on the next block before it collapses if you jump the instant you touch down. The Harpies have fixed dive patterns; maintain momentum and they miss by one character-width. Grant wall-jumps the right side and skips the entire sequence.
Dracula’s Second Form: The Head Cycle After destroying Dracula’s first form, his head detaches and circles the room while spawning fireballs. Players burn through all their Holy Water here because the head has brief invincibility between pattern loops. Wait for the head to complete one full circle, then position Trevor in the bottom-left corner. The head’s hitbox is vulnerable for exactly three whip strikes when it reaches the 7-o’clock position on its second loop—the only damage window that doesn’t trigger the invincibility counter. Use sub-weapons only on the fireballs, never the head.
15 of 127 verified codes, free to read. The rest are in the Code Vault.
008F:02008E:02SLOZTKSOPEVZTLAASLKAIVSOEINPGYEYSZAVGGAEXETPAGKLXEIXAYEYXEIXAY003D:00AAUPLLAGSXIAIO0086:05PEOXYOSPKVAVPYEAUSLYXAGameShark Labs · SharkVault Founding Membership
Unlock the full guide
9 more sections + all 127 codes in the Code Vault : boss strategies, glitches, easter eggs, and the complete archive. Founding Members get every GTA drop through launch day.
Only 64 days until GTA VI. lock in $1.99/mo for life before the founding rate closes (then $2.99/mo).
Surfaced from external sources, newest first. Not editorially endorsed.· 17 more in this feed.· 1 placed beside the section it relates to above.