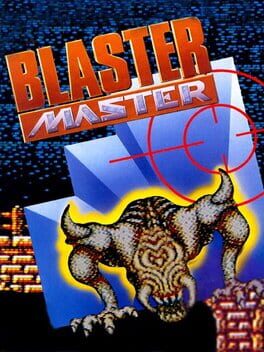
1988 · SUNSOFT · action · Nintendo
17 sources · 35 facts · verified 3mo ago · how this was made
Why this one is in the canon, and how to start it well.
Every named code, glitch, and easter egg above traces back to one of these sources. SharkVault editorial AI is grounded in human-curated facts files; nothing on this page is invented.
The game’s cheat-code culture exploded because Blaster Master is punishingly hard without safety nets. No passwords, no continues, no mercy — die on Stage 7 and you restart from Stage 1. Game Genie codes for infinite lives, invincibility, and stage select became essential tools for players who wanted to see the endgame without perfecting every pixel-precise hover jump. The GameShark era later added granular tweaks (infinite special weapons, hover gauge locks), but the Game Genie’s original infinite-life codes were the gateway drug. Sunsoft’s Western localization rewrote the Japanese original’s anime-style plot into a boy-and-his-radioactive-frog premise that became cult legend; the tank’s name, SOPHIA THE 3RD, was lifted from the original game’s planet designation and repurposed as the vehicle itself cite. It rewards patience and punishes hubris — and the cheat-device community built a second game on top of it.
Exit the tank and grab grenades in Area 1’s first room. Press Start + Up to leave SOPHIA III, then explore the side passage on foot. Grenades hit what the tank’s main gun can’t—bosses and tight corridors demand them.
Master SOPHIA’s jump arc now. The tank controls like a brick compared to most NES platformers. Short taps versus held jumps make the difference between clearing pits and eating spikes. You’ll need both within two areas.
Enter every overhead dungeon you see. These top-down sections hold the power-ups that gate progression. Area 1’s dungeon contains the Hyper engine upgrade—you can’t climb the first major vertical shaft without it.
Conserve gun power in overhead sections. Your gun has eight power levels; damage knocks them down. Most enemies respawn endlessly, so dodge instead of shooting. Save firepower for mini-bosses and area guardians.
Learn the wall-grip in Area 1’s left-side shaft. Jump toward a wall and SOPHIA clings. This vertical climb is your tutorial—you’ll backtrack here after the Area 1 boss to reach Area 2.
Pause-buffer during boss fights. Blaster Master has no mercy invincibility. Pause repeatedly to read attack patterns without taking hits. The frog boss telegraphs every jump—keep moving.
Deaths boot you to the area entrance with reduced gun power. No mid-level checkpoints. This is the design—memorize enemy placement on each attempt.
Save hover fuel for vertical escapes. SOPHIA’s hover drains fast and won’t recharge until you touch ground; Area transitions often stack collapsing platforms in tall shafts where running dry mid-climb drops you back to the bottom for another attempt.
Exit the tank before bosses. Jason on foot with the Wave Beam or higher gun upgrades deals far more damage than SOPHIA’s main cannon; most boss patterns are easier to dodge in top-down mode where you can strafe and your hitbox shrinks.
Grenade spam opens hidden paths. Crackable walls look identical to solid blocks; stuck at a dead-end? Lob grenades at suspicious corners—critical power-up rooms and Area shortcuts hide behind them.
Gun power resets on death, not continues. Die once and Jason’s gun drops to the pea-shooter no matter how many upgrades you collected; SOPHIA’s weapons persist. Late-game deaths are brutal—you’ll face endgame enemies with Gun Level 1.
Pause-buffer during boss fights. Pause freezes enemy patterns but not your position; pause mid-jump to study attack cycles or line up grenade tosses without burning reaction time.
Area 4’s quicksand is a soft-lock risk. SOPHIA sinks into sand pits without the Dive upgrade and can’t jump out—no progress, only reset. Don’t enter Area 4 until you’ve cleared Area 3’s mini-boss for Dive.
Track which sub-areas you’ve cleared. Each Area has multiple top-down dungeons; the game doesn’t mark completion and backtracking through empty rooms wastes time. Mental or paper notes prevent confusion when hunting the last power-up before a boss gate.
The walls players actually hit, and the way through each.
Area 3’s Frog Boss (Crab Attacker)
The oversized crab guarding Area 3’s exit stops most players cold. The top-down dungeons reward grenade spam; this boss punishes it. The crab’s shell deflects frontal shots — circle-strafe in SOPHIA and wait for the rear animation when it fires. Thunder Break (the wave beam from Area 2) cuts through shell phases faster, but positioning beats firepower. Stay mobile, fire during the rear animation, ignore the smaller adds unless they box you in.
The Vertical Shaft in Area 4
Area 4 drops you into a narrow vertical climb with respawning turrets and collapsing platforms. Players expect wall-jumps or grapples; Blaster Master gives you neither. Exit SOPHIA and climb as Jason. The side-view sections let Jason cling to walls indefinitely — hold toward the wall after a jump and tap A to inch upward. The turrets still fire, but Jason’s hitbox is smaller and the hover module (acquired in Area 3’s dungeon) lets you course-correct mid-air. SOPHIA can’t make this climb; park the tank and return after the next save point.
Area 5’s Lava Maze
The branching lava corridors in Area 5 loop back with no map system and identical junction rooms. The solution is methodical, not clever. Take every right turn first, mark dead-ends, backtrack and explore left branches. Exits to new areas always require both the Dive upgrade (from Area 4’s boss) and a ceiling you can pass through with Hover active. If you’re circling, you’re missing one of those two. The actual exit sits in the northwest quadrant, accessible only after defeating the mid-area mini-boss that drops the wall-climb gun upgrade.
Area 6 Lightning Hallway
The pre-boss gauntlet before Area 6’s Plutonium Boss features descending lightning columns that one-shot SOPHIA regardless of gun level. The timing window is frame-tight and the NES’s flicker makes tracking impossible. Exit the tank. Jason takes normal damage from the lightning (roughly two bars), and his smaller sprite threads gaps SOPHIA can’t. Heal between columns with the sub-weapon pause trick if you have grenades stocked.
15 of 51 verified codes, free to read. The rest are in the Code Vault.
AEEPUNYAKKGSTV0092:00ZGUKZITPSZOAUTVG00C3:FFXVLAKOOOLAKONAUKGSTYOLVKSOOO040D:00040D:FFEAKPOATAGZSOEEVK06F0:63GameShark Labs · SharkVault Founding Membership
Unlock the full guide
9 more sections + all 51 codes in the Code Vault : boss strategies, glitches, easter eggs, and the complete archive. Founding Members get every GTA drop through launch day.
Only 64 days until GTA VI. lock in $1.99/mo for life before the founding rate closes (then $2.99/mo).