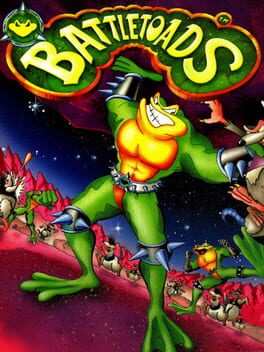
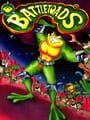
1991 · Rare · beat-em-up · Nintendo
16 sources · 43 facts · verified 4mo ago · how this was made
Why this one is in the canon, and how to start it well.
Until you’ve defeated the BattleToads hoverbike level I simply can’t respect your definition of a “difficult video f]game.”
Every named code, glitch, and easter egg above traces back to one of these sources. SharkVault editorial AI is grounded in human-curated facts files; nothing on this page is invented.
Battletoads mattered because it proved Rare could compete with Nintendo and Konami on technical ambition: the sprite work, animation fluidity, and David Wise soundtrack rivaled first-party output, and the studio leveraged that credibility into GoldenEye 007, Banjo-Kazooie, and Conker’s Bad Fur Day before Microsoft acquired them in 2002 cite. The cheat-code aftermarket exploded around it — Galoob’s Game Genie release shipped twenty codes covering infinite lives, invincibility, stage skips, and timer freezes, all verified across gamegenie.com and consoledatabase.com. The game’s cultural footprint extended beyond the cartridge: a 2011 4chan prank-call campaign targeting pawn shops with “Do You Have Battletoads?” queries became a meme significant enough that Rare named a Rare Replay achievement after it cite. For a generation of NES players, Battletoads was the game you rented once, died on the Turbo Tunnel, and spent the next thirty years insisting you’d beaten.
Master the punch-pause-morph combo. Tap B twice, then wait a beat before the third hit — that pause triggers the Ram (head-butt) and other morphing attacks. Button-mash and you’ll loop weak punches forever; time the gap and you’ll wreck crowds.
Throw enemies into each other. Press A near a stunned enemy to grab, B to hurl. Thrown bodies damage anything they hit — it’s the safest crowd-clear in the early stages and keeps you out of trading range.
Know the Turbo Tunnel (Stage 3) wall sequence before you reach it. The speeder-bike gauntlet runs a fixed pattern: right gap, left gap, center barrier, and so on. Reaction time won’t save you at speed — memorize the sequence or die on loop.
Eat every fly. You start with six HP and flies are the only healing in the game. One fly = one hit point. Miss them before a boss stage and you’ll regret it.
Pause during boss fights to read the pattern. Hit Start mid-combat to study spacing and telegraph animations. Most bosses cue their attacks with a windup frame — spot it, dodge, punish the recovery.
Budget continues for the vehicle stages. Stages 3, 5, and 11 are auto-scrolling obstacle courses with instant-death walls. Beat-em-up rules don’t apply here — it’s pure memorization and execution, and they will kill you repeatedly.
Skip co-op unless both players have cleared the game solo. Friendly fire is always on, lives drain from a shared pool, and if one player lags during auto-scroll, both die. Solo is legitimately easier for the learning curve.
Master the dash attack early. Hold a direction and tap Attack to charge forward — staggers most enemies and covers ground fast. It’s your safest crowd-control tool in stages 1–3 before enemy density spikes.
Memorize warp positions in Stage 3 (Turbo Tunnel). The speeder-bike section kills more runs than any other segment — ramps appear at fixed intervals, and the third barrier set requires frame-tight reactions. Practice the first two loops until muscle memory takes over; most players never see Stage 4.
Use the headbutt (Down+Attack in air) to control vertical space. Drops you fast and interrupts enemy approach angles. Critical for the snake segments in Stage 6 (Karnath’s Lair) and the rat-pack waves in Stage 8.
Don’t burn continues early. Battletoads gives six total continues for the entire game, no exceptions. Stages 10–12 are exponentially harder than the opening levels; if you’re burning continues before the Rat Race (Stage 8), restart and drill the early stages until you can clear them hitless.
Grab weapons whenever possible but don’t rely on them. Planks and pipes extend your range and deal heavy damage, but they disappear after a few swings or if you take a hit. Treat them as temporary advantages, not crutches — your base moveset needs to carry you.
Learn boss safe spots through repetition. Most bosses have exploitable patterns — Robo-Manus (Stage 4) telegraphs claw swipes, the Dark Queen’s walker (Stage 12) has a rhythm. There are no shortcuts here; you need reps to internalize the timing windows.
Co-op is harder, not easier. Friendly fire is always on, screen-scrolling desync causes instant deaths, and both players share the continue pool. Two-player runs require voice coordination and restraint most casual sessions won’t sustain.
The walls players actually hit, and the way through each.
Level 3 (Turbo Tunnel) — The Speeder Bike Section
Most players never see Level 4. The hoverbike accelerates constantly and obstacles arrive faster than the NES can telegraph them. Memorization is the only path through: the first barrier appears at a fixed distance, then the pattern repeats with minor variations. Drill the first ten obstacles until muscle memory takes over—pause-buffering between sections lets you study the layout without burning lives. The ramps that launch you over gaps demand split-second jump timing; early sends you into the ceiling, late drops you into the pit. TCRF documents that the obstacle spacing was hand-tuned to be barely reactable at full speed, making this one of the most infamous difficulty spikes in NES history.
Level 5 (Surf City) — The Surfboard Descent
The surfboard auto-scrolls downward while mines, walls, and spike barriers converge from both sides. Collision detection is pixel-perfect. Stay in the center vertical third of the screen—most obstacles spawn from the edges and give you a half-second dodge window. The spinning spike wheels force you to thread between rotating arms; wait for the gap to align with your lane before you commit. The ram attack (Down+Attack) grants no invincibility frames, so contact still kills. Slow, deliberate movements beat frantic overcorrection.
Level 11 (Clinger Winger) — The Vertical Climb Race
You race the Dark Queen’s rat up a vertical obstacle course lined with instant-death spikes. The rat’s AI cheats—it ignores some collision rules and clips through certain barriers. Don’t try to stay ahead; focus on survival and let the rat crash first. It will, if you stay alive long enough. The key: on the second half, alternating left-right spike walls appear—hug the safe side and tap the opposite direction only when the next gap opens. Oversteering kills more runs than the rat does.
15 of 69 verified codes, free to read. The rest are in the Code Vault.
051C:00051D:00051E:00051F:000520:000521:00PAEELLLEENOAGTEI03C3:1503C4:1503C5:15OOUAGVOUAAOTTVLA03C3:7FPYVTPESUAENUZSTPAAOYTKTPAEUAOOTPAENOTVTPTTEEIYVTAOUKXNAAALOTGTKIAUOAGTEIGXEILUSOGameShark Labs · SharkVault Founding Membership
Unlock the full guide
9 more sections + all 69 codes in the Code Vault : boss strategies, glitches, easter eggs, and the complete archive. Founding Members get every GTA drop through launch day.
Only 64 days until GTA VI. lock in $1.99/mo for life before the founding rate closes (then $2.99/mo).
Surfaced from external sources, newest first. Not editorially endorsed.· 14 more in this feed.· 1 placed beside the section it relates to above.