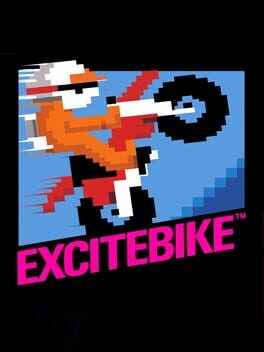
1985 · Nintendo · racing · Nintendo
19 sources · 30 facts · verified 3mo ago · how this was made
Why this one is in the canon, and how to start it well.
What is my six-year-old daughter choosing to do for her TV time today? Load up Nintendo Switch Online and play Excitebike. 🙂
Every named code, glitch, and easter egg above traces back to one of these sources. SharkVault editorial AI is grounded in human-curated facts files; nothing on this page is invented.
What cemented Excitebike in the canon wasn’t just its lineage—it was the Design mode, the track editor that let players build custom courses from hurdle pieces and ramps, then race them immediately. The catch: the base NES cartridge couldn’t save those tracks; the manual explicitly states “Save and Load menu selections are not operable in this game” cite. Japanese Famicom players could save to the cassette-based Famicom Data Recorder, and the 1988 Famicom Disk System re-release restored saving via disk, but Western players built, raced, and lost their creations the moment they powered off. That ephemeral creativity—combined with the overheating mechanic, the four-lane jockeying, and the thunk of a bad landing—made Excitebike the first Nintendo game that felt like a tool as much as a toy. The Game Genie crowd latched onto it for infinite-turbo codes and overheat patches, but the real draw was always the Design mode itself: a level editor in 1985, two decades before LittleBigPlanet made user-generated content a selling point.
Start with Selection A. The five pre-built tracks teach the core rhythm: hold A to accelerate, tap B for turbo over jumps, release both buttons mid-air to level the bike. Selection B is the track editor; Excitebike is the tournament gauntlet. Both assume you already know how to ride.
Manage the temperature gauge. The red bar below your bike fills when you hold A or tap B. Max it and you overheat—several seconds of helpless coasting while opponents pass. Release A on descents and between obstacle runs to cool down.
Turbo the jumps, not the flats. Tap B at ramp lips for height and distance. Holding it on flat ground overheats you faster than the speed gain pays. The line is: accelerate into the ramp, turbo at the lip, release mid-air, land, repeat.
Land rear-wheel-first on downslopes. Tilt back with the d-pad while airborne. Nose landings kill speed; rear landings preserve momentum. Flat landings are neutral. Triple-ramp sequences punish sloppy form.
Read the arrow tiles. Blue up-arrows boost speed if you hit them aligned; red down-arrows scrub it. They’re placed before major jumps—learn which ramps have helpful arrows and which force you to adjust your approach line.
Top 3 or bust in Excitebike mode. The tournament demands third place or better across five tracks. One crash is recoverable; two usually isn’t. If you overheat mid-race, drift to the cooldown lane on the right edge—slower than racing speed, faster than a full stall.
Test lines in Design mode after Track 3. Selection B lets you place ramps, arrows, and obstacles with the d-pad and A. Your layout erases on power-off, but you can race it in solo time trials to learn configurations before the tournament throws them at you.
Turbo burns hot, not infinite. The A button grants speed but fills your temperature gauge — overheat and you’re stuck roadside for precious seconds while the engine cools. Feather turbo on straightaways, coast over jumps, and save full-throttle bursts for the final stretch or critical overtakes.
Land rear-wheel-first for speed retention. Tilt back (d-pad down) in the air to angle your bike nose-up; touching down rear-first maintains momentum. Nose landings or flat landings scrub speed and can bounce you into obstacles. The physics reward committed rear-wheel contact on every jump.
Arrow ramps are mandatory speed boosts. The small directional ramps scattered on tracks aren’t optional — hit them aligned and they catapult you forward with no turbo cost. Missing one costs you a position; chaining three or four in sequence can gap the AI by half a screen.
Opponent bikes are movable obstacles. Colliding with AI riders mid-air or on landings will knock them off-course or crash them outright. Bully slower racers off arrow ramps or into track-edge barriers. They’ll do the same to you — give yourself space on crowded sections or accept the chaos.
Selection A races have fixed layouts; Design mode is the sandbox. Selection A offers five pre-built tracks of escalating difficulty. Selection B (Design mode) lets you place obstacles and ramps with the d-pad, then race your creation — temperature still matters, but you control every jump. Experiment here to learn ramp physics without the AI pressure.
Temperature management wins long tracks. Tracks 4 and 5 in Selection A punish sustained turbo use. Memorize the arrow-ramp positions and coast between them; let the ramps do the work while your gauge drops. The AI doesn’t overheat — you will if you hold A the whole lap.
The walls players actually hit, and the way through each.
Selection 5 temperature management
The fifth track in Selection A runs long enough that your bike overheats mid-race if you lean on turbo the way you did in tracks 1–4. The cooldown is mandatory, and the field passes you. The fix isn’t to avoid turbo—you’ll never place without it—but to treat straightaways after big jumps as cooling windows. Tap B on approach and takeoff, release completely while airborne and for two bike-lengths after landing, then resume. This rhythm keeps the gauge in the top third without redlining. Watch the gauge in peripheral vision; if it climbs past 75%, skip one jump’s turbo entirely.
Design Mode track testing lockout
You build a custom track in Design Mode, save to the Data Recorder (Famicom only; the NES version had no save), then discover the layout is unraceable—too many ramps in sequence bleed speed until the bike can’t clear the next obstacle. The game doesn’t validate designs before you race them. Test in segments: after placing three or four obstacles, exit to the start line and run that section. If the bike bogs or can’t reach a ramp, delete the most recent obstacle and add a straightaway. The Data Recorder won’t save broken layouts, but it won’t warn you until you’ve spent twenty minutes placing jumps.
Opponent rubberband breaking in Selection B
Selection B’s AI holds pack position through rubberband logic—fall behind and they slow down, pull ahead and they speed up. Winning by more than two seconds feels impossible. The break point: lap two, final straightaway. Enter that stretch in first with a one-second lead and the rubberband releases. You need a clean lap one—every turbo window hit, every landing smooth—to build that cushion. Miss more than two turbo opportunities in lap one and the win becomes a coin flip on the final jump.
All 10 verified codes for Excitebike, free to read.
EVUKGEAPTESGPALASXXTYUVVPOSITLYEXIKOYAPEXIEZLAAGPPPOAAUSEYAOGAUSEYAPENUKGEAPGESGPALANNISZZGameShark Labs · SharkVault Founding Membership
Unlock the full guide
9 more sections : boss strategies, glitches, easter eggs, and the complete archive. Founding Members get every GTA drop through launch day.
Only 64 days until GTA VI. lock in $1.99/mo for life before the founding rate closes (then $2.99/mo).
Surfaced from external sources, newest first. Not editorially endorsed.