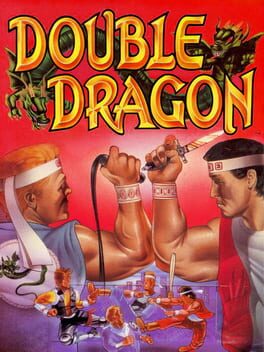
1988 · Technos Japan · beat-em-up · Nintendo
13 sources · 42 facts · verified 4mo ago · how this was made
Why this one is in the canon, and how to start it well.
Every named code, glitch, and easter egg above traces back to one of these sources. SharkVault editorial AI is grounded in human-curated facts files; nothing on this page is invented.
What the NES port did introduce became just as influential: an RPG-lite experience system that gated special moves behind heart-counter milestones. You start with punch, kick, and headbutt; uppercut and roundhouse unlock at two hearts, jump kick at three, grappling at four. Every landed hit awards XP; every 1,000 points adds a heart. The system forced players to grind early missions for move unlocks, turning a quarter-muncher into a progression loop — and it became the mechanical foundation for River City Ransom, Streets of Rage’s star ranks, and every beat-em-up that asked you to earn your moveset. The cheat-code scene exploded around it: Game Genie’s infinite-lives and max-hearts codes let players skip the grind and fight Willy’s machine gun with a full arsenal from Mission 1. The NES port is historically essential because of its compromises, not in spite of them.
Land the three-punch string clean. Mashing gets you countered between swings. The basic combo is your only offense until you unlock the elbow smash at Heart 2—rhythm beats speed.
Farm XP in Mission 1 before Willy’s warehouse. You need 1000 points per heart. Punch every Linda and Williams even after they’re stunned—the elbow smash (Heart 2) changes the game; reach it before Mission 2.
Jump kick (Heart 3) solves Mission 3’s conveyor belts and Abobo. Jump, then kick at the apex. Invincible during startup, knocks most enemies flat. The factory is a nightmare without it.
Keep enemies away from ledges until you’ve farmed the XP. Pit kills forfeit the points. In Mission 1, fight inland until you hit the next heart threshold.
Grab the baseball bat in Mission 2 and hold it. Weapons despawn between missions, but the bat trivializes Willy and the Machine Gun Willy gauntlet. Two swings kill regulars; three drops Abobo.
The hair-pull knee (Heart 4) is your highest single-hit damage. Walk into a stunned enemy to grapple, then tap A. Mandatory for Mission 4’s double-Abobo hallway.
Co-op forces a deathmatch in Mission 4. Only one Billy fights the Shadow Boss. Plan accordingly or play solo.
Grind hearts in Stage 1 before Abobo shows up. The heart system gates your moveset, and you want at least 2 hearts (uppercut and roundhouse unlocked) before Stage 2. Punch weaker enemies instead of finishing them — every landed hit awards XP whether it kills or not.
The elbow beats the jump kick for crowd control. Jump kick unlocks at 3 hearts, but the elbow (4 hearts, grapple-only) recovers faster and clears space better. Grab an Abobo, elbow, release, repeat — slower than the arcade original but safer in the NES version’s cramped corridors.
Save weapons for bosses; durability runs out fast. The bat breaks after 4–5 swings, the whip after 6–7. Don’t burn them on Williams and Lindas. Grab one right before a boss gate, carry it through, and stagger Abobo or Willy with the full clip.
Jump kick beats the AI’s anti-air gap. Enemies can’t counter airborne attacks; a timed jump kick (3 hearts) hits them during their own jump startup. Stage 3’s conveyor belt becomes free once you read the Linda spawn pattern and jump into their approach line.
Shadow Master has no throw escape — grapple-loop him to death. At 4 hearts, walk into grab range, throw backward, step forward, grab again. The hair-pull throw does weak damage but it’s the only no-trade strategy in the narrow tower arena.
The walls players actually hit, and the way through each.
Mission 2 Boss (Abobo in the Factory) — Walk in with one or two hearts and Abobo’s grab drains half your life bar. His reach is massive. The unblock: grind Mission 1 until you hit three hearts (jump kick unlocked). Stay mid-range, bait his lunge, jump kick his face, retreat. Never let him pin you against the left wall. Still getting crushed? Farm to four hearts so you can throw him — grappling trivializes the fight.
Mission 3 Climbing Section (Conveyor Belt Gauntlet) — The ascending platforms with respawning Lindas wreck players who rush. New enemies spawn as you climb. The solution: control the spawn rate by staying on the lower platform until you’ve cleared it completely, then advance one tier. Use the elbow smash (←+A+B while grabbed) to break free when swarmed. Jump kicks work on Lindas but the timing window is tight — whiff and you eat a whip combo. Patience wins. Treat this section like the XP farm it is.
Mission 4 Shadow Boss Gauntlet — You fight your own shadow clone with your full moveset plus AI-perfect reaction time. Players lose because they try to out-trade him. The trick: he always counters your first attack in a sequence. Bait with a whiffed punch at max range, then immediately jump kick when he commits to his counter-punch. Rinse and repeat. Do not grapple unless you have four hearts and can guarantee the throw input before he reverses you. Under-leveled (fewer than four hearts entering Mission 4)? This becomes a war of attrition — accept that you’ll trade hits and keep health-drop weapons (bats, barrels) in reserve.
15 of 92 verified codes, free to read. The rest are in the Code Vault.
03C5:0F03C6:0F0517:40YOPOIUZEPOIUZXPOIU03B5:0003B6:000396:80009B:01009C:01POTZZYEEIIOYYOPOPUZEPOPUAUPOPLSLNPAXSONYZSIUGameShark Labs · SharkVault Founding Membership
Unlock the full guide
9 more sections + all 92 codes in the Code Vault : boss strategies, glitches, easter eggs, and the complete archive. Founding Members get every GTA drop through launch day.
Only 64 days until GTA VI. lock in $1.99/mo for life before the founding rate closes (then $2.99/mo).
Surfaced from external sources, newest first. Not editorially endorsed.· 15 more in this feed.