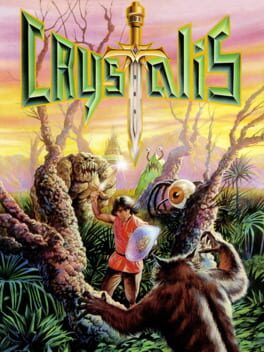
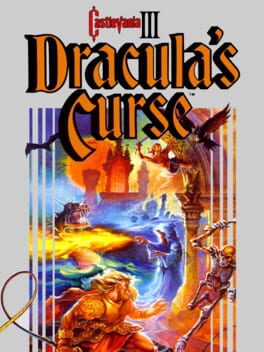
1990 · SNK · action-rpg · Nintendo
21 sources · 43 facts · verified 3mo ago · how this was made
Why this one is in the canon, and how to start it well.
Every named code, glitch, and easter egg above traces back to one of these sources. SharkVault editorial AI is grounded in human-curated facts files; nothing on this page is invented.
Game Genie adoption was instant: infinite-MP codes let players spam Refresh and Barrier without resource math, max-level codes skipped the grind to 16, and invincibility toggles turned the final Tower gauntlet—where under-leveled runs stall against Draygon II and Dyna—into a victory lap. The NES original remains canon; the 2000 Game Boy Color remake rewrote the story, renamed the protagonist, and stripped the elemental-immunity boss mechanic, losing the core audience. For a generation, Crystalis proved SNK could build a world as dense as Square’s or Enix’s—and that a Game Genie could make that world yours.
Talk to everyone in Leaf — the first NPC hands you the Wind Sword, your combat tool and grass-cutter for hidden items. Exhaust all dialogue; townsfolk drop the hints you need to know where to go and what to bring.
Grind to level 2 before you leave Leaf — kill Slimes and Insects in the surrounding fields until you hit level 2. Crystalis gates armor and sword techniques behind level requirements; you can’t equip better gear or unlock charged attacks until you meet the threshold.
Charge your sword attacks — hold the attack button to power up a ranged projectile. Charged shots deal more damage and hit at distance, essential for bosses and enemies with erratic movement. Each elemental sword has a unique charged effect.
Check every corner and wall — Crystalis hides power-ups, stat berries, and key items in unmarked tiles. Walk along walls and suspicious dead-ends; press A to reveal invisible chests and NPCs. The Ball of Wind (found early) lets you see hidden objects.
Save MP for healing — Recover magic restores HP efficiently; don’t waste MP on offensive spells during regular encounters. Stock up on Antidote and Medical Herb from shops; status effects and poison damage add up fast in dungeons.
Equip new swords immediately when found — each elemental sword (Wind → Fire → Water → Thunder) is required to damage specific enemy types and break color-coded barriers. You can’t progress through certain areas without the correct blade equipped.
Use the Warp Boots liberally — once acquired, Warp Boots let you teleport to any previously visited town. Crystalis involves significant backtracking for side quests and story triggers; the boots eliminate overworld walking.
Talk to every NPC twice. First pass is flavor; second pass drops the progression hint—where the next sword hides, which item clears the roadblock, which boss needs which element. Crystalis gates forward movement through dialogue, not just keys.
Charge attacks aren’t optional. Holding B to charge your sword is the only way to damage most mid-game enemies and all bosses. Uncharged slashes deal 1 HP to armored foes regardless of your stats. Learn each sword’s charge timing—Wind Sword’s tornado projectile, Fire Sword’s flame wave—because you’ll hold B for 80% of combat.
Level walls are real and unforgiving. Certain story triggers won’t activate until you hit specific levels (often 8, 12, 16). If an NPC repeats the same dialogue or a cave entrance stays sealed, you’re underleveled. Grind in the previous area; Crystalis expects it.
Equip the right sword for the terrain. Crystalis enforces elemental logic: Wind Sword cuts tornadoes blocking paths, Thunder Sword paralyzes water-based enemies, Fire Sword melts ice barriers. Swapping swords mid-dungeon isn’t tactical—it’s mandatory for progression. Check your menu when you hit a literal wall.
Teleport saves hours. Once you acquire Teleport magic, mark Warp Boots locations. The overworld is massive and backtracking to Leaf for healing or Oak for item shops drains real-world time. Teleport + Warp Boot combos trivialize late-game fetch quests.
Power Rings stack with sword levels. Equipping the Warrior Ring or Power Ring boosts damage output independent of sword upgrades. Against Draygon’s four forms, the difference between wearing a Defense Ring (survivability) and a Power Ring (killing speed) can mean three extra healing-item cycles.
The walls players actually hit, and the way through each.
Leaf Village’s Insect Flute requirement — The game doesn’t tell you the Insect Flute exists until you need it. You hit the poison marsh, take damage, and find no way forward. The answer: backtrack to Leaf’s tool shop and buy the flute. It’s cheap, but it’s easy to miss if you’re not talking to every NPC, and no NPC explicitly sends you there. Without the flute, you can’t summon the giant insect that carries you across the swamp. If you’re stuck wandering the marsh, you missed the purchase.
Sealed Cave statue puzzle — Four statues block the path forward. An NPC mentions “the order of the elements,” but doesn’t map that to positions. The solution: push the statues in sword-element order (Wind, Fire, Water, Thunder) starting top-left and moving clockwise. Push them out of sequence and nothing happens — exit the room to reset and try again. Players burn an hour here testing random combinations because the hint is too vague to execute.
Stom’s paralysis field in the Fortress — Stom fires paralysis beams that bounce off walls in a narrow room. Rush in for melee and you get stunlocked to death. Stay at the room’s vertical center and use Tornado Bracelet-charged sword beams from range. Let him approach, fire, sidestep, repeat. The fight is a DPS check on your ability to keep distance — if you’re getting chipped down, you’re standing too close.
Mt. Sabre North’s invisible bridge — After the Insect boss dies, a bridge appears that you must cross to reach the summit. The bridge is invisible against the mountain background on NES hardware — it looks like empty sky. Players walk past it assuming the path is blocked. The bridge is directly north of the boss arena exit. Walk straight up from the door and you’ll cross solid ground that renders as nothing.
15 of 110 verified codes, free to read. The rest are in the Code Vault.
6458:DE6459:DE645A:DE645B:DE645C:DE645D:DE645E:DE645F:DEYNZAUN03E1:630400:630401:63PPVINSPUSZEPEVGKOZNOOKZKLANOXKZGOZNOOKZKPANOXKZG6434:006435:006436:006437:000421:980421:62SALAGA0710:00SZUOIVSESZKPLVSESXVPUOSESXVOOOSEGameShark Labs · SharkVault Founding Membership
Unlock the full guide
9 more sections + all 110 codes in the Code Vault : boss strategies, glitches, easter eggs, and the complete archive. Founding Members get every GTA drop through launch day.
Only 64 days until GTA VI. lock in $1.99/mo for life before the founding rate closes (then $2.99/mo).
Surfaced from external sources, newest first. Not editorially endorsed.