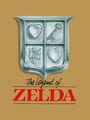
1987 · Nintendo R&D4 · action-adventure · Nintendo
15 sources · 28 facts · verified 4mo ago · how this was made
Why this one is in the canon, and how to start it well.
Every named code, glitch, and easter egg above traces back to one of these sources. SharkVault editorial AI is grounded in human-curated facts files; nothing on this page is invented.
The cheat-device culture that exploded around Zelda in the Game Genie era (1990–1992) leaned hard on infinite-rupee and invincibility codes, but the game’s deepest secrets — the Money-Making Game graveyard warp, the Second Quest unlocked by naming your file ZELDA, the Magical Sword hidden in the northern cemetery — were analog mysteries passed through schoolyard whispers and 1-900 tip hotlines. Zelda proved that a console game could be as arcane and replayable as a PC dungeon crawler, and it set the template for every action-adventure that followed: Metroid, Castlevania II, Dark Souls, Elden Ring. If you’re reading a SharkVault guide in 2025, you’re standing on the Hyrulean overworld grid whether you know it or not.
Grab the sword immediately. Enter the cave directly above your spawn point to receive the wooden sword from the old man. This is your only weapon until you find upgrades in dungeons.
Push every suspicious rock, bomb every cracked wall. Hyrule hides rupees, heart containers, and dungeon entrances behind environmental tells. Rocks that stand alone or form patterns usually conceal secrets. Cracked wall sections (darker, rougher texture) open with bombs.
Buy the blue candle from the shop east of spawn (60 rupees). Screen-clearing bushes reveals rupees and enemies faster than sword strikes. The candle also lights dark dungeon rooms. Grind blue Octoroks and Tektites in the starting area until you have enough rupees.
Map Level 1 (eagle dungeon) before fighting Aquamentus. The dungeon is east of spawn, past the waterfall. Grab the boomerang in the side room first—it stuns most enemies and makes the boss trivial. Kill keese and stalfos to farm keys; you need several to reach the Triforce shard.
Burn the tree east of the graveyard for the white sword (five hearts required). You need 40 rupees for the blue ring (shop north of spawn, behind a bombable wall) to cut damage in half. Both upgrades are essential before tackling Level 2.
Save bomb drops for dungeon walls, not overworld grinding. Bombs are scarce early. Prioritize cracked dungeon walls that hide keys, rupees, and shortcuts. The overworld secrets can wait until you’ve purchased bomb capacity upgrades from caves.
Die deliberately to warp back to spawn. No fast travel exists. If you’re deep in Hyrule with low hearts, let an enemy kill you—you respawn at the starting screen with three hearts, faster than walking back.
Push every suspicious block, burn every suspicious bush. Overworld secrets follow visual tells: lone trees, rock formations that break symmetry, dead-end alcoves. Dungeon blocks that stand alone or interrupt wall patterns almost always slide. The game rewards systematic paranoia.
Save rupees for the Blue Ring (250) before you chase heart containers. The defense boost cuts damage in half for the entire playthrough. Skip early shop items—keys, bombs, arrows—until you can afford the ring. Dungeons drop enough consumables if you clear rooms thoroughly.
The White Sword (5 hearts) and Magical Sword (12 hearts) are mandatory progression gates, not optional upgrades. Route your heart-container collection around these thresholds. Grabbing the White Sword before Dungeon 3 and the Magical Sword before Dungeon 6 keeps damage scaling manageable.
Enemies respawn when you scroll one full screen away and return. Farm rupees and bombs from blue Octoroks and Tektites in safe overworld zones rather than buying them. Red Leevers in the desert drop bombs at high rates—critical for late-game door-blasting.
The Recorder (flute) is not just a warp item. It drains specific lakes, reveals dungeon entrances, and stuns certain enemy types. Experiment in every screen that looks “empty but wrong”—the game hides required progression behind Recorder triggers.
Diagonal movement is faster than cardinal movement cite. Hold two directions simultaneously to cut across rooms and dodge projectiles more efficiently. Essential for Darknut rooms and late-dungeon Wizzrobe gauntlets.
The Arrow + Bomb combination fires a super-shot that kills most mini-bosses in one hit. Press both buttons simultaneously. The manual never mentions this. Costs one arrow and one bomb per shot—expensive but worth it for Gohmas and Digdogger phases.
Death in a dungeon respawns you at the entrance with three hearts but keeps all keys, map, and compass. If you’re low on health deep in a dungeon and near a continue point, intentional death beats backtracking for potion refills.
The walls players actually hit, and the way through each.
Level 2 (Moon) — Finding the entrance. The dungeon sits dead center in a graveyard square, but pushing tombstones gets you nowhere. Push the leftmost stone in the middle row (second from top). This is Zelda’s first “push everything” exam; skip systematic tile-checking here and you’ll hit the same wall at Level 7’s entrance.
Level 4 (Snake) — The raft dead-end. You clear the dungeon, grab the raft, exit to the overworld, and discover you’re landlocked — no water tiles near the exit. The raft works from any shore, not just dungeon-adjacent docks. Walk to the eastern coastline (Screen H8 or nearby), step onto a dock tile, and the raft auto-triggers. The game never explains that key items work contextually across the entire map; this is the most common sequence-break confusion in the campaign.
Old Man “Grumble, Grumble” caves — wasting rupees. Multiple caves feature an Old Man who says “Grumble, Grumble” and offers nothing. These are bait rooms. Leave exactly 30 rupees on the ground (drop from inventory if needed), exit, and re-enter — the door you came through is now a one-way passage to a new area. The Grumble rooms in Screen S7 and Screen H8 both lead to rupee-farming chambers. The manual hints at “leaving offerings” but doesn’t specify the mechanic; players who don’t experiment with intentional rupee drops never see these rooms.
Level 9 (Skull) — The Wizzrobe gauntlet before Ganon. The final approach to Ganon’s chamber is a narrow corridor flooded with teleporting Wizzrobes. The Red Ring (quarter-damage) is mandatory here unless you’re frame-perfect with sword beams. If you skipped Level 8’s Red Ring, backtrack now — Ganon is functionally unkillable at full damage scaling. Use the doorway as a chokepoint: stand in the threshold, let Wizzrobes materialize, strike, retreat. The AI won’t follow across the transition boundary.
15 of 225 verified codes, free to read. The rest are in the Code Vault.
00EE:FFAEAAEEXPZAYVSZVXASVKAEVEVALGOEYZEUSLKEUVSYAAITATNYAZPAZAVEIVXYAAVEIVXY0038:00ALEAVNAIPPAEAAAAVAYTGTAAVEAVGLGameShark Labs · SharkVault Founding Membership
Unlock the full guide
9 more sections + all 225 codes in the Code Vault : boss strategies, glitches, easter eggs, and the complete archive. Founding Members get every GTA drop through launch day.
Only 64 days until GTA VI. lock in $1.99/mo for life before the founding rate closes (then $2.99/mo).
The Legend of Zelda: Ocarina of Time key artwork and renders (2026) #retro #art #gaming #Zelda
Retro Game Art 🎮🖼️🍂👻🦇 (@retrogameart.bsky.social)
Had no idea this was out next month!! I would describe The Adventures of Elliot as a Square Enix version of the Legend of Zelda. Puzzles, Bombs, Boomerang, Bow and arrows, a fairy companion, top down gameplay. It's got it all. youtu.be/2Q0Tb8ofvKM?...
Stefan (@badwolf90.bsky.social)
Surfaced from external sources, newest first. Not editorially endorsed.· 17 more in this feed.· 1 placed beside the section it relates to above.
Ranked · 1988· same platform