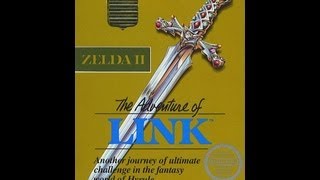
1988 · Nintendo R&D4 · action-adventure · Nintendo
Why this one is in the canon, and how to start it well.

The cheat-device culture around Zelda II focused less on sequence-breaking (the linear palace structure resisted it) and more on survivability: infinite lives, attack-level manipulation, and invincibility codes that let players experience the game’s ambitious design without the friction of its difficulty spikes. Speedrunners eventually discovered the game’s rich glitch landscape—downstab cancels, fairy-lock tricks, and the Thunder glitch that allows palace skips—but players in 1987 wanted to see Hyrule saved without burning through continues. Nintendo Power’s early coverage of the game’s cryptic secrets (the invisible path in the graveyard, the Magic Container in Parapa Desert) made it a focal point for the magazine’s tips-and-tricks mandate, establishing the template for how Nintendo would support its more opaque adventures throughout the 8-bit and 16-bit eras.
Talk to everyone in Rauru before you leave. One villager teaches Shield; another hands you the candle. Shield halves damage—early combat is brutal without it. The candle lights caves; you’re blind otherwise.
Grind the first three Moblins on the road to Parapa Palace until you hit 200 EXP. Dump every point into Attack. Sword reach and damage scale directly with this stat. Defense and Life wait; kill fast or die trying.
Learn the down-thrust in Parapa Palace. Crouch mid-jump and stab downward. This move trivializes ground enemies for the rest of the game. Practice the timing on Stalfos before the boss fight.
Save magic for Shield, not offense. Red and orange Moblins hit hard; Shield cuts all damage in half. Fire and Jump drain your meter fast—you need that bar for emergencies and boss rooms.
Death sends you back to North Palace with all EXP lost. Before entering a palace or tough overworld fight, check if you’re one level-up away from a stat boost. If so, grind it out first. The game does not respect your time.
Use the overworld map to dodge random encounters when low on health. Roads and forests spawn weaker enemies; deserts and graveyards throw harder fights. Duck into towns to reset encounter timers.
Check every dead-end and suspicious wall in palaces. The game hides 1-ups, magic jars, and P-Bags (50–200 EXP) in breakable blocks and fake walls. Slash everything—it’s not paranoia, it’s routing.
Grind early in Parapa Palace’s entrance room. The Iron Knuckles just inside respawn infinitely and drop solid experience. Get Attack to level 4 before tackling the overworld proper—every subsequent fight gets dramatically easier.
Shield blocks downward stabs. Crouch and Link’s shield covers his head. Stalfos and Iron Knuckles love the jump-stab; stay low and counter with your own upthrust once you learn it from the knight in Mido.
Save magic for Reflect, not Fire. Thunderbird and Dark Link demand the Reflect spell. Fire and Jump are convenient but drain your meter fast—learn enemy patterns instead and keep the blue jar reserves for the endgame.
Talk to every NPC in every town. Critical spells (Shield, Jump, Reflect) and techniques (downthrust, upthrust) come from townsfolk and wandering knights, not dungeons. Miss one conversation and you’ll hit a brick wall two palaces later.
The dolls (extra lives) are hidden in specific overworld tiles. Forests, graveyards, and deserts hide these—check dead-end screens and unusual tile clusters. You can’t buy lives; finding the doll caches is the only way to build a buffer for the Great Palace.
Leveling Life is a trap early on. Attack and Magic give better returns in the first half of the game. Life costs scale exponentially; pump Attack to 5–6 and Magic to 4–5 before touching Life, or you’ll grind for hours in the late palaces.
The Great Palace has no continue point. You fight through the entire dungeon, then Thunderbird, then Dark Link in one run. Die to Dark Link and you restart outside the palace entrance. Practice the final gauntlet on a separate save or accept that you’re burning an evening on attempts.
The walls players actually hit, and the way through each.
Death Mountain maze (Palace 4 approach) — The exit tile is invisible and the looping screens have no landmarks. From the Hammer cave entrance: up, up, right, right, up, right. Graph paper or the GameFAQs ASCII map will save you; the game offers zero hints and the random-encounter rate punishes guessing.
Palace 5 key shortage — The layout lets you burn keys in the wrong order and lock yourself out of the boss. You have exactly six keys; waste one and you restart the dungeon. Safe route: take the first-room key, clear the entire left wing before touching the right, save the glove-locked key for the final door before Gooma. Already used the wrong key? Reset now — backtracking won’t help.
Thunderbird (Palace 6 boss) — Nothing in the dungeon or overworld tells you Thunder is required. Players burn attempts on an invincible hitbox until they quit. The old man in Kasuto (the hidden town, reachable only after learning Spell) teaches Thunder; visit him before Palace 6. The manual’s spell description is the only hint. Cast Thunder, then the boss takes sword damage.
Hidden Town of Kasuto location — You need it for the final spell and a heart container, but the forest tile looks identical to fifty others in the zone. From the three-eye-rock landmark in southeast Hyrule, walk directly south into the forest until Link vanishes into an invisible screen transition. No NPC mentions this mechanic. Nintendo Power’s original map marked it; without that, you’re walking a grid for hours.
Great Palace entrance requirements — The door won’t open until you’ve placed all six crystals and your Attack is high enough. Players arrive underleveled, find the door locked, and assume they missed a crystal. You need Attack 7 minimum (8 recommended). Door still shut? Grind the respawning Moas in Palace 5’s lava-bridge room until you can afford the level-ups.
15 of 162 verified codes, free to read. The rest are in the Code Vault.
VLELXLAASTUTZNONIIPPPPSXXGUXVVAYUOLIALYYKEEVSENPKEOVVEAPVIIGAAPYKEEVSANPKEOVVE00C2:01SZVOUNSESZVOUNSESZNPKNSESXESIKSEXVVIXPENXVVIUOPO0776:000771:00EZOEILKZIAOETUAEGameShark Labs · SharkVault Founding Membership
Unlock the full guide
9 more sections + all 162 codes in the Code Vault : boss strategies, glitches, easter eggs, and the complete archive. Founding Members get every GTA drop through launch day.
Only 64 days until GTA VI. lock in $1.99/mo for life before the founding rate closes (then $2.99/mo).


Surfaced from external sources, newest first. Not editorially endorsed.