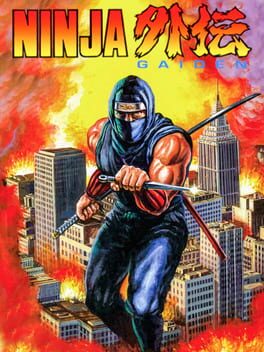
1989 · Tecmo Koei Games · action · Nintendo
Why this one is in the canon, and how to start it well.
Ninja Gaiden II is a 2008 action-adventure game developed by Team Ninja and published by Microsoft Game Studios for the Xbox 360.
The cheat-device ecosystem exploded around Ninja Gaiden precisely because the game’s challenge felt conquerable if you could just get past this one part. Game Genie and GameShark codes for infinite lives, invincibility timers, and weapon retention became as essential to the experience as the cutscenes themselves. Galoob’s Ninja Gaiden Game Genie release was one of the device’s best-sellers, and the game remained a staple of cheat-code magazines and player-traded secrets well into the SNES era. Speedrunners still dissect its pixel-perfect jumps and damage-boost routes; TASVideos has extensive frame data on enemy cycling and boss patterns. It’s a game that demands to be broken, studied, and mastered—whether through skill, codes, or sheer stubbornness.
Master the wall-jump immediately. Press toward a wall while airborne to cling, then press away + jump to leap off. You’ll die constantly in Stage 2 without this — practice on the first few walls in Stage 1-1.
Grab the Invincible Fire Wheel in Stage 1-2. It’s in a candle near the mid-stage checkpoint. This ninja power orbits Ryu and blocks projectiles — essential for crowd control and the first boss.
Kill enemies for spirit power. Blue orbs refill your ninja power meter (top of screen). You need 5–10 units per cast depending on the technique. Spam the Fire Wheel liberally; enemies respawn when you backtrack.
Learn boss patterns before burning ninja power. Each Act boss telegraphs attacks. Watch one cycle, then unload. The Barbarian (Act I) lunges after every third fireball — jump over him and slash his back.
Expect knockback deaths. Enemy hits don’t just drain health — they shove Ryu backward into pits. Stay centered on platforms. Never jump toward an enemy near a ledge.
Save continues for Act IV onward. You get unlimited tries but only 5 continues per session. The difficulty spike at Stage 4-2 is brutal — don’t waste continues learning Stage 1.
Candles = health and power-ups. Slash every candle, lantern, and background object. They drop spirit orbs, health, bonus points, and new ninja techniques.
Spin Slash (↓↑ + B) clears projectiles and grants invincibility for 5 ninpo. Use it when birds swarm or ambush rooms stack enemies, not on bosses where the meter is better spent elsewhere.
Wall-climb into jump-slash covers more ground than a standing jump. Cling, press away + jump, then attack mid-arc. You travel farther and can hit airborne threats without landing.
Respawning enemies mark screen transitions. A bat or thug you just killed reappears two seconds later? You’re near a scroll boundary. Ninpo refills at every cutscene—burn your meter before the story break.
The Invincible Fire Wheel (stage 6-2 onward) trivializes most boss phases. It orbits Ryu and hits repeatedly without consuming additional ninpo. Against Jaquio’s demon form and the final encounter, stand in place and let the wheel work.
Knockback sends you into pits more often than enemy damage kills you. Hug walls when fighting near ledges. A single hit from a brown ninja or football thug launches you backward a full body length.
The Jump & Slash Technique (learned in 3-2) is mandatory for vertical shaft climbing. Standard jumps won’t scale tall walls. Press jump while clinging, then attack at the peak to latch higher. Rhythm matters—mash and you fall.
Stage 6-2’s descending elevator has a damage-boost skip. Taking a hit from the first red ninja while jumping right lets you clip past a spawn trigger. TAS runners use this; casual players should just fight through.
The walls players actually hit, and the way through each.
Stage 2-2: The Vertical Climb with Respawning Eagles
The ascending section midway through 2-2 spawns eagles endlessly from above while forcing constant upward movement. Killing every enemy is the trap — eagles respawn instantly and knock you backward into pits. Ignore them. Jump immediately on landing, maintain upward momentum, and use invincibility frames from intentional damage to pass through clusters. The climb takes roughly 12 seconds of aggressive jumping; hesitation kills you.
Stage 3-2: The Descending Staircase Gauntlet
The downward staircase spawns bats, panthers, and knife-throwers in overlapping waves designed to push you into the pit below. Standing still to clear enemies triggers more spawns. Treat it as a timed descent: move down two stairs, pause one second to bait the bat spawn, slash once, continue. The panther always jumps from the fourth platform — crouch-slash as you land. Never backtrack upward; the spawn algorithm punishes retreat.
Stage 4-2: Jaquio’s First Form (Boss)
Jaquio teleports unpredictably and fires homing fireballs that track Ryu’s position. Burning through continues trying to out-damage him is the common mistake. The pattern: he always teleports to the opposite side of where you’re standing. After teleporting, he pauses for exactly one second before attacking — your damage window. Position mid-screen, wait for the teleport, dash toward his new position, land two slashes, retreat. The fireballs despawn when he teleports again. Windmill Shuriken (Item 3) trivializes the fight — continuous throw during his pause frames.
Stage 5-3: The Collapsing Bridge Section
Bridge tiles fall one second after you land on them while flying enemies attack from both directions simultaneously. Panic-jumping drops you through gaps. The counterintuitive solution: walk, don’t run. Walking speed gives you the exact timing to land, slash the approaching bat, and step forward before the tile drops. Running causes micro-positioning errors that misalign your jumps with solid tiles. The section requires 18 tiles crossed — muscle memory, not reflexes.
15 of 66 verified codes, free to read. The rest are in the Code Vault.
00C9:80APOILNZOOZXSGYSEEAXSIYEISAXSTYSZAAETUYIAAPOILNZOOZXSGYSESAXSIYEISAXSTYSZAAEVSTIAAAVVOIIAAEKTSGIAAPOILNZOOZXSGYSEOAXSIYEISAXSTYSZAAVTNYLAAPOILNZOOZXSGYSEXAXSIYEISAXSTYSZAEXVVYIASVXVGOON0497:00ANOTLOGUKUOTLOGLNNOTLOGUEEISKZUKISKUUKISVUUKISELUKISNLGameShark Labs · SharkVault Founding Membership
Unlock the full guide
9 more sections + all 66 codes in the Code Vault : boss strategies, glitches, easter eggs, and the complete archive. Founding Members get every GTA drop through launch day.
Only 64 days until GTA VI. lock in $1.99/mo for life before the founding rate closes (then $2.99/mo).
Surfaced from external sources, newest first. Not editorially endorsed.· 9 more in this feed.· 1 placed beside the section it relates to above.