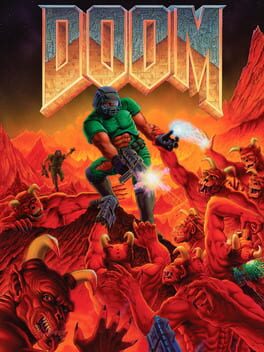
1993 · id Software · fps · Microsoft
23 sources · 35 facts · verified 3mo ago · how this was made
Why this one is in the canon, and how to start it well.
Every named code, glitch, and easter egg above traces back to one of these sources. SharkVault editorial AI is grounded in human-curated facts files; nothing on this page is invented.
Doom’s cheat-code culture exploded alongside its popularity. The built-in IDDQD (god mode), IDKFA (all weapons and keys), and IDSPISPOPD (no-clip walk-through-walls — a Doom II successor would rename it IDCLIP) became as iconic as the Konami Code, whispered across computer labs and printed in every PC gaming magazine. The game’s open WAD file structure invited modification from day one; by mid-1994 thousands of custom levels, weapon skins, and total conversions circulated online, birthing the modern modding scene and proving that players would extend a game’s life far beyond the developer’s original vision. Doom didn’t just matter — it became the template every shooter, every mod community, and every shareware success story would measure itself against for the next decade.
Strafe-run everywhere. Hold Shift (default run) and sidestep with comma/period instead of mouse-turning — the engine rewards lateral speed, and strafing dodges projectiles while keeping your aim on target.
Grab the shotgun in E1M1’s zigzag room. From spawn, follow the right wall through the toxic courtyard; the shotgun sits in the room with the chevron floor. Primary weapon through Episode 1.
Punch Zombiemen, shoot Former Sergeants. The pistol is weak; melee the brown soldiers to save ammo. Former Sergeants (shotgun troops) require gunfire — their hitscan hurts, but they drop shells.
Circle-strafe Pinkies and Imps. Pinkies only melee; run circles. Imps throw fireballs — projectiles are slow, so sidestep and return fire with the shotgun at close range.
Learn the automap toggle (Tab). Levels are non-linear; the automap shows visited areas, locked doors (red/blue/yellow lines), and facing direction. Tab frequently to orient.
Quicksave obsessively (F6). No regenerating health, limited medkits. F6 quicksaves, F9 quickloads — save before every door, after every major fight, whenever you’re above 50% health.
Number keys swap weapons instantly. 1 = fist, 2 = pistol, 3 = shotgun, 4 = chaingun. No wheel, no animation lag — memorize the row and tap mid-fight.
Strafe-run diagonally — you move ~40% faster than forward-only, critical for dodging projectiles in open arenas and outrunning hitscan chaingunners in later episodes.
Shotgun is king for ammo efficiency through Episode 2; without the super shotgun, careful shell management beats spraying the chaingun except against crowds or Barons.
Hitscan enemies fire the instant they begin their attack animation — former humans, shotgun guys, chaingunners all hit you on windup; break line-of-sight or strafe perpendicular the moment you see it. Projectile monsters (imps, cacodemons) give you travel time.
Infighting saves ammo and health — bait a Baron’s fireball into a pack of imps, let a Cyberdemon rocket splash into Hell Knights, watch monsters shred each other while you reposition. The AI prioritizes whatever last damaged it.
Secret-hunt every level — megaarmor, plasma rifles, and invulnerability spheres hide in off-angle wall textures (misaligned panels, different lighting) and suspicious dead-ends. Wall-hump methodically or consult a FAQ after your first blind run.
Rocket spam against Cyberdemons and Spider Masterminds is a resource trap — circle-strafe at mid-range with the plasma rifle or chaingun instead. Rockets are for crowd control and speedkill setups, not sustained boss DPS.
Quicksave obsessively but keep multiple slots — Doom’s save system doesn’t track ammo/health from prior levels, so a bad save in E2M6 with 12 shells can brick your run. Rotate 3–4 slots per episode.
Pain chance matters — the super shotgun and rocket launcher stun-lock most monsters mid-attack. Learn which enemies flinch reliably (imps, demons) versus which push through damage (Barons, Mancubi) to optimize burst-fire tactics.
The walls players actually hit, and the way through each.
E1M3 Toxin Refinery — Blue Key Trap
The outdoor courtyard past the green slime pit drops a pincer ambush the moment you touch the blue keycard. Monster closets open on three sides, the exit door seals. Clear the courtyard perimeter before you approach the key. Step into the alcove to trigger the spawns, then retreat to the entry hallway without picking up the card. Funnel the imps and demons through the doorway where the shotgun owns them at close range. Grab the key after the spawns stop.
E1M8 Phobos Anomaly — Barons of Hell
The episode boss drops two Barons into a small octagonal arena with minimal cover. Players dump all their cells and shells, then die in melee. The solution is geometry. Circle-strafe clockwise around the central pillar and never stop moving. Barons telegraph their green fireball volleys with a full-second windup — sidestep perpendicular to their facing when the animation starts. Plasma rifle if you have 200+ cells, otherwise shotgun at medium range between volleys. The fight takes 3–4 minutes of disciplined movement. Do not attempt to tank damage and trade — the Barons have 1,000 HP each.
E2M2 Containment Area — Crushing Ceiling Maze
The southwestern crusher hallway kills more players than any combat encounter in Episode 2. The ceilings descend on a fixed timer; sprinting gets you pancaked mid-corridor. The crushers operate in sequence, not simultaneously. Watch the first ceiling. When it rises, you have exactly one cycle to reach the safe alcove two crushers ahead. Stop there. Wait for the next rise, advance two more segments. Repeat. Players who try to outrun the full sequence always misjudge the timing on the fourth crusher.
E3M6 Mt. Erebus — Outdoor Lava Maze Navigation
The massive lava lake with narrow walkways and teleporter pads disorients players who lose cardinal bearings. The exit requires the yellow key from the central structure, but the teleporter network is non-intuitive. The yellow key building is always due north from the starting teleporter exit. Face north (automap reveals this), take the first visible walkway left, then the next right. Ignore all intermediate teleporters. The correct pad is at the walkway terminus, marked by a single medikit.

All 14 verified codes for Doom, free to read.
idbeholdsidchoppersidbeholdaidfaidkfaiddtiddqdidbeholdvidbeholdlidclipidspispopdidbeholdiidbeholdridmyposGameShark Labs · SharkVault Founding Membership
Unlock the full guide
9 more sections : boss strategies, glitches, easter eggs, and the complete archive. Founding Members get every GTA drop through launch day.
Only 64 days until GTA VI. lock in $1.99/mo for life before the founding rate closes (then $2.99/mo).