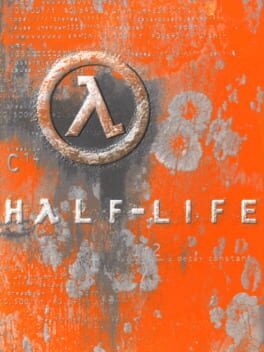
1998 · Valve · shooter · Microsoft
Why this one is in the canon, and how to start it well.
While reviewing the Steam Frame, I replayed all of Half Life: Alyx. It's still a singular game, and on the new hardware it sings. But to play it now is to be confronted with the possibility that nobody will be allowed to make a VR game of that scope ever again. aftermath.site/hal
No corrections logged for this guide yet. Spot something wrong? Use “Report an error” on any section above.
The cheat-code culture around Half-Life ran deeper than god mode and infinite ammo. Valve shipped the game with a developer console accessible via tilde key, turning every player into a potential modder. sv_cheats 1 unlocked impulse 101 for full weapons, noclip for boundary exploration, and notarget for AI observation — commands that became the foundation for the modding explosion that followed. Counter-Strike, Team Fortress Classic, and Day of Defeat all grew from that console-accessible toolset. Half-Life proved that giving players the keys to the simulation didn’t break immersion — it extended the game’s lifespan indefinitely. The Source engine, GoldSrc’s successor, carried that philosophy forward for two decades.
Spot a mistake? Sign in to report it.
Save constantly. Quicksave (F6) and quickload (F7) are your lifeline — Half-Life autosaves at chapter transitions, but you’ll die often enough that manual saves between firefights are non-negotiable.
Crowbar everything. Wooden crates drop health kits, batteries, and ammo. Smash every box you see in the opening tram ride area and Anomalous Materials — you’ll need those supplies when the resonance cascade hits.
Aim for headshots on human enemies. Marines and Black Ops troops go down fast with precise fire. The MP5 and pistol reward accuracy; spraying wastes ammo you can’t afford to lose.
Use the HEV suit chargers and health stations. Wall-mounted chargers refill your armor (blue bar); health stations restore HP. They don’t respawn, so map their locations mentally — backtracking to a known charger can save a bad situation.
Don’t fight the tentacles in Blast Pit. You can’t kill them with weapons. The chapter wants you to solve the puzzle (turn on the fuel, oxygen, and test fire systems). Crouch-walk past them when necessary.
Conserve magnum and crossbow ammo early. You won’t find the .357 Magnum until “We’ve Got Hostiles,” and crossbow bolts are rare. Save both for Alien Grunts and later tough encounters.
Jump-crouch for vents and high ledges. Tap crouch (Ctrl) at the peak of your jump to pull your legs up — essential for navigating Black Mesa’s ductwork.
Spot a mistake? Sign in to report it.
Crouch-jump everywhere. Hold crouch mid-jump to clear higher ledges and reach vents you’d otherwise miss. Half the game’s shortcuts and secrets gate on this input — practice it in the hazard course until it’s muscle memory.
The crowbar never runs out. Headcrabs, barnacles, and most small hostiles die in one or two swings. Save ammo for soldiers and aliens that shoot back; melee is silent and costs nothing.
Quicksave obsessively, but keep rotating slots. The game autosaves at chapter transitions, but scripted sequences can trap you in low-health checkpoints. Maintain 3–4 rotating manual saves so you can rewind past bad RNG or wasted resources.
Soldiers telegraph their grenades. You hear the clink before you see it. The moment you do, sprint perpendicular or back around the corner you came from — standing still to aim is how you eat 80 damage.
The HEV suit charge stations are finite. Unlike health kits, which respawn in some areas, suit chargers drain permanently once used. Prioritize health pickups when you have the choice; armor absorbs two-thirds of incoming damage and you can’t refill it as freely later.
Tripmines stick to any surface and detonate on proximity or damage. Plant them on walls at soldier spawn points or around blind corners, then backpedal. Shooting an enemy’s planted tripmine detonates it early — use the magnum or crossbow from range.
The long-jump module changes traversal. Once acquired in Blast Pit, crouch-jump while sprinting to launch across gaps the designers clearly intended you to cross this way. Several later chapters assume you have it.
Friendly fire is always on. Scientists and security guards die if you’re careless with grenades or the shotgun’s spread. Dead NPCs can’t open doors or give you access codes.
Spot a mistake? Sign in to report it.
The walls players actually hit, and the way through each.
Blast Pit’s Tentacle Trio
The three blind tentacles blocking the rocket test chamber kill on contact, and the solution isn’t obvious: you need to activate the test fire sequence, not fight them directly. The oxygen and fuel valves are straightforward, but the power requires a trip down into the flooded lower levels. Drain the water first using the wheel valve on the catwalk, then descend the ladder to find the generator room. Flip both breakers, return topside, and initiate the test fire from the control booth. The rocket exhaust incinerates all three tentacles. Players who try to sneak past or waste ammo shooting the heads waste twenty minutes before realizing the environmental kill is mandatory.
Surface Tension’s Cliffside Gauntlet
The outdoor canyon section with the mounted .50-cal and endless HECU marines is a momentum killer. The trick: don’t stay at the gun. Grab it long enough to clear the immediate Osprey drop, then sprint left up the cliffside path before the second helicopter arrives. Hug the rock wall to avoid the Apache’s rockets and push through to the bunker entrance. Players who try to hold the mounted position get rocketed or flanked by the ground squad. The game wants you moving, not defending.
“Forget About Freeman” Elevator Ambush
The parking garage elevator descent triggers a scripted HECU ambush the moment the doors open. The soldiers are already aiming. Don’t wait for the doors to fully open—cook a grenade during the descent (pull pin at the halfway point) and toss it into the gap as the doors start to part. The blast clears the immediate cluster. Follow with the MP5 grenade launcher for the second wave on the walkway above. Standing in the elevator doorway gets you shredded in two seconds.
Gonarch’s Lair Exit Route
After killing the giant headcrab mother, players circle the arena looking for a door that doesn’t exist. The exit is environmental: Gonarch’s death collapses part of the ceiling near her spawn point, opening a passage upward. Look for the rubble pile with the new light shaft. Climb the debris and follow the tunnel. The game gives no audio cue or objective marker; you just have to notice the changed geometry where the boss fight started.
Spot a mistake? Sign in to report it.
10 of 14 verified codes, free to read. The rest are in the Code Vault.
impulse 101impulse 203sv_cheats 1notargetr_fullbright 1give weapon_crowbargive item_suitgodmap c0a0noclipGameShark Labs · SharkVault Founding Membership
Unlock the full guide
9 more sections with membership, including boss strategies, glitches and easter eggs. All 14 codes are in the Code Vault, a one-time $99 purchase.
31 days until GTA VI. Lock in the founding rate for life at $1.99/mo: it stays your price for as long as your membership stays active (standard is $2.99/mo).
Surfaced from external sources, newest first. Not editorially endorsed.