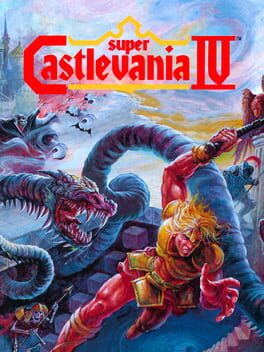
1991 · Konami · platformer · Nintendo
Why this one is in the canon, and how to start it well.
The cheat-code culture around Super Castlevania IV ran unusually deep because the difficulty curve made casual players desperate for health refills and weapon upgrades, while the branching route options—multiple staircase paths, breakable-floor shortcuts—rewarded code-assisted exploration. Action Replay’s walk-through-walls codes exposed out-of-bounds developer test rooms and collision gaps that speedrunners still exploit. It remains the gold standard for what a reimagining should accomplish: same gothic atmosphere and boss roster as the NES original, rebuilt from scratch to justify the new hardware. Every subsequent Castlevania, including Symphony of the Night’s Metroidvania pivot, inherits Super IV’s expectation that the whip should feel like an extension of your intent rather than a fixed-range poke stick.
Master eight-direction whipping immediately. Hold Y and flick the d-pad in any direction—up, down, diagonal—to attack without moving. Primary defense against bats, medusa heads, and anything approaching from odd angles.
Whip-dangle on every ledge. Jump toward a platform and hold Y as you fall past it; Simon latches on and dangles. Press up to climb, down to drop. Block 1 teaches this on the first chasm—miss it and you fight uphill the entire game.
Hold attack to swing the whip in a circle. Tap Y for a standard crack; hold Y and Simon spins the whip continuously in front of him, blocking most projectiles and dealing rapid contact damage. Essential for bone-pillar rooms and the Medusa boss in Stage 3.
Candles drop hearts—hearts buy subweapons. The HUD number next to the heart icon is your subweapon ammo, not health (health is the 16-pip bar). Axe hits airborne enemies on a high arc; Holy Water locks bosses in hitstun with ground fire. Stopwatch freezes everything but costs 5 hearts per use.
Crouch on stairs to avoid 90% of cheap hits. Down + Y lets you whip while crouched on steps. Medusa heads and bone-throwing skeletons track your standing height—crouch and they sail overhead.
Die once in Stage 4-1 to learn the chandelier timing. The descending-chandelier gauntlet has no checkpoints and kills most first-timers. Walk off each chandelier the instant the next one swings into range; don’t jump unless the gap is wide.
Passwords save after every stage. Pause and write down the 24-character grid. You restart at the beginning of that stage with your subweapon but lose any health upgrades collected mid-level—grab those red orbs before continuing.
Eight-direction whip control is your defense layer. The D-pad aims Simon’s whip in any cardinal or diagonal direction while standing still; hold the direction and tap attack to keep enemies at range before they enter jump-arc distance. Most players underuse the upward and down-diagonal angles until Medusa Heads or bats punish them for it.
Whip-dangling grants invincibility frames. While hanging from grapple points (candelabras, ceiling rings), Simon cannot take damage. Stall on the rope during enemy waves or projectile volleys, drop when the pattern resets. Stage 4’s rotating room and Stage 9’s vertical shafts reward this heavily.
Staircase whipping extends your hitbox downward. On descending stairs, a standing whip attack reaches below Simon’s feet and hits ground-level enemies you’d otherwise need to crouch for. Ascending stairs, the crouch-whip covers the step behind you. The game never teaches this; players jump off stairs into danger instead.
IV Axe has the tightest sub-weapon loop. The axe’s arc peaks just above Simon’s head height and returns quickly, letting you throw again before the first despawns. In stages with low ceilings (Stage 3 caves, Stage 6 corridors), axes outpace Holy Water for crowd control. Costs 1 heart per throw.
Medusa Heads telegraph their sine-wave path. They spawn at screen-edge and float in a fixed wave pattern; the spawn height determines whether the wave crests at Simon’s head or waist level. Don’t react to the head—react to the spawn point. Eight-direction whip or a preemptive jump clears them before the pattern reaches you.
Stage 5 and Stage 8 have critical heart-refill rooms. Both stages place a candelabra cluster or breakable-wall cache before the boss door. If you’re below 10 hearts entering Skull Knight (5) or Frankenstein (8), backtrack one screen and farm respawning candles. Sub-weapons trivialize both fights.
The walls players actually hit, and the way through each.
Stage 4-3: The Rotating Dungeon Room
The cylindrical room that spins 360 degrees stops most first runs cold. Simon’s eight-directional whip is the unblock — hold Up or Down while attacking to strike diagonally and clear Medusa Heads before they pin you against the rotating spikes. Move in short bursts synced to the room’s rotation; holding forward gets you spiked. The safe pattern: wait for the floor to rotate into the right wall position, walk three steps, stop, whip diagonally up-right, repeat.
Stage 8-2: The Mud Man Gauntlet
The rising-floor mud section with regenerating Mud Men overwhelms players who try to fight everything. Selective aggression is the solution: whip only the Mud Men directly blocking your jump path, ignore the rest. They respawn endlessly from the mud pools — clearing the screen is pointless. Jump the moment you land on each platform; hesitation lets new spawns surround you. The Cross sub-weapon trivializes this if you have it; the multi-hit clears spawns in both directions while you move.
Stage 9: The Collapsing Bridge Over Spikes
The crumbling stone bridge appears late enough that players forget Simon can whip-swing from specific hooks. Look for the metal rings embedded in the ceiling — press Jump while the whip connects to grapple. The bridge collapses in a fixed pattern from left to right; you grapple-swing across the gap rather than outrun the collapse. Practice the timing in the safe left section before committing. Missing the grapple point drops you onto instant-death spikes with no recovery.
Dracula’s Second Form
After the humanoid phase, Dracula transforms into a massive demon head that burns through most players’ resources. The pattern is deceptively simple: his fireballs always spawn in sets of three, moving in predictable arcs. Stand in the bottom corners — not center — and jump straight up when fireballs approach; they pass underneath. Whip the head during the brief vulnerability window after each fireball volley. Holy Water is nearly useless here; the Axe or Cross deals consistent damage if you have meter remaining.
15 of 62 verified codes, free to read. The rest are in the Code Vault.
D726-64077E0090017E0092037E056400CB2C-6DD7DF2C-6D077E0DB447EE2B-A767D728-6D07EEB9-0F0FBBB0-0F6FDFB0-04DFDFB0-040FDFB0-07AFDDD7-DD6DFE6D-DDA6DD24-AFD7GameShark Labs · SharkVault Founding Membership
Unlock the full guide
9 more sections + all 62 codes in the Code Vault : boss strategies, glitches, easter eggs, and the complete archive. Founding Members get every GTA drop through launch day.
Only 64 days until GTA VI. lock in $1.99/mo for life before the founding rate closes (then $2.99/mo).
Surfaced from external sources, newest first. Not editorially endorsed.· 17 more in this feed.