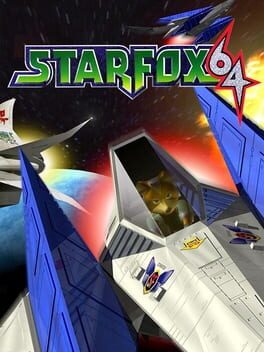
1993 · Nintendo Entertainment Analysis & Development · rail-shooter · Nintendo
Why this one is in the canon, and how to start it well.
The cheat-device libraries for Star Fox ran deeper than almost any SNES title because the game’s design — branching routes, hidden warps, score-attack boards — demanded obsessive replay, and the Super FX’s technical limits made invincibility and level-select codes especially potent. Game Genie and Pro Action Replay catalogs shipped with codes for infinite shields, all-range flight in rail sections, debug cameras, and level skips that let players tear apart Argonaut’s polygon engine in ways the developers never planned. The game’s impact reached beyond Nintendo’s catalog: it proved cartridge-based coprocessors could go toe-to-toe with CD-ROM hardware, a strategy Nintendo doubled down on with Star Fox 2’s unreleased Super FX 2 build and later with the Expansion Pak on N64.
Pick Route 1 on your first run. The game offers three difficulty paths at the start screen; Route 1 is the easiest and shortest (seven stages), letting you learn the Arwing’s handling without overwhelming enemy density.
Master the barrel roll immediately. Double-tap left or right on the D-pad to execute a barrel roll—it deflects incoming fire and clears most projectiles from your path. Spam it; there’s no cooldown or penalty.
Hold Y to boost, tap B to brake. Boosting speeds you through open sections and helps dodge obstacles; braking tightens your turn radius and slows enemy approach. Braking is critical for boss weak-point tracking.
Shoot everything for power-ups. Destroying enemy formations and environmental objects drops silver rings (health recovery) and gold rings (extra life at 100 collected). The game is generous with rings on Route 1.
Ignore your wingmen’s distress calls at first. Saving Peppy, Slippy, or Falco when they shout for help is optional. Focus on your own survival and learning enemy patterns before attempting rescues—dead wingmen don’t fail the mission.
Memorize the first boss (Attack Carrier). Shoot the rotating hatches when they open, then target the exposed core. The pattern repeats three times. Don’t waste bombs—save them for later routes.
Check your damage meter between stages. The white shield bar refills slightly between levels, but hull damage (the numerical percentage) does not. Route 1 is forgiving, but Routes 2 and 3 demand clean play.
Brake through asteroid fields and debris zones. Tap B to slow down — you get more reaction time and a tighter turn radius for weaving dense obstacles without eating cheap hits that drain your shield early.
Ignore your wingmen’s distress calls unless you’re hunting medals. Saving Peppy, Slippy, or Falco costs time and exposes you to crossfire. They respawn between levels. Focus on your own survival and score until you’re confident enough to chase the medal thresholds.
Charge shot breaks most mid-bosses in 2–3 hits. Hold Y until the reticle flashes, release on weak points — turrets, exposed cores, glowing sections. Uncharged spam is slower and wastes opportunities during brief vulnerability windows.
Barrel roll (double-tap L or R) deflects most incoming fire. Use it reactively when you see bullet spreads converging on your position, not as a panic button. The invincibility frames are short; mistimed rolls leave you drifting into worse angles.
Route matters more than raw skill for medals. Out of Corneria, the hardest path (through Sector Y → Aquas → Zoness) has lower score ceilings than the Katina → Solar → Macbeth chain. Check medal requirements per stage before committing to a warp.
Boss phases telegraph their patterns in the first 10 seconds. Learn the loop — attack window → invincible phase → repeat — and you’ll never burn continues on Sector Z’s slot machine or Titania’s sandworm again.
Hyper Laser pickup disappears if you die. The twin-beam upgrade from supply rings is lost on death, reverting you to single shot. Play conservatively once you grab it — it doubles your DPS for the rest of the stage.
The walls players actually hit, and the way through each.
Sector Y asteroid field (Level 1, Route 3) — Route 3 out of Corneria drops you into Sector Y’s asteroid belt, and players lose their wings before the boss every time. The rocks tumble in from screen edges at oblique angles with no predictable spawn pattern. Fly the center vertical third of the screen and tap brake (B button) constantly to slow your approach speed. This buys you reaction time to barrel-roll (double-tap L or R) through clusters instead of threading gaps. The Arwing’s roll has brief invincibility frames that nullify asteroid collision damage. Ignore most ground targets — your wingmen’s survival matters more than score here.
Sector X “slot machine” maze — The corridor section before the boss requires flying through rotating square gates that open and close in sequence. Miss one gate and you slam into the frame for heavy damage. Players try to memorize the timing, but the camera angle makes depth perception nearly impossible. Ignore the gates entirely and barrel-roll through every single frame. The invincibility window is long enough that you can hold forward and spam rolls without stopping. You take zero damage and skip the entire timing puzzle. This trick works on both Route 2 and Route 3 versions of Sector X.
Venom fortress final approach (Andross tunnel) — The long corridor leading to Andross has pillars that narrow as you progress, with the final stretch requiring pixel-perfect centering. One wing-scrape and you’re flying damaged into the final boss. Switch to cockpit view (Select button) for the last third of the tunnel. The first-person HUD has a centered crosshair that makes alignment trivial — keep the crosshair between the pillar edges. Most players never discover cockpit view has a functional advantage; they assume it’s cosmetic. Exit cockpit view before the Andross fight starts so you can see his full attack patterns.
Andross second form hands — After destroying the face, the hands chase you in the black void. Players panic-fire and run out of bombs before the brain appears. The hands telegraph their lunge with a brief pause and finger-curl animation. Barrel-roll the moment you see the curl, then charge shot (hold Y) into the palm during its recovery frames. Two charged shots per hand. Save all three smart bombs for the brain phase — one bomb instantly destroys each brain cube segment.

15 of 53 verified codes, free to read. The rest are in the Code Vault.
7EF0E909DD3F-0F1A4035-DD3ADD34-0F4ADDE2-6173DD37-D44A7E1F0F007E14DA127E0346007E0347FE2D33-DF4A7E14D9017E14D9037E14D9027E14D818GameShark Labs · SharkVault Founding Membership
Unlock the full guide
9 more sections + all 53 codes in the Code Vault : boss strategies, glitches, easter eggs, and the complete archive. Founding Members get every GTA drop through launch day.
Only 64 days until GTA VI. lock in $1.99/mo for life before the founding rate closes (then $2.99/mo).
[ #StarFox ] (holo)star fox: star fox 2 for the snes
Fluor 💡 COMMISSIONS CLOSED (@fluorescencefuture.bsky.social)
Surfaced from external sources, newest first. Not editorially endorsed.· 18 more in this feed.