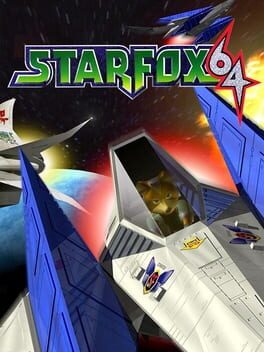
1997 · Nintendo Entertainment Analysis & Development · rail-shooter · Nintendo
Why this one is in the canon, and how to start it well.
📢A sub so new we've managed to finish right after airing! Ep. 424 Deploy! "Star Fox 64 (Part 1)-- jk Nintendo Channel Challenge #13 - Star Fox 64 pastebin.com/raw/CHdqJRAP (MEGA only for now, will post Nyaa links ASAP) Today's Goal: Do a barell roll
The GameShark code scene for Star Fox 64 ran lighter than most N64 flagships—no Game Genie existed for the platform, and the codes that circulated were largely cosmetic (invincibility, infinite bombs, unlock-all-medals flags)—but the cultural weight was in the game’s own architecture: it trained players to hunt secrets without external devices, to replay for alternate outcomes, to optimize medal scores the way arcade players had chased leaderboards a decade earlier. The voice acting (“Do a barrel roll!”) became meme currency years before the word “meme” had traction, and the four-player split-screen dogfight mode made it a fixture of late-’90s multiplayer rotations even as GoldenEye owned the FPS conversation. Star Fox 64 proved Nintendo could build a cinematic action game without sacrificing the mechanical depth their design philosophy demanded, and it remains the template every subsequent Star Fox entry has chased—and missed.
Tap A for rapid-fire, don’t hold it — builds your hit counter faster and shreds enemy wings before they return fire; especially critical against Corneria’s triangle fighters, which you can drop before they fire back.
Barrel roll on sight — Z or R twice deflects incoming lasers; by Mission 3 it’s reflex, so start now when you see tracers and ignore Peppy’s commentary.
Clear your teammates’ tails immediately — red reticle marks the threat when Slippy/Peppy/Falco calls for help; one charged shot (hold A) saves them and they’ll drop health rings or route tips later.
Grab silver rings, skip gold until you bank three — silver rings (small hoops) restore one shield bar each; gold rings only pay out at three collected for a spare Arwing, so prioritize shields over score in early missions.
Brake and boost move you vertically in tunnels — hold B to drop lower in the corridor, boost (up on stick + A) while tapping fire to climb; Meteo’s asteroid field will teach you or kill you.
Charged shots delete armored ground targets — hold A until the reticle glows green for supply depots and the Corneria boss’s legs; rapid-fire works for dogfights but wastes time on anything with plating.
Die in Training Mode to drill all-range movement — checkpoint restart lets you practice U-turns (brake + full stick) and somersaults (boost + brake together) without mission reset; all-range boss arenas require both.
Shoot everything for Hit+X combos. Every destroyed enemy, building, and debris piece feeds your stage score; chaining kills without taking damage builds the multiplier. High scores unlock medals (required for the alternate ending) and open branching paths — Corneria’s 150-hit threshold sends you to Sector Y instead of Meteo.
Charge shots break most threats in one hit. Hold fire until the reticle flashes green; charged lasers one-shot most fighters, destroy incoming missiles, and clear debris fields faster than rapid-fire. The brief charge window becomes muscle memory after two missions.
Brake and boost control your formation. Tapping brake clusters your wingmen ahead of you (they’ll clear minor threats); boosting spreads them behind. Use this to manipulate who draws fire during All-Range Mode dogfights — Slippy always gets targeted first if he’s exposed.
Somersaults and U-turns have invincibility frames. The full loop animation grants brief immunity; abuse this during boss phases with dense bullet patterns (Sector Z’s Shogun Warrior, Macbeth’s Forever Train). The U-turn’s tighter arc makes it better for dodging homing charge shots.
Wingman health gates certain mission branches. Keeping all three allies alive on specific stages (Fichina, Aquas, Zoness) opens Warp Zone shortcuts or alternate routes. If Slippy dies early, you lose the shield gauge readout on bosses — not critical, but helpful for timing.
Smart bombs clear the screen AND refill one shield bar. Don’t hoard them for bosses; using one mid-stage to survive a bad situation beats dying with three in reserve. You respawn with one bomb after each death anyway.
Gold rings restore one shield segment; silver rings are worth points only. Prioritize golds when shields drop below half — the game spawns them predictably after certain enemy waves or environmental hazards.
The walls players actually hit, and the way through each.
Sector Y Medal Requirements (51 hits minimum)
The all-range dogfight medal demands 100+ hits, but most players stall around 70–80 because they chase stragglers instead of clustering enemies. The fix: ignore the initial wave scatter. Fly to the center of the map and wait—reinforcement waves spawn in tight groups of 3–5 fighters. A charged homing shot into a fresh spawn cluster nets 4–5 kills in two seconds. Let Slippy and Peppy thin the edges while you farm the spawn points. The medal unlocks Expert Mode; without it, Venom II’s true ending route stays locked.
Aquas: Clearing the Clackers Before the Bio-Weapon
The Blue Marine’s torpedoes feel sluggish, and players waste all six on scattered Clackers, leaving nothing for Bacoon’s shell-break phase. Fire discipline wins this: tap A for single shots on the stone-column Clackers (one torpedo each), save charged shots for the barnacle clusters blocking the trench. Enter the boss arena with fewer than four torpedoes and Bacoon’s vulnerable window becomes a war of attrition. The light-bomb powerup near the second arch refills your stock—don’t skip it.
Macbeth: Hitting All Eight Switches for the Forever Train
The supply-train destruction route requires flipping every track switch in sequence, but the sixth switch (just after the U-turn) has a two-second window before a freight car blocks line-of-sight. Miss it and the points tally stops at 150 instead of the medal threshold. Fly low and left immediately after the curve; the switch sits on a raised platform. One charged shot, keep moving. Botch the sequence and you’re stuck on the standard boss fight—no shortcut to Area 6, no Venom II access from this branch.
Sector Z: Saving Slippy from the Missiles
Six homing missiles lock onto Slippy during the Copperhead ambush. Shoot them down or he’s gone for the rest of the campaign (no health warnings, no bomb supplies). The missiles approach in two waves of three; charged shots one-shot them, uncharged lasers require two hits each. Falco’s “I guess I should be thankful” dialogue confirms success. Lose Slippy here and Venom’s corridors get significantly harder without his targeting assistance.
15 of 372 verified codes, free to read. The rest are in the Code Vault.
811AE0B6 00008016DC2B 0000811AE092 000080157911 00FF811AE096 00008016E7BE 00008016E740 00008016E778 00008016E7A2 00008016E75C 00008016E74E 00008016E76A 00008016E794 00008016E7B0 00008016E786 0000GameShark Labs · SharkVault Founding Membership
Unlock the full guide
9 more sections + all 372 codes in the Code Vault : boss strategies, glitches, easter eggs, and the complete archive. Founding Members get every GTA drop through launch day.
Only 64 days until GTA VI. lock in $1.99/mo for life before the founding rate closes (then $2.99/mo).
So many people saying "Star Fox 64 is just 2 hour long game" and I'm like, do it then. Try to do all of it in 2 hours. Good luck.
Yakumono (@luigiblood.bsky.social)
Surfaced from external sources, newest first. Not editorially endorsed.· 18 more in this feed.· 1 placed beside the section it relates to above.