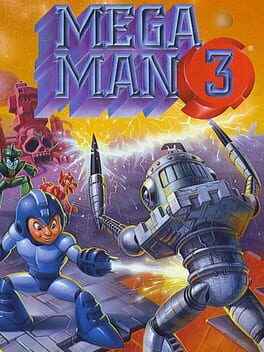
1990 · Capcom · platformer · Nintendo
Why this one is in the canon, and how to start it well.
Cheat-device culture exploded around Mega Man 3. Galoob’s Game Genie release shipped with invincibility codes, weapon-energy locks, and gravity modifiers that turned the slide into a flight glitch — the “moon jump” became a playground legend. GameFAQs archives from the late ’90s document dozens of community-discovered codes for stage select, enemy behavior tweaks, and sprite corruption experiments. The game’s relative ease (compared to MM1–2’s brutality) made it the ideal sandbox for code experimentation: you could break the game without needing frame-perfect execution to survive. For a generation of players, Mega Man 3 was where “beating the game” became less important than “what happens if I turn on infinite Shadow Blade and infinite Rush Jet at the same time?”
Snake Man or Top Man. Snake Man’s stage runs straight with few pits, and Search Snake wrecks half the roster. Top Man is the easiest kill—jump the spin, slide under Top Spin—and his weapon one-shots Shadow Man.
Slide everywhere. Down+Jump while running. Slide under shots, through gaps, off ledges to keep speed. Faster than walking and the only answer to Mega Man 3’s relentless enemy waves.
Rush Coil bails you out. Default utility drops a springboard anywhere. Skip rough platforming, reach high energy pickups, recover from bad boss positioning.
Save E-Tanks for Doc Robot. The rematch gauntlet after the first eight bosses hits harder than anything before it. Bank all 4 E-Tanks for that and Wily Castle.
Farm Needle Man’s vertical shaft. Enemies before the mid-boss respawn and drop large weapon capsules. Exit left to reset spawns—mandatory for keeping Search Snake and Hard Knuckle topped off.
Pause-glitch with Search Snake. Fire Search Snake, pause rapidly on contact (roughly 30 Hz), unpause. Each cycle reapplies damage. Deletes Yellow Devil Mk. II and most Wily bosses, but the rhythm takes practice—warm up on Needle Man.
Rush Coil is mandatory movement tech. The dog-spring unlocks vertical shortcuts in nearly every stage—most notably Shadow Man’s climb and Gemini Man’s final shaft. Practice double-tapping to cancel horizontal drift mid-bounce; you want height, not distance, in tight vertical spaces.
Top Spin trivializes half the Robot Masters. Hard Man, Shadow Man, and Spark Man all fold to contact damage from Mega Man’s spinning jump—just hold the button and collide. It’s the game’s most broken weapon against bosses, but drains energy fast; don’t waste it on stage enemies.
Slide under everything. Mega Man 3 is designed around the slide’s 16-pixel hitbox reduction. Low ceilings, needle traps, and projectile volleys all expect you to duck-and-dash. If you’re taking chip damage from static hazards, you’re not sliding enough.
Doc Robot refights cost zero E-Tanks if you know the matchups. Each Doc Robot pair mirrors MM2 weaknesses: Metal Blade shreds Wood Man, Atomic Fire deletes Bubble Man, Air Shooter wrecks Crash Man. Learn the tells—Doc Robots telegraph attacks one frame longer than the originals.
Rush Jet breaks Needle Man and Magnet Man stages wide open. Both levels have long horizontal stretches where the jet lets you skip 80% of enemy spawns. Magnet Man’s magnetic ceiling sections become trivial; just fly under them. Energy cost is steep, so refill at the mid-stage checkpoints.
The pause trick still works. Pause/unpause rapidly while certain weapons (Search Snake, Gemini Laser) are on-screen to multiply hit detection. It’s frame-perfect and drains weapon energy per pause, but it’s how TAS runs delete Wily bosses in seconds. Practice on Yellow Devil Mk. II first—his pattern is slow enough to learn the rhythm.
Grab the extra lives in Spark Man and Top Man stages before tackling Doc Robots. You’ll burn through attempts learning the refight patterns; those 1-ups are insurance. Top Man’s appears after the first Hammer Joe if you slide into the pit and jump left.
The walls players actually hit, and the way through each.
Gemini Man’s stage ceiling spikes — The vertical climb with the disappearing blocks and spike ceiling kills more first-timers than any Robot Master. Rush Coil trivializes it: stand on the rightmost safe block, summon Rush, and leap straight up to skip two tiers of vanishing platforms. Without Rush, memorize the flicker pattern — blocks vanish in a left-to-right sweep every 90 frames. Jump the moment the block under you starts blinking.
Shadow Man himself — His shuriken spread and erratic leap pattern wreck players who treat this like a pattern-memorization fight. Top Spin demolishes him in four connects if you can stomach the contact damage. Jump into him while holding B with Top Spin equipped; each spin-collision deals heavy damage and you trade roughly one pip of health per hit. Camp the left corner and bait his jump if you’d rather play it safe — he always throws mid-arc — then slide under and shoot his back.
Needle Man’s spike gauntlet — The descending needle-ceiling corridor near the stage midpoint demands slide-timing most players don’t have yet. Destroy the first Hammer Joe, wait for the ceiling cycle to retract fully, then hold right and tap slide in rhythm with the needle drops. Magnet Missile auto-targets the Hammer Joe and clears him while you focus on movement. Missing the rhythm once means instant death; there’s no recovery window.
Doc Robot refights in the Wily Castle — These double-health rematches against MM2 Robot Master patterns catch everyone off-guard. Wood Man’s Leaf Shield still eats Search Snake shots, but the arena is smaller and he moves faster. Hard Man’s fist pattern has tighter gaps. Rush Jet lets you hover above Wood Man’s jump arc and rain Needle Cannon shots; for Hard Man, stand on the far left platform and Magnet Missile him between fist volleys. Each Doc Robot drops a large weapon energy capsule — farm these if you’re low before the next gauntlet.
Yellow Devil MK-II — The eye-open window is three frames shorter than the original Yellow Devil. Shadow Blade is the optimal weapon (three hits per cycle), but you stand at mid-screen and fire the moment the eye blinks. Pause-glitch still works if you’re willing to exploit it.
15 of 150 verified codes, free to read. The rest are in the Code Vault.
EEAELEAENKKAZAPAOONPZANNULUVOOSUKLNTSAIENKKAZAIAOONPZAAENKKAZEAAOONPZEAAOOGLSIVVKXIZSZEUOKVSXUSSUGKISSESSILAEYEYSEYIEIZIVSINGUVPVSINGLGameShark Labs · SharkVault Founding Membership
Unlock the full guide
9 more sections + all 150 codes in the Code Vault : boss strategies, glitches, easter eggs, and the complete archive. Founding Members get every GTA drop through launch day.
Only 64 days until GTA VI. lock in $1.99/mo for life before the founding rate closes (then $2.99/mo).
Surfaced from external sources, newest first. Not editorially endorsed.· 16 more in this feed.