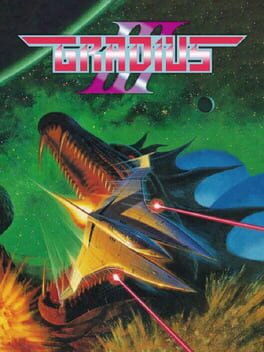
1991 · Konami · shoot-em-up · Nintendo
19 sources · 39 facts · verified 3mo ago · how this was made
Why this one is in the canon, and how to start it well.
Gradius III SA-1 is one my most proud ROM hacks. Zero slowdown. Gameplay fluid as a rocket. You can either play it unlocked (60 FPS and harder) or play the Origin version (60 FPS with speed controls for fair difficulty). It's available for download and works on real hardware.
Every named code, glitch, and easter egg above traces back to one of these sources. SharkVault editorial AI is grounded in human-curated facts files; nothing on this page is invented.
The cheat-code culture around Gradius III exploded because the difficulty curve was borderline sadistic without assistance, and Konami embedded a modified version of their own legendary code directly into the SNES port. The quirk: entering the standard Up Up Down Down Left Right Left Right B A sequence while paused self-destructs the Vic Viper the instant you unpause, but substituting the shoulder buttons—Up Up Down Down L R L R B A—grants full power-ups once per stage cite. That trap-code easter egg became playground legend, and Game Genie publishers flooded their code books with infinite-lives, invincibility, and stage-select entries to bypass the SNES port’s truncated stage roster (the arcade’s bonus stage and cube-rush zone were cut entirely) cite. For a generation of players, Gradius III was the Konami Code’s home—the place where cheat devices transformed a launch-window showpiece into a beatable game.
Pick Edit Mode 1 in the options menu before starting. This loads a balanced weapon layout (Missile → Double → Laser → Option → Shield) that’s forgiving for new pilots. Edit Modes 2–4 offer exotic weapon combinations but require memorization under fire.
Grab the first power-up capsule, then immediately start chaining. Destroyed enemies drop capsules; each one advances your weapon bar by one slot. Collect four to reach Laser, five for Option (the orbiting drone that mirrors your fire). Banking capsules beats premature Speed-Ups.
Activate Speed-Up twice, then stop. Press the power-up button after collecting two capsules in the Speed slot. Two speed tiers give you maneuverability without making the Vic Viper uncontrollable. Three or more speed-ups slam you into walls during the vertical-scrolling crystal section in Stage 2.
Prioritize Option over Shield. Your first Option doubles your firepower and covers blind spots. The Shield (slot 5) absorbs four hits but vanishes permanently when depleted—you can’t recharge it. Options persist until you die.
Memorize the Stage 1 Moai head pattern. The Easter Island statues fire rings in fixed intervals. Hug the left side of the screen, weave between the first two rings, then drift right as the third wave spawns. This pattern repeats in later Moai stages.
Use the pause button. SNES Gradius III has no time limit. Pause mid-chaos to study bullet spreads, plan your power-up activation sequence, or catch your breath before boss phases.
Expect to die in Stage 3 (the bubble column) on your first run. The ascending-shaft gimmick reverses gravity and scrolling direction. Gradius veterans still crash here. Learn the safe zones between bubble clusters, then attempt it with at least one Option active.
Don’t power up in a straight line. The SNES port slows when the screen fills with sprites, but that slowdown vanishes the instant you die and respawn naked. Grab Speed Up and Missile first, then pick Options or Shields based on what’s ahead. Four Options before you have a weapon means you can’t dodge.
The bubble shield blocks more than you think. Unlike the force field, the two-orb bubble rotates and destroys bullets on contact rather than absorbing a set number of hits. It’s weaker against large enemies that push through, but for bullet-dense sections—the Moai gauntlet, the crystal stage—it’s the better pick. The orbs don’t vanish after one hit; they absorb multiple small projectiles before breaking.
Memorize safe spots, not patterns. Stage 2’s solar flares, Stage 5’s falling crystals, and Stage 6’s biological tunnel all have pixel-specific safe zones where nothing spawns. The game expects you to learn these through repetition—no telegraph, no warning flash. Once you know where to sit, entire “impossible” sections become trivial.
The Edit Mode loadout is a trap for new players. Custom weapon configurations sound appealing, but the pre-set Type 2 (Ripple Laser + Spread Bomb) and Type 4 (Twin Laser + Photon Torpedo) are better balanced for the SNES version’s difficulty spikes. Edit Mode shines for challenge runs, not first clears.
Slowdown is a resource. When the frame rate tanks during heavy sprite loads, your hitbox moves slower but so do enemy bullets. Trigger slowdown by spawning extra Options or luring popcorn enemies on-screen before a difficult dodge sequence. The game doesn’t punish this—it’s built into the design.
The walls players actually hit, and the way through each.
Stage 2 (Moai) — Crystal Core
The crystalline Moai head at the end of Stage 2 fires rapid-fire ion rings while spawning smaller heads from both sides. Power up heavily before this fight and you die immediately: the SNES version’s slowdown-on-death mechanic suddenly removes all lag when you respawn, flooding the screen with bullets at full speed. Stay under-powered going in — carry Speed Up and Option but skip the fourth power-up tier. Position at mid-screen height, move in small circles to thread the rings, and destroy spawning heads the instant they appear. The core itself has a rhythm: fire in three-shot bursts between ring volleys rather than holding the button down.
Stage 4 (High Speed) — Wall Maze
The auto-scrolling wall section kills more players than any other segment in the game. The SNES port runs this sequence faster than the arcade original and the collision boxes extend beyond the visible wall edges. Hug the top of the screen and tap down in quarter-second intervals rather than holding a diagonal — the Vic Viper’s momentum carries you into walls if you hold directions. Memorization is mandatory; there are no visual tells for upcoming turns. Slow down your power-up collection before this stage begins — entering with full Speed Up makes the controls too sensitive for the required micro-adjustments.
Stage 6 (Cell) — Bubble Core Rush
The organic bubble-maze boss spawns four cores simultaneously while the screen scrolls. Chase cores into the bubble walls and you die to collision damage. Ignore the cores entirely on the first pass — focus only on survival and destroying the bubble barriers with your Options positioned above and below your ship. Once you’ve cleared a safe horizontal lane, park at screen-left and let the cores scroll back to you. The fight resets if you die, but the bubble pattern remains identical; sketch it on paper if needed.
Stage 8 (Crystal) — Covered Core
The final core hides behind regenerating crystal shields and fires spread shots that cover 80% of the screen. The only safe zone is a pixel-width gap that shifts position every 2.3 seconds. Pause the game, note the gap location, unpause and reposition, then pause again. The developers never patched this; tournament players used it routinely cite.
15 of 73 verified codes, free to read. The rest are in the Code Vault.
7E0346027E0350027E08C6016D82-0D6FD78F-D4AFDD8B-64647E1E04FF7E1E05FF7E00DC0B7E00CC00CBAF-D7ADDFA4-DDDD7E04060A7E04460A7E04860A7E04C60A7E03C60ADD34-A7646D3F-A7D4GameShark Labs · SharkVault Founding Membership
Unlock the full guide
9 more sections + all 73 codes in the Code Vault : boss strategies, glitches, easter eggs, and the complete archive. Founding Members get every GTA drop through launch day.
Only 64 days until GTA VI. lock in $1.99/mo for life before the founding rate closes (then $2.99/mo).
Surfaced from external sources, newest first. Not editorially endorsed.· 1 more in this feed.