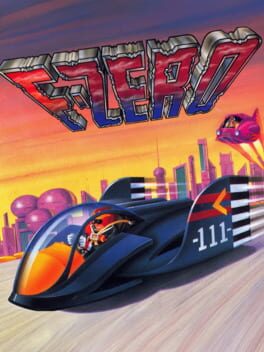
1991 · Nintendo Entertainment Analysis & Development · racing · Nintendo
Why this one is in the canon, and how to start it well.
The cheat-code scene around F-Zero stayed quiet compared to Konami or Capcom catalog staples—no Game Genie codes broke the game wide open, and the challenge was the point. What mattered was mastery: learning the Mute City jump shortcuts, the Big Blue rail-ride lines, the Death Wind hairpin drifts that separated casual players from the obsessives chasing sub-5:00 laps in Master difficulty. Nintendo Power ran time-trial challenges; players mailed in Polaroids of their TV screens as proof. That culture of execution over exploitation made F-Zero the gold standard for skill-based racing on consoles, a reputation it holds thirty-plus years later. Captain Falcon’s Falcon Punch wouldn’t exist without this game putting him on the map first.
Pick Captain Falcon. The Blue Falcon balances speed, acceleration, and body strength—forgiving enough to learn the tracks, fast enough to win on Knight and above.
Master the boost system. You get three turbo boosts per race (Y button). Burn them on long straights, never into corners—a wall collision costs more time than the boost saves. The Mute City I straight after the first hairpin is clean practice.
Drift without braking. Tap left/right on straights to angle your entry, then hold through the turn. The brake button kills speed; you almost never need it outside emergency dodges.
Run Knight League first. Mute City I, Big Blue, and Sand Ocean teach the core skills. Don’t jump to Queen or King until you’re placing top-3 consistently—the AI difficulty spike is severe and the later tracks demand precision you won’t have.
Memorize jump plates and land mines. Yellow strips launch you over obstacles and can skip entire sections with the right angle. Black squares destroy your shields instantly—they’re always in the same spots, so learn the patterns.
Pit strategically. The flashing strip regenerates your shield but kills speed. Only use it when your energy bar is red or you’re about to explode—shield management separates finishes from DNFs.
Win King League to unlock Master difficulty. Tighter AI, higher speeds, and the real skill ceiling. Practice mode lets you learn tracks without league pressure.
Brake into turns, don’t coast. The B button scrubs speed but tightens your turning radius — most first-timers understeer into walls because they never touch B. Tap it on hairpins and you’ll hold the racing line instead of bleeding seconds on recovery.
Boost on straightaways only. Each machine gets three boost charges per lap; burning one mid-turn is a guaranteed wall kiss. Save them for long straights where you can hold the racing line at max throttle — Port Town’s back stretch and Mute City’s opening run are textbook spots.
The Golden Fox is the beginner’s best friend. Its acceleration and cornering forgive sloppy lines; the Fire Stingray’s top speed means nothing if you’re pinging between guardrails. Master Knight League with the Fox before stepping up to heavier machines.
Purple repair strips are mandatory pit strategy. Your energy bar doubles as collision health — scrape walls or eat rival bumps and you’re one bad hit from exploding. Plan at least one pit pass per three-lap race; skipping it to maintain position is a coin-flip gamble that rarely pays off.
Rival AI rubberband on higher leagues. Queen and King League opponents will draft past you on straights if you’re leading — they don’t obey the same speed caps. Use boost charges defensively in the final lap to create separation, or bait them into walls on technical sections where their pathfinding breaks down.
Memorize jump ramp angles. Death Wind’s canyon leap and Big Blue’s elevated sections require specific approach speeds — too slow and you undershoot into the void, too fast and you overshoot the landing zone. The game gives no mid-air control; your trajectory is locked the instant you leave the ramp.
Practice Mode is a trap for building bad habits. It disables damage and rival traffic, so you never learn defensive spacing or energy management. Run Grand Prix from the start — the Knight League curve is gentle enough to teach fundamentals under real race conditions.
The walls players actually hit, and the way through each.
Mute City I hairpin turn (first lap panic)
The 90-degree hairpin after the first long straightaway catches new players who haven’t learned the brake-tap rhythm. The Blue Falcon slides wide, clips the barrier, and loses 15–20% energy before the first jump plate. Tap B three times entering the turn—don’t hold it—release the accelerator completely during the apex, then resume full throttle on exit. The brake system requires staccato inputs; holding brake kills all momentum and guarantees a barrier scrape.
Big Blue jump plate undershoot
Big Blue’s mid-track jump plates launch vehicles across gaps, but the Blue Falcon and Fire Stingray frequently undershoot the landing zone when damaged below 50% energy. Reduced speed from energy loss means you don’t clear the gap. Use the repair zone before the jump sequence, even if it costs you a position. A full-energy undershoot is impossible with proper pre-jump speed; a low-energy attempt is a guaranteed retirement. The AI rubber-bands—you’ll recover the positions.
Death Wind I & II barrier magnetism
Death Wind tracks have narrow lanes bordered by instant-death drops, and the SNES collision detection creates a “magnetism” effect where light barrier contact pulls the vehicle into a spin toward the edge. First-time players lose 8–12 vehicles here across the cup. Drive the center of your lane, not the racing line. F-Zero rewards safe center-lane driving over optimal racing lines when barriers are fatal. Tap opposite d-pad direction immediately on any barrier touch to counter the spin before it compounds.
Fire Field final lap energy management
Fire Field drains energy from track surface heat in addition to collision damage. Players who survive laps 1–4 frequently run out of energy on lap 5 with no repair zones remaining. Hit every repair zone on laps 1–3 even when above 80% energy. The cumulative heat drain is non-obvious but mathematically guaranteed to zero you out. Master difficulty Fire Field requires treating repair zones as mandatory checkpoints, not conditional stops.
15 of 27 verified codes, free to read. The rest are in the Code Vault.
7E0053087E0053077E0D51087E115000CB3C-0FA4DF3C-04D47E0053167E0D0000B321-6767A96E-A4A4CB3C-0FA4DF3C-04D4A9C3-6F66D433-0D6FDB69-ADD4D669-A7D43DB3-A46DDDB3-A4ADEDB3-A7DD9BB3-A70D3CB3-A76D7E00C9007E00CA08C960-DF647E005908A96E-A4A4D484-D404GameShark Labs · SharkVault Founding Membership
Unlock the full guide
9 more sections + all 27 codes in the Code Vault : boss strategies, glitches, easter eggs, and the complete archive. Founding Members get every GTA drop through launch day.
Only 64 days until GTA VI. lock in $1.99/mo for life before the founding rate closes (then $2.99/mo).
F-Zero 99 was a new game and it was very good.
Liam Robertson (@liamrobertson.bsky.social)
"wHy dO yOu oNlY pLaY nInTeNdO?" - Next to no live service games - no AI slop - Switch 2's the cheapest of the big 4 - no layoffs - they actually care about their IP's (Star Fox, Metroid, F-Zero has SOMETHING with F-Zero 99, sure not a new game, still better than letting
Monado Gamer (@monadogamer.bsky.social)
Can a racing game be too fast? Hell no!! This is an F-Zero inspired indie racing game that reaches speeds of 8,000 km/h! BRAYZ is coming to Steam: store.steampowered.com/app/4873560/... by indie dev Studio Nu #gaming
Alpha Beta Gamer (@alphabetagamer.bsky.social)
Surfaced from external sources, newest first. Not editorially endorsed.· 22 more in this feed.