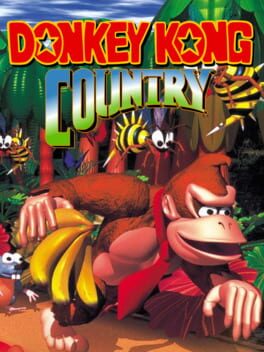
1994 · Rare · platformer · Nintendo
29 sources · 59 facts · verified 4mo ago · how this was made
Why this one is in the canon, and how to start it well.
Every named code, glitch, and easter egg above traces back to one of these sources. SharkVault editorial AI is grounded in human-curated facts files; nothing on this page is invented.
DKC’s cultural footprint runs deeper than the tech demo. It taught a generation of players to search — every level hides bonus barrels, animal-buddy crates, and KONG letters in places the camera doesn’t want you to look. That treasure-hunt structure made it a natural fit for the playground-rumor era and the early cheat-device scene: Game Genie codes for infinite lives and bonus-barrel access spread through word-of-mouth and xeroxed code lists, while the BARRAL 50-lives controller code (entered on the file-select screen: B, A, R, R, A, L) became one of the SNES’s most famous button sequences. The game’s mix of punishing later-world difficulty and generous hidden 1-ups created a perfect storm for cheat culture — you wanted the safety net, because Chimp Caverns and Gang-Plank Galleon didn’t forgive mistakes.
Pick Donkey Kong for combat, Diddy for precision. DK kills most enemies in one hit; Diddy dies faster but jumps higher and runs quicker. Swap with Select. If one Kong dies, break a DK Barrel to revive your partner.
Roll everywhere (Y button). Both Kongs cartwheel to kill weak enemies and build momentum. Hold Y while running to maintain speed across gaps. Rolling off ledges carries horizontal velocity—critical for reaching distant platforms.
Collect KONG letters in every stage. Spelling K-O-N-G in a level grants an extra life. They’re usually visible along the main path, but some require minor detours or animal-buddy access.
Find the hidden bonus barrels. Most stages have 2–3 bonus rooms (timed challenges, enemy gauntlets, or item hunts). Look for suspicious gaps in walls, off-screen jumps, or tire-bounce sequences that launch you into the ceiling. Bonus completions award lives or animal tokens.
Ride animal buddies when available. Rambi the rhino plows through walls and enemies. Expresso runs fast and glides. Enguarde the swordfish is mandatory for underwater combat. You lose the animal if you take damage, so treat them as temporary invincibility.
Save at Kong family barrels between worlds. Candy’s Save Point appears after boss fights. The game has no auto-save; quit without saving and you restart from your last manual save.
Die deliberately if you’re about to lose both Kongs with zero lives. Reset before the Game Over screen to reload your last save with your previous life count intact.
Diddy is faster, Donkey hits harder. Diddy moves quicker and jumps farther—use him for precision platforming and time-sensitive sequences. Donkey breaks armored enemies (Krusha) that Diddy can’t touch without a barrel. Switch deliberately; the second Kong isn’t a backup life.
Roll-jump for maximum distance. Tap Y to roll, then press B mid-roll to launch a jump that carries significantly more horizontal momentum than a standing leap. Essential for reaching far platforms and hidden bonus barrels. Works with both Kongs but feels snappier with Diddy.
Animal buddies absorb one hit. Rambi, Enguarde, Expresso, Winky, and Squawks take a single enemy contact before you lose them—they’re an extra hit point. Ride them aggressively into enemies rather than dismounting at the first sign of danger.
Bonus rooms often hide above the visible screen. Many stages have barrel cannons or climbable ropes that launch you into off-screen bonus areas. Barrel cannon aimed 45 degrees upward with no visible landing zone? Fire yourself—there’s likely a hidden room. Same principle applies to ropes that extend past the top border.
DK barrels respawn if you leave and re-enter. Lost your partner Kong? Backtrack to the last DK barrel you passed. Exit the level entirely (pause and select “Give Up”), then re-enter from the world map. The DK barrel refills, letting you reclaim your partner before tackling difficult sections.
Cartwheel off edges for style and safety. Diddy’s cartwheel (Y button) keeps momentum when you run off a platform, letting you cover gaps without committing to a full jump. Useful for last-second adjustments and threading narrow passages in mine cart levels.
K-O-N-G letters unlock bonus percentages. Collecting all four letters in a stage contributes to 103% completion but doesn’t gate progress. Prioritize them in early worlds when learning layouts—they’re often placed along the critical path to teach you about breakable walls and hidden alcoves you’ll need to spot later.
The walls players actually hit, and the way through each.
Mine Cart Carnage (Kremkroc Industries, Inc.) — the first auto-scrolling mine cart stage kills more first-timers than any other level in the game. The cart picks up speed on downhill slopes; panic-jumping into every gap puts your head straight into the low-hanging stalactites. Tap jump once per gap, let momentum carry you over, and crouch under ceiling obstacles. The Krash enemies riding opposite-direction carts appear one screen ahead — jump early, before they’re in collision range.
Slipslide Ride (Gorilla Glacier) — ice physics, rope-climbing, and Zingers converge into a difficulty spike the game hasn’t prepared you for. The vertical rope segments demand patience: Zingers patrol fixed oval patterns, so wait one full cycle before climbing. On the barrel-blasting sequence near the end, hold jump after each launch to grab ropes at maximum height. Missing a rope drops you into a pit with no recovery. Diddy’s smaller hitbox makes the Zinger gaps more forgiving — swap to him if you have him.
Really Gnawty (boss rematch, Gorilla Glacier) — the palette-swap Very Gnawty fight adds speed and tighter jump windows. Players expect the same five-bounce pattern from the first encounter; Really Gnawty bounces seven times and covers more horizontal distance per arc. Stand near the center of the arena, not the edges. Jump straight up when he passes underneath — don’t try to land on him during forward movement. After the fourth hit he enters panic mode with erratic double-bounces; wait for him to reset to the corner before engaging.
Blackout Basement (Kremkroc Industries, Inc.) — the flashlight barrel gimmick disorients players who rely on visual anticipation. The light radius is fixed; enemies and pits exist in total darkness beyond it. Slow down. The Slippas and Krushas follow predictable ground patrol loops — listen for footstep audio cues. The bonus room near the midpoint requires a blind leap left from the Continue Barrel; the platform is there, two body-lengths out.
15 of 160 verified codes, free to read. The rest are in the Code Vault.
DBC1-3D6DDCC1-34ADDBC9-340DDCC1-3D6DDBC1-3D6DDCC1-34ADDBC9-340DDCC1-3D6DF6C1-3D6DFBC1-34ADF6C9-340DFBC1-3D6DF6C1-3D6DFBC1-34ADF6C9-340DFBC1-3D6D7FC1-3D6D74C1-34AD7FC9-340D74C1-3D6D7FC1-3D6D74C1-34AD7FC9-340D74C1-3D6D0CC1-3D6D08C1-34AD0CC9-340D08C1-3D6D0CC1-3D6D08C1-34AD0CC9-340D08C1-3D6D1DCA-C2EA1DCC-CA7A1DCC-CA7A1DCA-C2EAGameShark Labs · SharkVault Founding Membership
Unlock the full guide
9 more sections + all 160 codes in the Code Vault : boss strategies, glitches, easter eggs, and the complete archive. Founding Members get every GTA drop through launch day.
Only 64 days until GTA VI. lock in $1.99/mo for life before the founding rate closes (then $2.99/mo).
Surfaced from external sources, newest first. Not editorially endorsed.· 20 more in this feed.· 1 placed beside the section it relates to above.