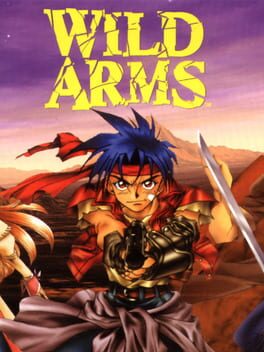
1996 · Media.Vision · rpg · Sony
26 sources · 41 facts · verified 3mo ago · how this was made
Why this one is in the canon, and how to start it well.
The anime opening for Wild Arms (PS1) ❤️
Every named code, glitch, and easter egg above traces back to one of these sources. SharkVault editorial AI is grounded in human-curated facts files; nothing on this page is invented.
The cheat-code scene grew thick around missable items, optional superbosses (Ragu O Ragula and the King of Angolmois in the postgame Abyss), and the endgame boss gauntlet (Zeikfried → Motherfried → Zeik Tuvai) cite. GameShark lists circulated for max-Gella codes, stat modifiers, and encounter toggles — the tools you needed to explore every corner of Filgaia without the grinding tax that defined mid-’90s console RPGs. The series spawned four numbered sequels and a tactical spin-off, but the original Wild Arms remains the proof: a JRPG can wear a duster and spurs without losing its mechanical spine.
Start with Rudy. When the game splits into three character prologues, pick his first—Berry Cave is the shortest dungeon, straight combat with minimal puzzles. Jack’s prologue demands Fast Draw timing, Cecilia’s has more backtracking. You’ll play all three eventually; this just sets the order.
Load up on Heal Berries in Surf Village before you leave. The item shop is cheap, and you won’t have consistent healing magic for hours. Grab 10–15 Heal Berries—early dungeons burn through them fast.
Talk to every NPC in Surf Village for the tool tutorials. One explains Rudy’s bombs (required for Berry Cave progression), another mentions the Circle-button search command that reveals hidden items all game. Easy to skip if you beeline for the dungeon; don’t.
Save 5,000 Gella for the Migrant Seal in Adlehyde. After the three prologues converge, you’ll hit the capital. The tool shop sells the Migrant Seal—one-time purchase, unlocks fast-travel between towns. Essential for backtracking to missable chests and side content later.
Equip the Pocket Watch on Cecilia the moment you find it in Ship Graveyard. Permanent +10% encounter rate reduction when worn. Wild Arms has aggressive random encounters in dungeons; this accessory pays off over 30 hours.
Never sell duplicate tools or accessories. Dungeons recycle gimmicks—you’ll need bombs, the radar, and the grappling hook in multiple locations. Accessories like Power Boost and Magic Boost don’t stack, but keep spares for different party setups.
Hit level 8–9 before Lolithia’s Tomb. The Alhazad boss fight spikes hard; most players arrive at 6–7 and get flattened. Two extra levels and a full stock of Heal Berries turn a wall into a fair fight.
Stock up on Heal Berries early and often — Wild Arms gates healing magic behind Cecilia’s spell list, and dungeons are long. Towns sell Heal Berries cheap; buy 20+ before each dungeon run to avoid backtracking when Jack and Rudy run dry.
Tool puzzles lock progression, not combat — Each character’s Tools (Jack’s bombs, Rudy’s ARM, Cecilia’s wand) solve environmental puzzles that gate entire dungeons. If you hit a dead end, cycle through all three characters and scan for interactive objects; the game rarely telegraphs which Tool applies where.
Duplicators are finite and precious — Duplicator items copy consumables and certain key items, but the game only seeds a handful across the entire playthrough. Save them for late-game stat seeds (Gimel Coins, Lucky Cards) or rare healing stock before the final dungeon gauntlet.
Fast Draws require exact timing, not button mashing — Jack’s Fast Draw skills (his highest single-target damage) demand you press Circle the instant the targeting reticle flashes. Too early or late and the move fails, wasting a turn. Practice on trash mobs in early areas before relying on them for boss DPS.
Equip the Sheriff Star on Rudy immediately — This accessory (found in Adlehyde’s item shop sidequest chain) doubles ARM damage output for minimal cost. Rudy’s ARMs scale harder than magic or physicals in the mid-game; the Star turns him into your primary damage dealer until the final act.
Crest Graphs are missable and non-renewable — Cecilia’s spell customization system depends on finding Crest Graphs in chests and NPC trades. Several are locked to specific story windows; if you miss the Adlehyde library graph or the Baskar elder’s trade before plot flags advance, that spell slot is gone for the run.
Guardian summons cost MP but also grant passive stat bonuses — Equipping a Guardian (even if you never summon it) applies hidden buffs to the equipped character. Stona prevents petrification, Grudiev boosts physical defense — treat them as hybrid accessories, not just flashy limit breaks.
The walls players actually hit, and the way through each.
Lolithia’s Tomb puzzle sequence — The three-hero split dungeon early in the game stops first-timers cold because it expects you to know each character’s field tools before the game bothers teaching them. Jack’s bombs crack walls, Rudy’s RAD reveals hidden passages, Cecilia’s Wand lights dark rooms. Rush the initial solo dungeons without experimenting and you miss the mechanics entirely. Backtrack to each starting area if you’re stuck, re-read the sparse tutorial text, and map which tool solves which obstacle. The tomb won’t progress until all three paths converge — brute-forcing one route gets you nowhere.
Asgard boss fight (the giant golem guarding the Memory Bird statues) — This mid-game skill check flattens parties that haven’t grasped the Force system. Asgard hits hard enough to two-shot underleveled characters, and his defense turns conventional attacks into a slog. Burn Guardian summons (Stoldark for earth-element damage), use Cecilia’s Magic Barrier to mitigate his area attacks, and spend those Gimel Coins you’ve been hoarding — revive fallen party members immediately or the fight snowballs. Grind to level 22–24 in the surrounding desert if you’re getting flattened; the EXP curve is steep enough that two levels make a dramatic difference.
Photosphere dungeon’s color-tile teleporter maze — The late-game Photosphere drops a tile-color teleportation puzzle with zero in-game explanation of the routing logic. Each color warps you to a specific destination, the pattern isn’t intuitive, and backtracking costs time. Players waste 30+ minutes trial-and-erroring tiles. The correct path is red → blue → yellow → green for the main route to the boss chamber. Map the teleporter destinations on graph paper if you’re chasing the optional chests — the dungeon has three separate loops and the treasure routes don’t overlap with the critical path.
Running out of Heal Berries before the final dungeon — Malduke (the endgame location) is a long resource-attrition gauntlet with no shops and limited save points. Players who didn’t stockpile consumables in Court Seim get trapped in a death spiral where they can’t heal between fights but also can’t backtrack without losing progress. Stock 40+ Heal Berries and 15+ Revive Fruits before entering. Already inside and starving? The Duplicator tool (acquired earlier) clones consumables — it’s RNG-based but better than a hard reset.
All 6 verified codes for Wild Arms, free to read.
$87777025D298$8736732657B7$77E75B17901A$87FCA4BAE5D7$77E75B17901A$876A9A6C3D35$77A58DED125C$87BEA2B84535$77ADDAEEC1B4$87099CE45935$87BAD6D33436$87E246472AEA$778C25D91260$87A93EA04535$8721B54225CD$87A6421958B4$77FB1ADCC7A9$874FAE6C5935$7757BBD8C7A9$87AB4F685935GameShark Labs · SharkVault Founding Membership
Unlock the full guide
9 more sections : boss strategies, glitches, easter eggs, and the complete archive. Founding Members get every GTA drop through launch day.
Only 64 days until GTA VI. lock in $1.99/mo for life before the founding rate closes (then $2.99/mo).
Surfaced from external sources, newest first. Not editorially endorsed.