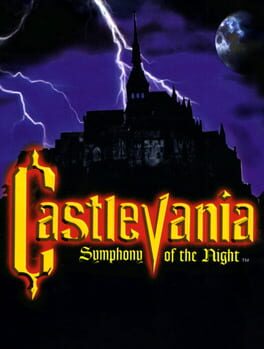
1997 · Konami Computer Entertainment Tokyo · metroidvania · Sony
30 sources · 38 facts · verified 5mo ago
Why this one is in the canon, and how to start it well.
Retro gaming is fun. It’s strange how video games is one of the only mediums where enjoying the old stuff is niche. Can you imagine if someone only listened to music from the past few years? Or only read new books? Anyways I’m gonna play Castlevania Symphony of the Night for
Codes, glitches and easter eggs on this page are AI-drafted from the sources cited below and checked against a curated facts file. Spot a mistake? Tell us: hello@gamesharklabs.com.
No corrections logged for this guide yet. Spot something wrong? Use “Report an error” on any section above.
The cheat-device culture that grew up around SOTN is inseparable from its legacy. GameShark codes for max stats, infinite hearts, and item modifiers let players break sequence locks and explore the castle out of order—speedrun training wheels before speedrunning had a name cite. The name-entry unlocks (AXEARMOR for the Axe Lord alternate, RICHTER for the Belmont playthrough, X-X!V”Q for max Luck) became folklore, passed through magazine letters and early GameFAQs guides cite. SOTN was the game you finished, then the game you solved—and the PS1 GameShark was the Rosetta Stone for a generation of players who wanted to see everything Igarashi hid in the castle walls.
Spot a mistake? Sign in to report it.
Equip the Alucard Shield. It’s in your inventory but not on your back—pause, Equipment menu, left hand. Block with L1 or R1 to negate most early damage, and you can still swing while blocking.
Kill the first Zombie in the Entrance for the short sword drop. Bare fists are worthless. Any weapon beats none; this zombie drops one guaranteed on first kill.
Save in the Alchemy Laboratory, then backtrack left through the Entrance. You ran past treasure chests and candles during the prologue. Double back for potions and throwables before you push deeper.
Talk to the Master Librarian in the Long Library. He sells items and identifies unknown equipment for 10 gold per piece. Unidentified gear carries hidden stat penalties until you pay—identify anything you plan to wear.
Grind Outer Wall skeletons for levels and bone drops if a boss walls you. Symphony is an RPG; two or three levels change the math. Skeletons respawn on room transition and die in two hits.
Check every dead-end for cracked walls. Breakable walls hide shortcuts and permanent stat upgrades—Life Max Ups, Heart Max Ups. Attack suspicious stonework. Some walls need specific sub-weapons: axes for high cracks, holy water for floor sections.
Don’t sell the Duplicator if you find it early. Rare drop from Outer Wall skeletons; lets you use sub-weapons without consuming hearts. Breaks certain builds wide open.
Spot a mistake? Sign in to report it.
Save rooms heal you to full. HP and MP restore the instant you enter. Treat them as free checkpoints before boss fights or sequence breaks—backtrack, save, return at full strength.
Equip two shields and hold both attack buttons to block everything. Alucard Shield (or any pair) + Square + Circle = permanent guard stance. Negates most damage. Slow, removes all challenge, works.
Sell duplicate relics and spare equipment to the librarian. He pays well. Second Spike Breaker, extra Faerie Scrolls, redundant armor—liquidate for late-game weapons and consumables. Don’t hoard.
Shield Rod + Alucard Shield trivializes the game. Equip both, hold Circle to activate the shield’s special: sustained energy field, rapid damage, near-invincibility. Works on bosses, mobs, environmental hazards. Konami shipped it this way.
Punch every wall. Breakable walls hide stat boosts, optional areas, top-tier items. Slightly different texture or a dead-end that feels wrong—strike it. Gravity Boots room, Reverse Caverns shortcut, multiple upgrades are all behind false walls.
Mist form passes through spike floors and certain gates. Bat + Down + Up ignores damage tiles, slips through one-tile gaps. Required for upper Reverse Keep without double-jump-cancel tech.
Farm Schmoos in the Long Library for early levels. Infinite respawns, decent XP for the first third. Ten minutes at level 10–15 makes Olrox and Succubus significantly easier.
Prologue performance determines starting gear. Beat Dracula fast and clean (no damage, high style) for better equipment. Poor showing leaves you with the minimum, making Marble Gallery a slog.
Spot a mistake? Sign in to report it.
The walls players actually hit, and the way through each.
Inverted Castle access after Richter fight. First-time players defeat Richter at the castle keep and watch the credits roll at 196.0% completion—everything signals you’re done. You’re not. Equip the Holy Glasses (dropped by the Succubus boss in the Outer Wall) before confronting Richter. This reveals the green orb above his head; destroy it with any attack to trigger the true ending sequence and unlock the inverted castle. Without the glasses equipped during the fight, you lock yourself into the bad ending and must reload an earlier save. The game never tells you this explicitly; players discovered it through Japanese strategy guides and word-of-mouth in 1997.
Jewel Sword requirement for Orlox’s Quarters. The long vertical shaft leading to Orlox has a single breakable floor tile halfway down that requires the Jewel Sword to destroy—no other weapon in the game works, not even the Crissaegrim or late-game legendary drops. Miss this obscure weapon (found in a secret room in the Marble Gallery, accessible only by transforming into mist and passing through the ceiling near the clock room) and you’ll loop the Outer Wall for hours convinced there’s a movement ability you’re missing. The tell: if you’ve fought the Succubus and still can’t reach Orlox, you need the sword, not a new form.
Gravity Boots wall-jump in the Catacombs. The path to the Catacombs save room and the Spike Breaker armor requires a counterintuitive wall-jump using the Gravity Boots’ high-jump property. Players expect Bat, Mist, or Wolf form solutions here; the actual method is to equip Gravity Boots, stand at the base of the tall shaft near the poison-pool room, and tap jump rapidly while holding toward the wall to climb. The timing is unforgiving (roughly 4–6 frames per input) and the game never tutorializes this interaction. Speedrunners use it constantly; casual players abandon the Catacombs entirely and return over-leveled from the inverted castle.
Soul of Bat acquisition sequence. You need the Form of Mist (Catacombs), then the Power of Mist (Colosseum), then backtrack to the room below the Alchemy Lab’s save point to mist-dash through the floor grate. First-timers miss the Colosseum visit entirely because it requires a library leap of faith off the second-floor balcony—there’s no visual indicator the drop is safe or leads anywhere critical.
Spot a mistake? Sign in to report it.
10 of 30 verified codes, free to read. The rest are in the Code Vault.
800F4BF6140080097C54006380097C60006380097C6C006380097C78006380097C84006350000E020000800979740303500004020202800979928081300974580090800A8460001E80097BA8006380097BA003E780087BB0003C80136C14003C80097C00423F80097C02000FGameShark Labs · SharkVault Founding Membership
Unlock the full guide
9 more sections with membership, including boss strategies, glitches and easter eggs. All 30 codes are in the Code Vault, a one-time $99 purchase.
31 days until GTA VI. Lock in the founding rate for life at $1.99/mo: it stays your price for as long as your membership stays active (standard is $2.99/mo).
Surfaced from external sources, newest first. Not editorially endorsed.· 19 more in this feed.· 1 placed beside the section it relates to above.