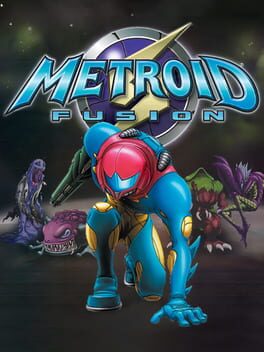
2002 · Nintendo R&D1 · action-platformer · Nintendo
15 sources · 18 facts · verified 3mo ago · how this was made
Why this one is in the canon, and how to start it well.
Every named code, glitch, and easter egg above traces back to one of these sources. SharkVault editorial AI is grounded in human-curated facts files; nothing on this page is invented.
The cheat-device scene exploded around Fusion because the game’s rigid progression made sequence-breaking a form of rebellion. GameShark codes for infinite health, moon-jump, and item unlocks let players bypass Adam’s navigation computer entirely; the community discovered memory-corruption glitches that skip entire sectors cite. The GBA-to-GameCube link cable unlocked the Fusion Suit in Metroid Prime and made the original NES Metroid playable — a cross-platform easter egg that rewarded dual ownership and fueled the “Metroid Renaissance” narrative cite. Fusion proved 2D Metroid could survive in the handheld era by leaning into claustrophobia, narrative control, and the terror of being outgunned by your own legacy.
Hit every Navigation Room. Blue doors mark these save/refuel stations — the only autosave points in the game. Miss one and you’re replaying from the last. Your ship’s AI also delivers objectives here.
Shoot everything. Blocks, walls, ceilings — if the texture looks off, it hides a path or pickup. X Parasites (the floating blobs enemies drop) refill health and missiles on contact; kill often, absorb freely.
Map is mandatory (Start button). Yellow doors mark your next objective. Fusion is linear compared to Super Metroid — follow yellow until you know the station cold enough to sequence-break.
Charge Beam in Sector 1 is non-negotiable. First major upgrade, required for progression. Charged shots open specific doors and delete mini-bosses; get it before you do anything else.
Master the Grip Ledge the moment you acquire it. Hang from overhangs, pull up into ceiling alcoves — dozens of expansions hide in spots you can only reach by gripping. Practice in Sector 2.
Run from the SA-X. The blue-suited doppelgänger is invincible in scripted encounters. These are chase sequences, not fights — you cannot damage it until the game says you can.
Missile Tanks before Energy Tanks. Missiles unlock doors and shred mini-bosses faster. Health matters less when you’re dodging clean and absorbing X Parasites between rooms.
Save stations heal you completely. Every save room restores full energy and missiles—backtrack to one if you’re low before a boss or difficult segment rather than limping forward on two energy tanks.
Shoot diagonally downward while running to maintain momentum. Samus can fire at 45-degree angles while sprinting; this lets you clear low enemies without breaking stride or crouching, which kills your forward speed.
The SA-X patrols on a timer, not a trigger. Most SA-X encounters are scripted chases, but in open sectors it moves on fixed routes—if you die and retry, it will be in a different position. Wait in a side room if you need it to pass.
Absorb X Parasites immediately in combat. Free-floating X refill health and ammo when touched, but they vanish after a few seconds. Prioritize collection during multi-enemy fights—each one is a free top-up you can’t get back.
Shinespark vertically to reach hidden upgrades early. Several missile and energy expansions are placed above normal jump height in long vertical shafts. Charge a Speed Booster run, crouch to store it, then jump and press up+jump to rocket upward—many upgrades are reachable before the game expects you to have Space Jump.
Core-X bosses always drop a major ability. Every large boss ends with a Core-X phase that yields a suit upgrade or weapon. Learn the Core-X evasion pattern (it telegraphs lunges with a brief pause) so you don’t waste missiles on a fight that’s already won.
Missiles damage armored enemies faster than the beam. Yellow-plated Space Pirates and security robots take reduced beam damage but full missile damage. Don’t waste time—five missiles ends the fight; charged shots drag it out.
The walls players actually hit, and the way through each.
Sector 2 (TRO) Water Turbine Puzzle
After Zazabi drops, players leave the sector without the Diffusion Missile upgrade, then hit a wall when Navigation says “destroy the water turbine.” You need Diffusion to progress—freeze the turbine with an Ice Missile, then fire Diffusion at the frozen wheel to shatter it. The upgrade room sits one screen left of the save station in the large vertical shaft immediately after the boss arena. The game never explains the freeze-then-shatter sequence; if you skipped the pickup, backtrack now.
Sector 4 (AQA) Underwater Maze Navigation
The flooded reactor core loops you through identical corridors because the exit path hides under a bombable floor grate in the bottom-right quadrant of the main chamber. The camera won’t reveal the destructible tile until you’re standing on it, so most players circle the upper perimeter forever. If you’re lost, return to the entrance airlock and bomb every floor tile methodically—Fusion buries critical paths under generic tilework throughout the station.
SA-X Confrontation in Sector 5 (ARC)
The frozen storage bay SA-X encounter kills you if you fire a shot. The moment you regain control after the cutscene, hold left and jump into the background door—don’t shoot. The SA-X follows scripted patrol behavior; firing breaks the script and makes it aggressive. If you’ve already alerted it, reset to your last save. There’s no outrunning it once the hunt starts.
Yakuza Boss (Sector 3 - PYR) Damage Cycle
You can’t damage Yakuza until the shell retracts—shooting the closed armor just drains missiles. Wait for all six shell segments to pull back simultaneously (roughly two seconds), then unload charged shots and missiles into the exposed red core. Impatient players burn through 40+ missiles hitting invulnerable plating, then die to the later phases with empty reserves. The vulnerability window opens when the full shell-open animation completes; fire before that and you waste ammo.
15 of 24 verified codes, free to read. The rest are in the Code Vault.
3300151E00643203821F00003203821D000783001252A0013203821D00XX00000F6D000A100008B400073300124E00004300131AFFFF00000003000283004D2C02FF83004D2E01BE83004D3000D383004D36020F83004D40010883004D4431E883004D4628A68300131403E7330013180063830013100833330012490001830001380100830013120833GameShark Labs · SharkVault Founding Membership
Unlock the full guide
9 more sections + all 24 codes in the Code Vault : boss strategies, glitches, easter eggs, and the complete archive. Founding Members get every GTA drop through launch day.
Only 64 days until GTA VI. lock in $1.99/mo for life before the founding rate closes (then $2.99/mo).
Surfaced from external sources, newest first. Not editorially endorsed.