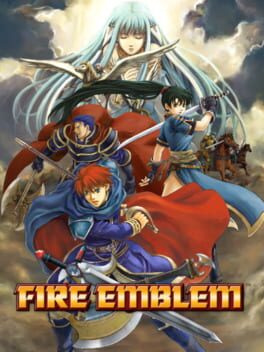
2003 · Intelligent Systems · strategy-rpg · Nintendo
18 sources · 22 facts · verified 3mo ago · how this was made
Why this one is in the canon, and how to start it well.
Every named code, glitch, and easter egg above traces back to one of these sources. SharkVault editorial AI is grounded in human-curated facts files; nothing on this page is invented.
Cheat-device play orbited stat-cap manipulation (CodeBreaker and Action Replay MAX hex codes pushing Strength, Speed, and Luck past the hard 20-point ceiling) and permadeath workarounds — the GBA never saw Game Genie support, so flash-cart savestates and device codes became the lab for experimenting with otherwise-dead units. Serenes Forest archived gaiden-chapter triggers, support prerequisites, and RNG-abuse routing; the Triangle Attack guides mapped frame-advance methods to lock critical hits and level-up stat gains. The outcome was a metagame as intricate as the campaign: players who would never attempt Hector Hard Mode ironman could field a 20/20/20 Lyn with capped stats via codes, turning the final dragon fight into a victory lap instead of a calculated puzzle.
Play Lyn’s ten-chapter tutorial — Movement grid, weapon triangle (swords beat axes, axes beat lances, lances beat swords), and permadeath fundamentals. The game expects you to know this cold by Chapter 11; skipping it on a first run is self-sabotage.
Check weapon durability before you deploy — Every weapon shows uses as a fraction (35/40). When it hits zero, it’s gone. Keep iron-tier spares in inventory; silver weapons are for bosses, not fodder.
Read the pre-battle roster screen — Movement range (foot units = 5 tiles, cavalry = 7+), weapon loadout, and HP matter. You can’t swap gear mid-chapter, so equip Vulneraries on your mages and healers now.
Put fragile units behind your tanks — Mages and healers fold in 1–2 hits. Let Oswin, Hector, or high-HP lords absorb the frontline. Enemy AI targets kills it can confirm.
Suspend-save every turn — Start → Suspend. The save deletes itself if a unit dies, forcing a chapter restart. Suspend freely to test aggressive plays without commitment.
Promote at Level 10+ with promotion items — Knight Crests, Hero Crests, and equivalent consumables trigger class upgrades. Promotion resets level to 1 but preserves stats. Wait until Level 15–20 to maximize pre-promotion stat gains.
Hoard stat boosters for your lords — Angelic Robes, Energy Rings, Speedwings are finite. Save them for Eliwood, Hector, or Lyn — they’re forced deployments in endgame maps where every point counts.
Lyn’s tutorial locks you in on the first run — ten chapters of basics before you touch Eliwood or Hector mode. If you already know SRPGs, it drags, but those chapters are the only way to recruit Rath and Wallace for the main campaign. Skip the dialogue or let the characterization land; either way, you’re playing it once.
Arena abuse shatters the curve — arenas let you grind gold and experience with soft-reset RNG manipulation (reset if the forecast looks grim). A few sessions on Marcus or Lowen in early Eliwood chapters trivializes the midgame, but overleveling costs you bonus experience thresholds and long-term stat gains.
Rescue-drop chains warp slow units across the map — mounted units Rescue infantry, move full distance, then Drop next turn. Chain it with multiple cavaliers and your armor knights and mages hit the front without burning ten turns. Critical for gaiden turn limits.
Supports are invisible stat boosts on a glacial timer — adjacent units build affinity ranks for hit/avoid/crit bonuses. The catch: 60+ shared turns to reach A-rank, and only five active support conversations per unit. Plan pairings early (Eliwood/Hector, Florina/Lyn, Raven/Lucius build fast) or finish with everyone at C.
Mani Katti, Rapier, and Wolf Bane are effective-damage tools, not stat sticks — bonus damage to armored/cavalry units, limited durability. Save them for armored bosses and cavalier swarms where the 3× multiplier matters; wasting charges on generic infantry is a rookie move.
Triangle Attack demands exact positioning and rarely justifies the setup — Florina/Fiora/Farina surround one enemy on three sides for a guaranteed crit. By the time you have all three sisters recruited and leveled, you have better options than spending three unit-turns on a single kill.
Hector Hard Mode is the actual game — new units, tougher placements, gaiden requirements that make sense. Eliwood Normal is the tutorial that won’t admit it.
The walls players actually hit, and the way through each.
Chapter 11: “Whereabouts Unknown” — Fog of War Ambush
The first fog-of-war map catches players off guard. Enemy cavaliers charge from the darkness with 6+ movement range while your units crawl forward at 4–5 tiles per turn. The torch staff only reveals a 5-tile radius, and Matthew’s torch item runs out fast.
Keep Matthew alive and central to your formation — his torch refreshes each turn. Position armored units (Oswin, Dorcas) at chokepoints two tiles behind your torch radius so charging enemies hit them first, not your mages. Send a flier (Florina) straight up the left side to pull the western cavaliers away from your main force. The map wants you to turtle; refuse. Push forward aggressively once you’ve baited the initial wave.
Chapter 19x: “The Crimson Flash” — Jaffar Solo Survival
Jaffar starts alone, surrounded, with a Killing Edge that breaks after 20 uses. Players burn through durability fighting everything, then face the boss weaponless. The door to Nino’s cell won’t open until turn 11.
Jaffar has 30 Speed — he doubles everything. Bait enemies into corridors where only one can attack per turn, counterattack to kill, then retreat. Ignore the northwest treasure room entirely; those reinforcements aren’t worth the weapon durability. Save 8–10 Killing Edge charges for the boss. Once Nino’s door opens, rush her to Jaffar — she carries a Torch staff to reveal the southern reinforcement spawn points.
Chapter 26/28: “Cog of Destiny” / “Night of Farewells” — Morphs
The morph chapters throw stat-inflated enemies with legendary weapons (Armads, Durandal, Forblaze) at underleveled teams. Players try to tank hits and watch their best units get one-rounded.
Abuse the weapon triangle. Morphs have perfect stats but follow standard AI — they won’t attack if they deal zero damage. Bring a high-defense swordmaster (Karel, Raven) to bait axe-morphs, a high-resistance mage to bait sword-morphs. The Ninian/Nils dance/play refresher is mandatory here; double-turn your strongest unit to player-phase kill morphs before they counter. Physics staves (restores 50% HP from range) keep your bait units alive without burning healer turns on positioning.
Final Chapter: Dragon Gate — The Hammer
Players bring their best units and discover the dragon has 120 HP, high defense, and 1–2 range fire breath. Conventional weapons chip for 8–12 damage per hit; you’d need 10+ combats to win.
The Armory sells hammers. Nobody buys hammers. The dragon is classified as a monster and counts as armored for damage calculation — hammers deal effective (3×) damage. A 20-strength hero with a hammer deals 45+ per hit. Bring two hammer-users, a dancer, and healing. Four rounds maximum.
GameShark Labs · SharkVault Founding Membership
Unlock the full guide
9 more sections : boss strategies, glitches, easter eggs, and the complete archive. Founding Members get every GTA drop through launch day.
Only 64 days until GTA VI. lock in $1.99/mo for life before the founding rate closes (then $2.99/mo).
Surfaced from external sources, newest first. Not editorially endorsed.