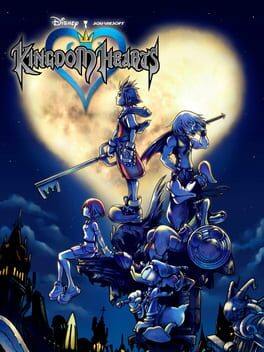
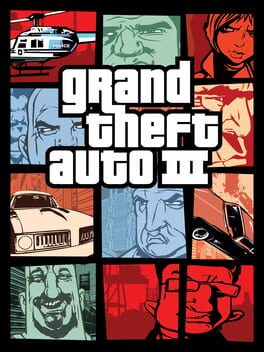
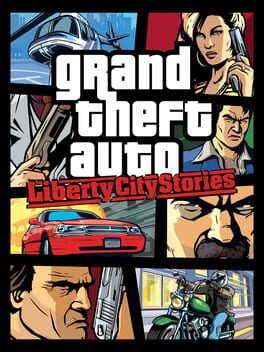
2002 · Square Product Development Division 1 · action-rpg · Sony
Why this one is in the canon, and how to start it well.
The cheat-device scene embraced it immediately. CodeBreaker and Action Replay MAX codes flooded GameFAQs within weeks—infinite munny, max synthesis materials, all keyblades unlocked, AP multipliers to speed-grind abilities. The game’s grind-heavy endgame (Hades Cup, Sephiroth superboss, synthesis completion for Ultima Weapon) made it perfect territory for code users who wanted the story and spectacle without the 60-hour slog. More importantly, Kingdom Hearts proved that action-RPG hybrids could carry mainstream appeal: it opened the door for God of War, Devil May Cry’s wider success, and the eventual Western embrace of character-action design. It’s the bridge game—the moment Disney IP became a legitimate vector for complex storytelling and the moment Square learned it could sell millions without turn-based combat.
Lock on immediately. Tap R1 to target enemies — Kingdom Hearts’ camera fights you at every turn, and manual lock-on is the only way to keep Sora facing the threat. Hold R1 and flick the right stick to cycle targets.
Mash X, but watch the MP gauge. Square is your basic three-hit combo; X dodges and closes distance. Magic (triangle menu, then X to cast) drains MP fast, and you can’t recover it mid-fight without items until you unlock MP Rage or MP Haste abilities later.
Customize your shortcuts. Pause → Customize lets you map four items or spells to L1 + shape buttons. Put Potion on one, Cure on another, and your most-used attack spell (Fire early, Thunder mid-game) on a third. The triangle menu will kill your momentum otherwise.
Talk to every NPC with an exclamation mark. They hand out free accessories, synthesis materials, and Gummi Ship blueprints. Traverse Town’s item shop district is dense with these in the first hour.
Equip abilities as soon as you unlock them. The ability menu (pause → Abilities) shows AP cost vs. your current AP pool. Combo Plus, Scan, and Guard are non-negotiable; leave Counterattack and Ripple Drive for later when you have AP to spare.
Save at every save point, synthesize at every Moogle. Synthesis is how you get the best accessories and weapons before endgame. Collect every material drop (they look like colored gems) and dump them into the Moogle menu whenever you’re in town.
Run Olympus Coliseum time trials. Phil’s training courses unlock EXP boosts and rare accessories. The early cups are trivial and front-load your stat growth.
Guard early, guard often. The block command (square by default) has generous timing and staggers most enemies, opening counterattack windows. Mastering guard rhythm trivializes boss patterns that otherwise demand constant dodge-rolling and potion spam.
Synthesis materials matter more than you think. Don’t sell off every Bright Shard and Mythril Stone for pocket change. Late-game Gummi Ship upgrades and the Ultima Weapon keychain both require stockpiled synthesis drops—many of which only come from specific Heartless types you’ll stop encountering after certain story thresholds.
Tech Points reward style, not brute force. Juggling enemies, parrying attacks, and finishing with aerial combos awards bonus Tech experience separate from kill XP. A single well-executed combo chain can grant as much progression as three sloppy ground-pound kills.
MP management is a survival skill. Cure drains your entire MP bar regardless of how much you have, triggering the recharge cooldown. In prolonged fights, space your heals—let the bar refill between casts rather than panic-curing at half health and leaving yourself defenseless during the refill window.
Scan every boss, every time. The Scan ability (learned via Goofy’s shield progression) reveals enemy HP totals and weaknesses. Knowing a boss has three health bars instead of one changes your item loadout and Summon timing. Not optional for Sephiroth or the Phantom.
Shortcuts are your panic button. The L1 menu lets you assign four items or spells to instant-access slots. Map Cure, Elixir, and your two most-used offensive spells—scrolling through the command menu mid-combo is how you eat unnecessary damage.
Gummi Ship routes have optional objectives. Each world’s flight path hides enemy formations that drop rare synthesis materials and blueprint pieces. A single clean run with the lock-on laser nets more Orichalcum than twenty story clears.
The walls players actually hit, and the way through each.
Deep Jungle – Climbing the Vines to Camp
After sealing the Keyhole, you need to return to the treehouse and climb the vines on the opposite side from your first entry. The camera hides the climbable surface. Look for the vine-wrapped trunk near Tarzan’s room—lock on with R1 to orient, then jump and press Circle to grab. Already left the world? Gummi Ship back; the treehouse stays open.
Monstro – Escaping After Pinocchio
Monstro’s three-chamber loop reverses after the Parasite Cage fight in Chamber 6. Backtrack through Chamber 5 → Chamber 3 → Chamber 2, then climb the platforms in Chamber 1 to reach the throat. The green exit marker won’t appear until you trigger Geppetto’s dialogue in Chamber 2. Lost? Open the world map (Select)—the flashing icon marks your objective chamber.
Ansem (First Form) – Breaking the Guardian Barrier
Ansem’s dark Guardian creates a damage-nullifying shield when he crosses his arms and it wraps around him. Stop attacking. Wait for the Guardian’s purple claw lunge, Dodge Roll behind Ansem, and combo his back. Hitting the shield wastes MP and feeds his Shock counter. Below level 45? Equip Aero and keep Cure ready—this is endurance, not burst damage.
Atlantica – Ursula’s Cauldron Bubbles
The second Ursula fight spawns homing cauldron bubbles that stunlock Sora underwater. Don’t try to outswim them. Lock onto Ursula (R1) and use your physical combo’s upward-thrust finisher to rise above the bubble stream while dealing damage. Better: cast Thunder when she inhales (mouth-open animation)—it interrupts the cauldron spawn and staggers her for 3–4 seconds. Equip Mermaid Kick (Donald’s Atlantica ability) for faster repositioning between phases.
Hollow Bastion – Second Visit Emblem Piece Locations
The post-game Emblem hunt requires five pieces scattered across the castle. Most-missed: the piece in the Library’s second-floor alcove (requires High Jump + Glide) and the piece in the waterway near the save point (underwater, easy to swim past). Check your Jiminy Journal under Hollow Bastion—it tracks Emblem piece count (x/5). All five are accessible once you have the full movement kit from late-game level-ups.
All 2 verified codes for Kingdom Hearts, free to read.
1,EE,00104264,word,000000001,EE,00104384,word,000000001,EE,001103ac,word,3c0143d61,EE,00110898,word,3c013f191,EE,0011089c,word,3421999a1,EE,002a0d88,word,700070001,EE,001061f4,word,3c0719001,EE,0026202c,word,3c013f401,EE,00262030,word,448100001,EE,00262038,word,4600c6021,EE,2048E550,word,3FAAAAABGameShark Labs · SharkVault Founding Membership
Unlock the full guide
9 more sections : boss strategies, glitches, easter eggs, and the complete archive. Founding Members get every GTA drop through launch day.
Only 64 days until GTA VI. lock in $1.99/mo for life before the founding rate closes (then $2.99/mo).
Surfaced from external sources, newest first. Not editorially endorsed.· 22 more in this feed.· 2 placed beside the sections they relate to above.