2001 · open-world · Sony
SharkVault Editorial AI
Why this one is in the canon, and how to start it well.
QTP with 10 Games to get to know you 🎮 #gamesky #promosky 🔷Resident Evil Village 🔹Tactics Ogre Reborn 🔷Ninja Gaiden 🔹Grand Theft Auto III The Definitive Edition 🔷Super Mario World Super Mario Advance 2 🔹Altered Beast 🔷Mina the Hollower 🔹Front Mission 1st Remake 🔷Golden
The cheat-code culture became inseparable from the experience. GameShark and Action Replay codes for infinite health, wanted-level manipulation, vehicle spawning, and pedestrian-behavior chaos turned Liberty City into a physics sandbox years before “emergent gameplay” became industry jargon. Players circulated codes through message boards and magazines, treating the city as a laboratory — flying tanks, invincible Mafia Sentinels, riots on demand. The game’s structure rewarded this: missions were brutally difficult, but the open world was endlessly replayable with the right codes loaded. GTA III mattered because it changed how games were designed and how players thought about what a game could let them do.
Steal a car immediately. Walk up to any parked vehicle, triangle to jack it. Cops ignore you unless you carjack in front of them or hit a police cruiser. Drive to the spray shop in Portland (marked by a spray-can icon) to erase your wanted level for $1,000—memorize this location.
Do the first Luigi mission chain. Head to Luigi’s Sex Club 7 in the Red Light District (marked “L” on radar). These tutorial missions teach you the core loop: drive to waypoint, kill target or collect package, return. They unlock Misty’s health pickup and your first safehouse save point.
Ignore side missions until you need cash. Taxi, ambulance, vigilante, and fire-truck diversions pay out, but story missions unlock new islands and weapons. The baseball bat spawns near your safehouse; grab it for melee.
Use the radar, not the map. Pink blips are mission markers, blue is your safehouse, yellow are phone missions. The pause-screen map is static and unhelpful—navigate by following the radar dot and learning landmark routes.
Save after every 2–3 missions. Return to your safehouse, walk into the floating disk. No autosave, no checkpoints. Die or get busted and you lose all weapons and pay hospital/bail fees.
Rampage icons and hidden packages are optional. The 100 packages scattered across Portland, Staunton, Shoreside unlock weapon spawns at your safehouse—skip them unless you want the armory grind.
Wanted stars escalate fast. One star = cops chase on foot. Two stars = roadblocks and cruisers. Three+ = SWAT, helicopters, roadblocks with spike strips. Pay-n-Spray or find a police bribe pickup (spinning star icon) to drop heat instantly.
Steal a cop car early and park it in your safehouse garage. Police Bribes spawn near safehouses once you’ve got heat, but a cruiser on hand lets you cancel stars instantly: toggle Vigilante, cancel immediately — two stars gone.
Ambulance and Firetruck missions unlock permanent health and fireproof upgrades at level 12 completion. Ambulance is a grind but the 25-point health boost above base maximum is worth it. Fireproof matters less, but completionists want both before story missions lock you out of early islands.
Molotovs and grenades use the same arc as the grenade launcher — learn throw distance in a parking lot. The camera won’t help you judge range. Explosives are mandatory for certain Salvatore and Asuka contracts; if you can’t land a Molotov on a stationary Sentinel, you’ll fail those missions.
Unique jumps and hidden packages stay found across save files in the same slot; Rampages reset. Hunt jumps and packages first — they’re permanent progress. Rampages are per-playthrough and some become inaccessible when bridges blow or gang wars escalate.
The Kuruma (Japanese sport coupe) and Cheetah spawn reliably in Belleville Park and Torrington after you unlock Staunton. Both have top-tier speed and handling. The Banshee is faster in a straight line but spins out under panic braking — Kuruma is the better all-purpose getaway car.
Pay phones save your location but not your vehicle. Delivering a rare car to a garage and the next mission phone is two blocks away? Drive to the phone, get out, save at a safehouse first, then return for the car. Mission failures warp you to the hospital and your ride is gone.
The walls players actually hit, and the way through each.
“Bomb Da Base: Act II” — The Sniper Escort
You’re locked in a sniper nest while 8-Ball plants charges on a freighter. The PS2’s analog aiming wobbles, Cartel guards spawn in waves, and 8-Ball’s pathfinding gets him wedged on railings. Miss one guard, he dies. The game tells you to “cover him constantly” — ignore that. Clear the entire top deck before 8-Ball moves. Sweep left-to-right across every visible catwalk, drop every guard you can see, then shift to ground-level targets only when he descends the ramp. The timer is generous; methodical clearing beats reactive panic-shooting.
“Espresso-2-Go!” — The Citywide Café Destruction Run
Salvatore wants nine Cartel coffee stands destroyed across Portland, Staunton, and Shoreside Vale in eight minutes. Players run cars and run out of time — traffic chokes bridges, the wanted level kicks in at stand #3, and the clock dies. Steal the police helicopter from the Shoreside Vale station before starting the mission cite. Park it near your safehouse, trigger the mission, sprint to the chopper, and air-strafe every stand with drive-by Uzi fire. The helicopter ignores traffic, bridges stay open, and wanted levels don’t spawn police choppers until 4-stars. You’ll finish with two minutes left.
Shoreside Vale Bridge Access — The Kenji Mission Wall
The third island unlocks after “Waka-Gashira Wipeout!” for Asuka, but that mission requires a functional sniper rifle. Players attempt it with the basic Ammu-Nation rifle, which has insufficient zoom for the yacht hit. You need the upgraded sniper rifle, which spawns on the Shoreside Vale rooftop — but Shoreside is locked. The rifle also appears in the tunnel construction site in Staunton Island after completing “Bait” for Asuka. Grab it there, then attempt Waka-Gashira. Alternatively, the Cartel Cruiser parked near the Portland docks has enough speed to jump the unfinished Callahan Bridge gap — risky, but documented in speedrun routing.
“S.A.M.” — The Parked Plane Missile Lock
You need to destroy a parked plane with a rocket launcher before it takes off. The rocket launcher’s lock-on refuses to acquire stationary targets, and free-aim rockets miss the fuselage hitbox. Players waste rockets, the plane escapes. Don’t lock on. Position yourself perpendicular to the plane’s nose, aim manually at the cockpit windows, and fire. The explosion radius is forgiving. Two rockets, no lock-on, guaranteed destruction.
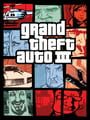
Down, Up, Left, Up, X, R1, R2, L2, L1L1, L1, Square, R2, Triangle, L1, TriangleR2, R2, L1, L1, Left, Down, Right, Up, Left, Down, Right, UpL1, L2, R1, R2, R2, R1, L2, XR2, R2, L1, L2, Left, Down, Right, Up, Left, Down, Right, UpGameShark Labs · SharkVault Founding Membership
Unlock the full guide
9 more sections + all 23 codes in the Code Vault — boss strategies, glitches, easter eggs, and the complete archive. Founding Members get every GTA drop through launch day.
Only 114 days until GTA VI — lock in $1.99/mo for life before the founding rate closes (then $2.99/mo).
Really impressive stuff from Mark in this! Reverse-engineering Grand Theft Auto III to show how it performs one of the first bits of video game magic is so sick, what a G
Jesse Guarascia (@jesseguarascia.com)

hackers are building an alternate reality where Grand Theft Auto III was a hit for the Sega Dreamcast rather than the PS2. Take a peek at their progress! www.youtube.com/watch?v=6MFN...
Retronauts (@retronauts.bsky.social)
Surfaced from external sources, newest first. Not editorially endorsed.· 8 more in this feed.· 1 placed beside the section it relates to above.

Top 100 · 2001· same platform