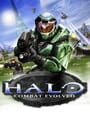
2001 · Bungie · fps · Microsoft
Why this one is in the canon, and how to start it well.
The cheat-code culture around Halo split two directions. Single-player saw Action Replay MAX codes for infinite ammo, invincibility, and super jumps—tools for exploring Bungie’s skybox boundaries and discovering the famous “megg” Easter egg on The Maw. But the real underground was multiplayer: LAN-party communities obsessed over grenade jumps, sword-canceling (pre-patch), and out-of-map exploits on Blood Gulch and Sidewinder that let snipers reach geometry Bungie never intended as playable space. Xbox Live didn’t exist yet, so Halo’s sixteen-player LAN scene became the last great era of physical gathering—dorm rooms, computer labs, someone’s basement with eight CRT TVs daisy-chained together. The game defined the Xbox and how a generation socialized around competitive shooters before broadband matchmaking flattened the experience.
Master the melee-grenade-headshot triangle immediately. Plasma Pistol overcharge strips Elite shields in one shot; swap to human Pistol and headshot while they’re vulnerable. Melee (B button) lunges farther than it looks and kills most Grunts in one hit. Frag grenades bounce; Plasma grenades stick to enemies and guarantee kills on shielded targets.
Carry one human weapon, one Covenant weapon at all times. Assault Rifle chews through Flood infection forms but runs dry fast. Plasma Rifle melts shields. Pistol is your long-range precision tool—12-round magazine, 2x zoom, three-shot-kill on Elites if you land headshots. Shotgun dominates close quarters but ammo is scarce until late-game Flood levels.
Your shield recharges; your health does not. The beeping means your shield is down—sprint to cover and wait for the hum that signals full recharge. Health packs (white cross icons) are permanent pickups; memorize their locations on Legendary. If your health bar is in the red, you’re one stray Needler round from a restart.
Grenades are currency, not panic buttons. You carry four of each type. Toss Plasmas around corners to flush Elites out of cover. Bank Frags off walls into Grunt clusters. Grenade jumps—throw at your feet, jump as it detonates—reach shortcuts and hidden areas; practice on The Silent Cartographer beach.
Vehicles are disposable; your life is not. Warthog gunner seat shreds infantry but you’re exposed—driver should serpentine constantly. Ghost boost (left trigger) lets you ram Grunts and dodge rockets. Scorpion tank trivializes most encounters but gets stuck on geometry; dismount before narrow corridors.
Let Marines do the work when possible. AI squadmates have infinite ammo and draw aggro. On Assault on the Control Room, keep the rocket-launcher Marines alive and they’ll delete Wraiths for you. Dead Marines drop extra grenades and health packs.
Save before every major encounter on Normal or higher. Halo autosaves at checkpoints, but some are placed after difficult fights start. Manual save at the pause menu before bridge crossings, elevator descents, and any time Cortana says something ominous about “significant Covenant presence.”
Melee deals full damage regardless of weapon. The butt-strike (right stick click on default layout) interrupts Elite shields and drops a shielded Elite in two hits on Normal. Plasma Pistol overcharge + melee is the Covenant delete button once you internalize the timing.
Plasma weapons strip shields, human weapons strip health. This is mechanical, not flavor. Plasma Pistol and Plasma Rifle tear through energy shields in half the time ballistic weapons do; swap to the Magnum or AR to finish unshielded targets. The damage-type system is the load-bearing pillar of Halo’s sandbox.
The Magnum is the best all-around weapon in the campaign. Three headshots kill shielded Elites on Normal, 2× zoom handles mid-range, and 12-round magazines with ample ammo spawns. Bungie didn’t intend it to be this strong cite, but it shipped overpowered and defines Combat Evolved’s weapon meta.
Grenades have massive splash radius and bounce predictably. You carry four frags and four plasmas; use them. Plasma grenades stick to geometry and enemies (one-hit kill on contact). Frags bank off angled surfaces—bounce them around corners or into Grunt clusters. The game gives you eight grenades because encounters expect grenade spam.
The Warthog gunner seat has unlimited ammo but overheats. Let the Marine drive on vehicle sections—the AI is competent and you’re more effective on the chaingun. Tap-fire in bursts to manage heat; continuous hold locks you into a cooldown animation that gets you killed.
Active Camo doesn’t hide your silhouette when moving. Elites see a visible distortion shimmer. Crouch-walk to reduce shimmer or use Camo as an opener, not sustained stealth. The pickup lasts 45 seconds but drains faster if you fire or take damage.
Shotgun and Sniper Rifle ammo is finite and non-renewable in most levels. Don’t waste Sniper rounds on Grunts. Reserve it for Hunters (one shot to exposed orange flesh) and distant Elites. The Shotgun is a panic button for Flood encounters—save shells for 343 Guilty Spark and The Library.
Backtracking to earlier checkpoints loses progress but refreshes your loadout. If you’re stuck in a bad weapon state (dual Needlers, empty Magnum), die intentionally to revert to the last checkpoint with better guns. The game autosaves generously but doesn’t track weapon swaps between saves.
The walls players actually hit, and the way through each.
Truth and Reconciliation — Gravity Lift Gauntlet
The purple gravity lift into the Covenant ship’s hangar is a kill box on Heroic and Legendary. You float up at fixed speed while Elites, Grunts, and two Hunters wait at the top. The mistake: riding the lift with an Assault Rifle or empty Sniper Rifle. The fix: swap to Plasma Pistol + Magnum before you step in. Charge the Plasma Pistol during ascent, strip Elite shields the instant you clear the lip, then headshot with the Magnum. Strafe left or right on landing—standing center gets you plasma-spammed. Clear the welcoming party, grab the Active Camo in the side alcove, then push into the ship.
The Library — Endless Flood Corridors
The Library is four identical tower sections of narrow halls, each ending in a button press while 343 Guilty Spark narrates. Players lose orientation, burn through Shotgun shells, and get swarmed by Infection Forms. The fix: the Shotgun is king, but save shells for Carrier Forms and close-range Combat Forms. Melee Infection Forms in groups—one swing kills multiple. Every tower has a mid-level weapons cache with Shotgun spawns; memorize them. Sprint past minor encounters when Spark opens doors—you don’t have to kill everything. The final stretch before the Index has infinite Combat Form spawns; ignore them, grab the Index, and the level ends.
Two Betrayals — Banshee Fuel Rod Spam
This mission reverses “Assault on the Control Room,” but now Banshees patrol every outdoor section with Fuel Rod Guns. On Legendary, two hits kill you. Players try to Warthog through; the vehicle explodes in seconds. The fix: hijack the first Banshee you see—jump from a cliff or structure onto its canopy, melee to board. Fly the entire level. Banshees trivialize outdoor combat and let you skip pulse generator interiors almost entirely: land on the structure roof, drop through vents, plant grenades, extract via Banshee. The game expects ground combat; aerial cheese is faster and safer.
GameShark Labs · SharkVault Founding Membership
Unlock the full guide
9 more sections : boss strategies, glitches, easter eggs, and the complete archive. Founding Members get every GTA drop through launch day.
Only 64 days until GTA VI. lock in $1.99/mo for life before the founding rate closes (then $2.99/mo).
My Four Favorite FPS Games 🎮 🔫 • Halo Combat Evolved • Escape From Tarkov • Fallout 4 • Cyberpunk 2077
@datvivar.bsky.social
Surfaced from external sources, newest first. Not editorially endorsed.· 21 more in this feed.· 1 placed beside the section it relates to above.