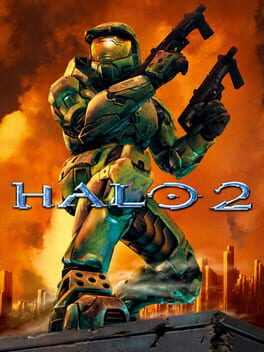
2004 · Bungie · fps · Microsoft
Why this one is in the canon, and how to start it well.
The cultural footprint extends beyond the disc. MLG built its console esports division around Halo 2. Machinima as a storytelling medium exploded with Red vs. Blue leveraging Halo 2’s theater-friendly maps. The cliffhanger ending (“Finishing this fight”) became one of gaming’s most infamous non-resolutions, driving Halo 3 preorders years in advance. For a generation of players, Xbox Live was Halo 2 — the friends list, the trash talk, the 1-50 rank grind in Team Slayer. No other console shooter before or since has so completely owned its platform’s online identity.
Run the Cairo Station armory tutorial. The opening teaches dual-wielding, melee combos, and grenade physics—every mechanic you’ll lean on for the next ten hours. Skip it and you’re guessing.
Drill the melee-shot-melee combo now. Melee, fire one Battle Rifle burst, melee again. Kills most Elites before shields recharge. Works with any precision weapon; you’ll use it in every firefight.
Dual-wield Plasma Rifle + SMG or Needler + Plasma Pistol. Left trigger strips shields (plasma), right trigger finishes (ballistic). You can’t grenade or melee while dual-wielding—drop the combo when shields break.
Grab Battle Rifle and Covenant Carbine on sight. Hitscan precision weapons own mid-range. BR fires three-round bursts; Carbine is semi-auto. Both one-shot headshot unshielded targets.
Overcharge the Plasma Pistol against Elites and vehicles. Hold trigger until the green bolt glows, release to strip shields instantly, follow with headshot. The “noob combo” trivializes Legendary Elites and drops Banshees/Ghosts.
Hijack vehicles with melee. Stand near a Ghost or Wraith, hold X to board, melee to kill the driver. You can hijack mid-boost—mandatory for Legendary vehicle waves.
Dashboard-quit bad checkpoints on Legendary. Die in a bad position and the checkpoint locks you there. Quit to dashboard, reload the last save for a clean spawn.
Dual-wielding disables grenades and melee lunge — you trade the plasma grenade’s shield-strip and the energy sword’s lock-on for sustained fire. Drop the off-hand weapon (Y button) to restore full combat options; treat dual-wield as situational rather than default.
Plasma Pistol + precision weapon is the meta — overcharged plasma pistol drops any Elite or Brute shield in one shot; swap immediately to Battle Rifle or Carbine for the headshot finish. This combo trivializes Legendary if you manage battery reserves.
Enemy weapon drops are semi-randomized on checkpoint reload — if you die with poor weapon spawns (especially on Legendary Jackal sniper gauntlets), revert to last checkpoint rather than respawn; the game re-rolls certain pickups and can give you better tools.
Sword-flying and button combos are tournament-legal — BXR (melee-cancel into shot), BXB (double melee), and sword-lunge cancels define high-level multiplayer. Bungie never patched them; they became features. Practice in custom games before ranked matches.
Vehicle boarding is faster than rockets for most targets — Ghosts, Wraiths, and Banshees all have boarding animations that grant brief invulnerability and guarantee the kill. Save heavy ammo for Scarabs and multiplayer power-position control.
The Arbiter levels have active camo on cooldown — use it liberally for repositioning rather than hoarding; the recharge is fast enough to treat as a per-encounter tool. Enemies track you by sound during cloak, so crouch-walk near Elites.
Backpack reloading saves frames in speedruns and Legendary pushes — swap to your second weapon and back (YY) during any reload animation to skip the tail end. Shaves time on Battle Rifle, Shotgun, and Sniper Rifle reloads across the campaign.
Checkpoint triggers are proximity-based, not progress-gated — you can force saves in bad positions (mid-grenade, surrounded) by crossing invisible lines. Learn the safe zones for each encounter or accept that some Legendary deaths mean replaying 90 seconds of cleanup.
The walls players actually hit, and the way through each.
Cairo Station — Bomb Defusal Gauntlet
The opening space-station defense throws waves of Elites and Grunts at narrow corridors while the timer counts down to MAC-gun destruction. On Heroic and Legendary, the hangar bay right after the first bomb defusal kills players who let Elites with Energy Swords close distance faster than the BR55 can drop them. Backpedal to the previous room’s doorway chokepoint, force Elites to funnel through, and melee-finish wounded targets. Grab a Covenant weapon early—Plasma Rifle or Needler strips shields before you switch to human ballistics. The game expects weapon-pairing discipline from this mission forward.
Regret Boss Fight — Temple Water Arena
Prophet of Regret’s hovering throne and Honor Guard spawn make this a war of attrition. Players burn all Battle Rifle ammo trying to snipe Honor Guards from the upper ring, then have nothing for the final Regret boarding sequence. Ignore the adds. Jump from the central platform to Regret’s throne (requires a running start), melee him once, retreat before the Honor Guards converge, repeat. Each melee advances the phase; you need roughly 15–18 hits across three waves. Swim underwater between approaches to break aggro and reposition. The Covenant Carbine on the upper walkways is backup only.
Gravemind — Opening Prison Cell
Legendary Gravemind’s first 30 seconds are a community meme for difficulty spikes—two Brutes with Brute Shots spawn in melee range while Drones swarm from above. The game autosaves in an unwinnable state if you move forward too quickly. Immediately backpedal into the starting cell alcove. Let the Brutes come to you in the doorway (limits their grenade angles), headshot Drones with the starting Carbine, then focus-fire Brutes with dual-wielded Plasma Rifles stripped from dead Grunts. Do not leave the cell until both Brutes are down. Bungie patched nothing; this remained the intended difficulty curve.
Quarantine Zone — Gondola Defense Waves
The gondola ride through the Flood-infested Library has four distinct hold-points where Combat Forms spawn infinitely until you clear trigger enemies. Players waste Sentinel Beam ammo on the chaff and get overwhelmed at the final platform. The Scorpion tank from the previous section can be driven onto the gondola—tight fit, requires angling. Park it center-platform; infinite cannon ammo trivializes all four waves. If you lost the tank, prioritize Energy Swords dropped by Flood-infected Elites—one-hit kills on all Flood forms, infinite ammo via pickup refresh.
GameShark Labs · SharkVault Founding Membership
Unlock the full guide
9 more sections : boss strategies, glitches, easter eggs, and the complete archive. Founding Members get every GTA drop through launch day.
Only 64 days until GTA VI. lock in $1.99/mo for life before the founding rate closes (then $2.99/mo).
One thing I miss about the mid-2000’s was yelling “GROVE STREET FOR LIFE!!!” in games of Halo 2 and hearing people genuinely getting angry. Mf’s were not about being silly or having fun.
StopSkeletonsFromFighting (@stopskeletons.bsky.social)
Surfaced from external sources, newest first. Not editorially endorsed.· 16 more in this feed.· 2 placed beside the sections they relate to above.