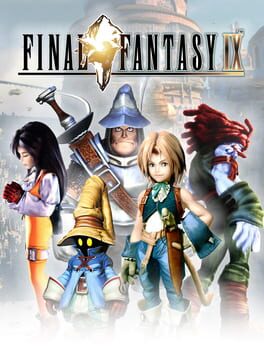
2000 · Square USA · rpg · Sony
Why this one is in the canon, and how to start it well.

The cheat-device scene exploded around FFIX’s stat-maxing endgame and its missable-heavy design. GameShark and CodeBreaker codes for 9999 HP, instant Trance, and ability-point multipliers became essential tools for players chasing Excalibur II — the legendary weapon locked behind an eight-hour speedrun requirement that demanded either frame-perfect execution or liberal use of encounter-disabling codes. The Chocobo Hot & Cold sidequest, Stellazzio coin hunt, and jump-rope minigame all spawned their own code ecosystems. GameFAQs guides for FFIX remain some of the most-viewed on the platform, and the four-party ATB system made it a natural fit for challenge runs documented across early-2000s message boards. It aged best precisely because it never tried to be anything but a Final Fantasy.
Name Vivi when the game prompts you. The opening ATE sequence lets you rename him — default works, but the choice is permanent without a full restart.
Mash through the opening cutscenes, then explore Alexandria the moment you control Zidane. You have 12 minutes of real-time before the play begins. Talk to every NPC with a ! marker for free items (Phoenix Down, Potion) and mini-ATE triggers that award early AP.
Equip abilities after every battle in the first hour. Press Triangle on the equipment screen to see what each piece teaches. Prioritize passive abilities like Auto-Potion (Leather Wrist) and Protect Girls (Leather Plate) — cheap to equip, fast to master on Zidane.
Never sell equipment until the character masters every ability it teaches. The ability list shows a red checkmark when done. Early armor teaches critical support skills (Antibody, Add Status, Counter) you’ll want across the party.
Save Potions — burn Vivi’s Fire spell on random encounters. MP refills for 100 gil at inns; Vivi one-shots most early enemy groups. Potions cost 50 gil each and you’ll need a stockpile for the Steiner/Blank forced fight in the Ice Cavern.
Talk to Moogles to save and accept every Mognet letter delivery. Delivering mail between Moogles unlocks optional scenes and a sidequest chain that awards unique equipment later.
Set Battle Speed to Slow and ATB to Wait in the Config menu. FFIX’s ATB gauge runs during ability animations by default — Wait mode pauses it during menus so you can plan without the clock running.
Vivi + Steiner’s Sword Magic combo carries you through Disc 2 — Vivi casts a spell on Steiner’s weapon, letting him deal elemental damage to all enemies at once. Wrecks random encounters and saves your healer’s MP.
Never sell equipment until you’ve mastered its abilities — every weapon and armor teaches permanent skills (Zidane’s Mage Masher teaches Steal, Freya’s Javelin teaches Dragon Breath). The AP system rewards keeping gear equipped past stat upgrades; once the ability shows “Mastered,” sell or synthesize freely.
Synthesis shops beat treasure chests for endgame gear — Treno, Lindblum, and Alexandria combine two items into stronger equipment. Keep one copy of every unique drop; some late-game armor requires materials you can’t re-obtain after story gates close.
Equip Auto-Potion and Antibody on your healer before bosses — Poison, Silence, and Confusion wreck unprepared parties. Garnet and Eiko both have accessory slots; Auto-Potion triggers on any damage and prevents wipes when the healer gets stunned mid-cast.
Teach Quina Mighty Guard and Auto-Life the moment they’re available — Quina’s Blue Magic learns from eating enemies. Mighty Guard (from Gigan Toads in Qu’s Marsh) casts Shell/Protect/Haste on the whole party for 14 MP. Auto-Life (from Carrion Worms in Fossil Roo) is insurance for endgame superbosses.
Steal from every boss at least once — designers hid mid-game equipment in boss steal tables (Zidane pulls Mythril Daggers and Ether stocks). Steal rate is low; save before major fights and retry on whiffs.
Grind AP, not XP — overleveling tanks AP gains per fight. Farm ability unlocks in areas appropriate to your level and equip as many unmastered abilities as your support slots allow.
(missable:) Recruit Quina before leaving the Outer Continent on Disc 1 — skip the Qu’s Marsh sidequest and Quina joins underleveled on Disc 2, costing you early Blue Magic opportunities. Return to the marsh after Lindblum’s festival ends.
The walls players actually hit, and the way through each.
Disc 3 Desert Palace — Oeilvert Trap
Oeilvert nullifies magic entirely. Zidane mutters “something feels off” when you enter, but the game doesn’t spell out that you’re locked into Zidane/Quina/Amarant/Freya — no Vivi, no Garnet — and every spell fizzles. Stock Phoenix Downs and Hi-Potions before the dungeon; Quina’s Frog Drop and Amarant’s Chakra become your only healing. If you saved inside without supplies, backtrack to the world map via the teleporter and restock at Conde Petie Mountain Path’s Mogshop cite. The Ark guardian at the end punishes magic-dependent strategies; physical attackers with Auto-Potion support abilities trivialize it.
Gizamaluke’s Grotto Bell Puzzle
The fake bell stops progress cold if you don’t talk to every Burmecian soldier. The real bell requires the Gizamaluke Bell key item, obtained from the dying soldier near the entrance after the initial Ralvuimago fight. Exhaust his dialogue — he won’t hand it over on first contact. Players who rush past him get stuck at the locked door with no apparent solution. If you already cleared the grotto’s random encounters and can’t find him, he’s in the first major chamber, left side, near the Moogle save point.
Memoria — Time-Gated Crystal World Access
The final dungeon’s multi-tier structure confuses players who expect linear progression. After defeating Tiamat, you must backtrack through three previous Memoria zones to trigger the staircase that leads to the Crystal World. The game doesn’t signpost this — many assume they missed a door. Walk all the way back to the Entrance area, then return forward; the path opens automatically cite. Save at every Moogle; Memoria has no shops and the final boss gauntlet is four consecutive fights with only tent-healing between phases.
Chocobo Hot & Cold — Chocograph Piece Requirements
Unlocking Chocobo’s Air Garden (and the best ultimate weapons) requires finding all Chocograph Pieces across multiple play sessions. The Forgotten Lagoon piece is missable if you don’t return to the Chocobo Forest after acquiring Ocean abilities. Mene won’t prompt you — the piece is a random dig reward in the Forest minigame itself, separate from Chocographs. Budget 30–45 minutes of digging; RNG can be cruel cite.
15 of 51 verified codes, free to read. The rest are in the Code Vault.
D00F11B8000180108F2812C0D00F11B8000180108F3620ECD00F11B8000180108F384000D00F11B8000180108F384000D00F11B8000180108F7421FFD00F11B8000180108F24270FD00F11B8000180098668270FD00F11B8000180108F26270FD00F11B800018009866E270FD00F11B8000180108FF81400D00F11B800018010900620ECD00F11B80001801090084000D00F11B80001801090084000D00F11B800018010904421FFD00F11B8000180108FF4270FD00F11B8000180098B10270FD00F11B8000180108FF6270FD00F11B8000180098B16270FD00F11B80001801090C81540D00F11B80001801090D620ECD00F11B80001801090D84000D00F11B80001801090D84000D00F11B800018010911421FFD00F11B80001801090C4270FD00F11B8000180098FB8270FD00F11B80001801090C6270FD00F11B8000180098FBE270FGameShark Labs · SharkVault Founding Membership
Unlock the full guide
9 more sections + all 51 codes in the Code Vault : boss strategies, glitches, easter eggs, and the complete archive. Founding Members get every GTA drop through launch day.
Only 64 days until GTA VI. lock in $1.99/mo for life before the founding rate closes (then $2.99/mo).
Surfaced from external sources, newest first. Not editorially endorsed.· 18 more in this feed.