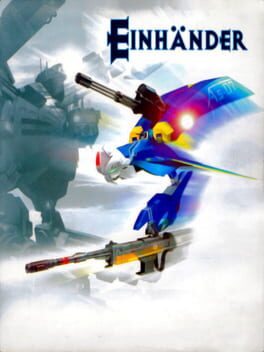
1997 · Square Product Development Division 5 · shoot-em-up · Sony
15 sources · 32 facts · verified 3mo ago · how this was made
Why this one is in the canon, and how to start it well.
Einhänder [1997] Square - PlayStation
Every named code, glitch, and easter egg above traces back to one of these sources. SharkVault editorial AI is grounded in human-curated facts files; nothing on this page is invented.
Cheat-device culture latched onto Einhänder immediately. GameShark codes unlocked the secret EOS UFG Mk.IX fighter (nicknamed “Selene” by FAQ author Zach Keene, though that’s the enemy nation’s name, not the craft’s official designation) without the grueling unlock grind, let you start with endgame gunpods like the homing Mosquito or the screen-clearing Flash, and toggled invincibility for runs where you wanted to hear Kenichiro Fukui’s techno-industrial soundtrack all the way through without the tenth continue-screen cite. The game remains Square’s only shoot-em-up—a one-mission detour that proved the studio could render chrome and explosions as compellingly as chocobos and summon animations.
Pick EIN-001 for your first run. The default Einhänder has balanced speed and two manipulator arms — top and bottom mounts. Astraea (EIN-002) and Endymion (EIN-003) unlock after stage completions but demand tighter play.
Destroy everything in the Kyoto opener. Every enemy, turret, and destructible building piece drops score chips. Bonus multipliers stack when you collect chips rapidly without taking damage — aggression pays.
Master the manipulator system now. R1 grabs weapon pods with your right arm, L1 grabs left. Tap again to rotate between top-mount (fixed forward fire) and side-mount (gunner position, tracks your aim). Top-mounted weapons leave your manipulator free to snag the next pod mid-firefight.
Prioritize Vulcan and Cannon early. The Vulcan (green pod) fires rapidly — mount it top for consistent damage. The Cannon (red) hits hard but fires slow — side-mount it where you control the angle. Dual-wield both in Stage 1 before enemy density spikes.
Watch your ammunition. Weapon pods have limited ammo; the counter appears when equipped. When depleted, the pod shatters — grab a fresh one or revert to your weak default shot.
Use Gestalt mode sparingly. Hold L1+R1 to activate a screen-clearing super attack that drains your gunpod ammo. Save it for bullet-dense moments or mid-boss rushes, not popcorn enemies.
Replay stages for weapon unlocks. Rare gunpods (Spreader, Juno laser) only appear in specific stages after meeting score or destruction thresholds. The Blade pod in Stage 2 requires destroying the train cars in sequence cite.
Rotate and swap Gunpods constantly. Position heavy cannons below for ground targets, rapid-fire above for air threats. The Gunpod you’re not firing recharges ammo — swap between them instead of running one dry.
Route your runs around Gunpod spawns. Enemy carriers drop specific weapon types in fixed positions. Miss a Vulcan, Cannon, or Spreader and you’re fighting the next boss with the wrong loadout. Speedrunners map entire stages around these drops because you can only carry two at once.
Flash gives you invincibility frames. Fire it just before you collide with bullets or environmental hazards and you’re immune for the duration. The timing is tight but repeatable — horizontal-scrolling shmups of this era often shipped similar “bomb shield” mechanics.
Hug the bottom in vertical sections. When the camera tilts into forced-perspective vertical scrolling, enemy fire becomes harder to read. Stay low for maximum reaction time and keep ground threats in your firing arc.
Ignore score multipliers on first runs. The combo system rewards continuous destruction without taking hits, but learning enemy patterns matters more than rank. Dying actually lowers the difficulty curve; flawless play spawns denser bullet formations.
Muzzle-flash is your telegraph. Most enemies fire immediately after their weapon lights up. That half-second warning is the difference between clean dodges and panic movement.
Selene and Endymion have different hitbox geometry. Selene’s slimmer profile makes vertical dodging easier but horizontal movement slightly more vulnerable. Pick ships based on stage layout, not stats.
The walls players actually hit, and the way through each.
Stage 3 (Autobahn) — Avoiding the Instant-Death Tunnel Walls
The narrow highway tunnel segments kill on contact with the side barriers, and the camera angle makes depth perception treacherous. Players accustomed to bullet-hell dodging slam into walls while evading fire. Hug the center line religiously. Ignore gunship pods on the extreme left/right edges unless you’re carrying a manipulator arm that lets you grab without positioning directly over the target. The Flash weapon’s spread shot clears threats without forcing risky lateral movement. Dodge with small taps rather than holding the d-pad.
Stage 4 (Military Facility) — The Spinning Laser Grid Boss (Schwarzgeist)
Schwarzgeist’s rotating laser walls feel impossible until you recognize the safe zone pattern. The outer ring always has one gap; the inner ring rotates opposite. Position your Einhänder at mid-screen vertically and track the outer gap—when it reaches 3 o’clock or 9 o’clock, drift through while firing at the core. Wait for the pattern to bring the gap to you. The Cannon gunpod’s piercing shot hits the core through the barrier segments, letting you deal damage even during closed phases. Players who panic-dodge into the center typically die to the inner ring.
Stage 5 (Fortress) — The Descending Elevator Ambush
The vertical shaft descent spawns relentless turret waves from both sides while the screen scrolls downward. Equip dual Vulcan gunpods before entering (dropped by the mini-boss immediately prior). Hold fire and sweep side-to-side in the upper third of the screen—the Vulcans’ rate of fire suppresses turrets before they complete their firing cycles. Let lower enemies scroll off-screen. Conserve your limited continues for the next segment.
Final Boss (Hyperion) — Second Form Shield Spam
Hyperion’s second phase deploys regenerating shield bits that absorb all frontal fire. Players waste ammunition shooting the shields instead of the core. Manipulator arms let you grab the shield bits and use them as your own temporary protection. Alternatively, position above or below Hyperion’s centerline—the shields only block horizontal fire lanes. The Juno gunpod’s homing missiles curve around the barrier. Destroying the bit-generators on Hyperion’s wings stops shield regeneration entirely.
All 9 verified codes for Einhänder, free to read.
3008571000FFD0083E2E0100800ADA40000D00ADA520100D0083E2E0001300ADA5300053008570900FF800813C4000380084832000F80084834000F8008571800A5800813260028D00ADA520100D0083E2E0100300ADA530004GameShark Labs · SharkVault Founding Membership
Unlock the full guide
9 more sections : boss strategies, glitches, easter eggs, and the complete archive. Founding Members get every GTA drop through launch day.
Only 64 days until GTA VI. lock in $1.99/mo for life before the founding rate closes (then $2.99/mo).
Surfaced from external sources, newest first. Not editorially endorsed.