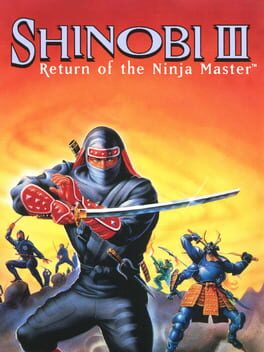
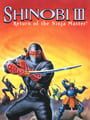
1993 · Sega Enterprises, Ltd. · action · Sega
Why this one is in the canon, and how to start it well.
Cheat-device culture embraced Shinobi III harder than almost any Genesis title outside Sonic 2. Galoob’s Game Genie release shipped with infinite-shuriken, invincibility, level-select, and ninjitsu codes that let players dissect the spectacle without the quarter-muncher difficulty. Action Replay carts added slow-motion and sprite-viewer codes that turned the game into a teach-yourself-animation seminar. By 1994, playground code-sharing and the early BBS scene had canonized Shinobi III as the game you modded to feel like a TAS before TAS was a term—because even with infinite health, the movement system rewards execution. Cheat codes don’t cheapen mastery here; they unlock the lab where mastery is studied.
Master the double-jump immediately. Joe Musashi can now double-jump — press jump twice in quick succession. Every stage expects you to clear gaps and dodge projectiles vertically. Practice the timing in Round 1 before the horseback sequence.
Learn to throw shurikens while running. Hold the direction you’re moving and tap attack repeatedly. You can fire eight shurikens per screen before the counter refills. Clearing enemies ahead while maintaining momentum is the core rhythm of every stage.
Use the slide (Down+Jump while running) for low attacks and speed. Slides duck under most projectiles, hit ground-level enemies, and maintain forward momentum. Round 2’s forest and Round 4’s underground sections demand it constantly.
Switch ninjutsu with Start, activate with C. You begin with four techniques: lightning (screen-clear), fire (forward blast), wind (invincibility dash), and body double (temporary decoy). Lightning is your panic button — save at least one charge for boss phases.
Grab the first power-up in Round 1-2. After the waterfall descent, a floating icon appears mid-screen. This increases your maximum shurikens to 16. Every power-up you collect stacks.
Expect vehicle/gimmick stages. Round 2 puts you on horseback, Round 4-2 is an auto-scrolling surfboard sequence. These control differently — horseback uses attack for sword swipes, surfing requires constant jump-timing. Don’t burn continues learning them; they’re short.
Bosses have obvious attack telegraphs. Wait for the wind-up animation, double-jump over or slide under, counter-attack during recovery frames. If a pattern isn’t clicking after three attempts, burn a lightning ninjutsu and brute-force through.
Hold the attack button for charged shuriken throws — Joe can hold Y/B/C to charge a spread of four shuriken that fires on release. This costs nothing extra and hits multiple targets simultaneously, making it essential for crowd control and boss damage phases.
The double-jump is also a block — Pressing jump again in midair executes a forward somersault that negates most projectiles during the flip animation. Time it right and you can pass through enemy fire unharmed, especially useful in the auto-scrolling surfing and horse-riding stages.
Ninjutsu costs health, so hoard it for bosses — Each of the four ninja magic attacks drains roughly one-third of your life bar. Don’t waste lightning or self-destruct on regular enemies when shurikens and melee do the job. Save the screen-clear for panic moments or to skip difficult boss patterns.
Melee has more range than it looks — Joe’s sword slash reaches farther forward than the sprite suggests, and you can often hit airborne enemies from the ground. Learn the spacing and you’ll take far less damage than trying to jump into every encounter.
The wall-climb is faster than walking in vertical sections — Cling to walls and tap up rapidly to shimmy upward faster than the default climb speed. In Round 4’s tower ascent this shaves significant time and lets you outpace rising hazards.
Stage 2’s surfing section has a damage-boost shortcut — Taking a hit from the first jet-ski rider while holding forward launches Joe ahead, skipping a dangerous obstacle cluster. Intentional damage-boosting is risky but saves time in score runs.
You can manipulate boss patterns by positioning — Most bosses have multiple attack cycles triggered by Joe’s horizontal position. Standing at specific screen zones (usually far left or far right) forces safer, more predictable patterns with longer openings for counterattacks.
The walls players actually hit, and the way through each.
Round 4-1: The Descending Spike Corridor
The vertical auto-scroller halfway through Round 4 kills more first-timers than any boss in the game. The screen scrolls down while spike walls close in from both sides, forcing you into a narrow safe column. Most players panic-jump and impale themselves on ceiling spikes or get crushed trying to hug one wall. Stay centered, use short hops only, and watch the floor patterns—the safe landing zones telegraph one full screen-height ahead. Double-jump gives you hover control; use it to adjust horizontal position mid-air rather than committing to long arcs. If you have shurikens, toss them upward to clear the ceiling-mounted ninjas without jumping into spike range.
Round 5: Neo Zeed Marine Fortress—The Underwater Mine Section
The second half of Round 5 forces you underwater with floaty physics and respawning mines that track your movement. Players routinely get cornered against the right edge of the screen and eat three consecutive mine hits. Mines spawn based on your horizontal position, not time. Move in short bursts—advance two body-lengths, stop, let the mine spawn and drift past, then advance again. Never hold right. The double-jump’s extended hang-time is a liability here; single taps only. If you’re getting swarmed, you’re moving too fast.
Round 6: The Mechanized Samurai Mini-Boss
This mid-stage encounter in the enemy base wrecks players who try to attack head-on. The samurai has a three-hit combo that stunlocks you into a corner, and his sword out-ranges your kunai. He always dashes forward after his third slash. Let him commit to the dash, double-jump over him as he passes underneath, land behind, and punish with a jumping slash to his back. He turns slowly. Repeat. Do not use ninjitsu—the screen-clear wastes meter you need for the Round 7 boss gauntlet.
Round 7-2: Shadow Master’s Teleport Spam
The final boss’s second phase introduces teleport-strike loops that feel random but follow a position-based pattern. He materializes at one of five fixed points and immediately attacks. Players die trying to reaction-dodge. After each teleport, double-jump to the center of the screen and hold your position in mid-air. From center-screen apex, you can see all five spawn points and have equal reaction distance to any of them. Wait for the spawn flash, then air-dash toward him with a jumping slash during his attack startup. Trading hits favors you—his teleport has recovery frames, yours doesn’t.
15 of 84 verified codes, free to read. The rest are in the Code Vault.
RYSA-E6T4FF001C:0064RELT-E6WTRY3A-E6Y4FF415A:002AMASA-EPNNRGFT-A6ZL67ST-GGFNAJLT-EALRC97T-DWS4FF0001:0000FF000B:0000SE3A-FLZ2AALA-EA36E23A-EA64FF000A:0041GameShark Labs · SharkVault Founding Membership
Unlock the full guide
9 more sections + all 84 codes in the Code Vault : boss strategies, glitches, easter eggs, and the complete archive. Founding Members get every GTA drop through launch day.
Only 64 days until GTA VI. lock in $1.99/mo for life before the founding rate closes (then $2.99/mo).
Such an iconic level. It's still really impressive. Shinobi III: Return of the Ninja Master (Mega Drive, Sega, 1993)
Timeproof Games (@timeproof.games)
Opening the year of the horse with an amazing horse level in our #ScanlineSunday: 🕹️ Shinobi III, Sega, 1993 🎮 Mega Drive via RGB 📺 Sony BVM-20F1U The horse-riding level had me immediately hooked. Playing it to the sound of “Idaten” by Hirofumi Murasaki is still transcendent
Fabio Santana (@fabiosantana79.bsky.social)
Surfaced from external sources, newest first. Not editorially endorsed.· 8 more in this feed.