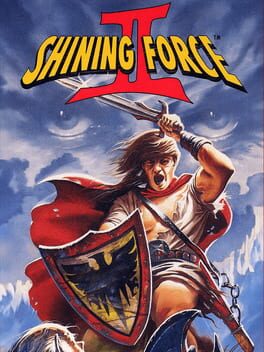
1993 · Camelot Software Planning · strategy-rpg · Sega
16 sources · 40 facts · verified 3mo ago · how this was made
Why this one is in the canon, and how to start it well.
Every named code, glitch, and easter egg above traces back to one of these sources. SharkVault editorial AI is grounded in human-curated facts files; nothing on this page is invented.
The grind made Shining Force II a cheat-code fixture. Experience gain slowed to a crawl in the back half; promoted units needed dozens of battles to reach their second-tier classes; the secret characters (Peter the Phoenix, Kiwi, Claude the golem) required obsessive exploration and item-hunting most players would never stumble into blind cite. GameShark and Action Replay codes for max experience, instant promotions, and Mithril-forge skips became standard issue in the mid-’90s code-book ecosystem — not to break the game, but to let working adults see the ending before the PlayStation launched. The game’s cult following has kept Shining Force Central’s “Ultimate Guide” alive for three decades, a monument to the era when strategy-RPG secrets were passed notebook-to-notebook in middle-school cafeterias.
Talk to everyone in the starting town — NPCs hand out free items (Healing Seed, Medical Herb) and trigger quest flags you can’t backtrack for. Exhaust all dialogue before you leave; the game doesn’t warn you about missed pickups.
Promote Bowie after battle 3 — Your protagonist hits level 10 fast. Visit the shrine in Granseal, pay 100 gold, promote to Master Swordsman. Early promotion means more stat growth across the campaign’s 30+ battles.
Position fragile units (Sarah, Kazin) on the back line — Turn-based grid combat punishes overextension. Enemies swarm isolated mages. Keep healers two rows behind your knights and let the AI come to you.
Save Mithril for the Weapons Dealer in Polca — Don’t sell rare drops early. The Polca blacksmith (unlocked around battle 8) offers the best mid-game weapon upgrades; Mithril funds those transactions.
Equip the Power Ring on your weakest attacker — Found in Granseal Castle’s hidden room (search the left wall near the throne). Doubles attack power. Put it on Chester or Jaha to keep them relevant through the first act.
Grind one battle if a unit falls behind — The Caravan headquarters lets you replay the last cleared map. If anyone’s 3+ levels under the curve, spend 10 minutes there. Experience distribution gets unforgiving in later chapters.
Save before every battle — No mid-battle saves. One bad crit costs 20 minutes.
Promote early, promote often. Characters can promote at level 10, but waiting until 20 maximizes stat gains. The trade-off: promoted units gain experience slower, so early promotions let you snowball power through the mid-game while late promotions yield marginally better endgame stats. Most players promote around level 15–17 as a practical compromise.
Egress is not a coward’s spell. The Egress spell (and the Egress staff) lets you bail out of any battle to the world map, keeping all experience and items earned so far. If a fight is going south or you realize your roster is wrong, retreat and regroup. No penalty except time.
Caravan inventory is shared, not personal. Items stored at the caravan (your mobile headquarters) are accessible to anyone during battle prep. Don’t hoard Healing Seeds on one character—dump consumables into storage and distribute them tactically before each map.
Centaurs dominate early, fall off late. High movement and decent attack make centaur units (May, Elric) strong in the first third of the game. Their promotion gains are weak, though, and they struggle to keep pace with heavy hitters like Bowie and Zynk in the endgame. Use them while they’re good, but don’t over-invest.
Hidden characters require specific actions. Sheela (the centaur archer) joins only if you visit a specific house in one town; Kiwi (the birdman) requires a detour to a shrine. The game doesn’t signpost these recruitments—if you’re aiming for a full roster, consult a recruitment guide or risk missing permanent party members.
The Mithril weapon upgrade chain is non-linear. Certain legendary weapons require you to bring Mithril ore and a specific base weapon to the blacksmith. The game doesn’t tell you which base weapon evolves into what. Experiment or check a reference chart to avoid wasting Mithril on dead-end upgrades.
The walls players actually hit, and the way through each.
Early Grans Island Grind Wall (Chapters 1–2)
The difficulty spike hits after the Shrine of Grans. Players who push straight through the story reach the Ancient Gate Kraken fight 2–3 levels short, and the tentacle attacks one-shot frontliners. The fix is deliberate: retreat to Grans or Hassan after every story battle and run the Caravan headquarters battles. These repeatable encounters scale gently, bank experience without permadeath risk, and let you promote Bowie and Sarah the instant they hit Level 10. The stat reset stings — promoted units start weaker — but they gain experience faster and the long-term power curve pays off. Burn the Healing Seed to keep your healer alive during these grinds; hoarding it costs you more than using it.
Geshp Valley Ambush (Mid-Game)
The valley battle spawns enemies behind your formation while reinforcements pour from the north exit. First-timers lose mages — Kazin, Slade — in the opening two turns because they positioned for the visible enemy count, not the ambush. Check the battlefield preview before deployment and place mages center-rear, not back row. May or Chester hold the rear flanks; archers counterattack at range. Park Bowie or Zynk at the reinforcement chokepoint and force enemies into single-file. The surround collapses once you control the spawn.
Zeon’s Demon Rod Spam (Final Chapter)
Zeon opens the final battle with Demon Rod — map-wide, 30–40 damage per cast, three casts wipes under-leveled parties. Players who didn’t promote the full roster by Level 20 can’t survive the damage-per-turn math. Stock Protect Milk or Healing Seeds from Tristan’s item shop before the fight and equip every character. Position your army in two clusters, not a single blob — Demon Rod hits everyone in range, so spreading cuts total damage. Rush Zeon with your fastest promoted units — Jaha, Zynk, Slade — while clerics rotate healing. He stops casting Demon Rod once you close to melee range, and the fight becomes a standard slugfest.
15 of 402 verified codes, free to read. The rest are in the Code Vault.
RGJA-C6XE2GMT-B8R830MT-AA9ACBEA-EA8YABEA-EA80CJVA-CA30CJTT-CA9RCJTT-CA2ECJTT-CA4HCJVA-CA2TCJTT-CA3HCJTT-CA5LCJVA-CA42AB1A-CAG6RGPT-A60LFFE8A0:00FFFFE9F0:00FFGameShark Labs · SharkVault Founding Membership
Unlock the full guide
9 more sections + all 402 codes in the Code Vault : boss strategies, glitches, easter eggs, and the complete archive. Founding Members get every GTA drop through launch day.
Only 64 days until GTA VI. lock in $1.99/mo for life before the founding rate closes (then $2.99/mo).
Surfaced from external sources, newest first. Not editorially endorsed.