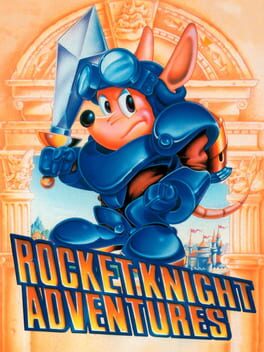
1993 · Konami · platformer · Sega
12 sources · 65 facts · verified 3mo ago · how this was made
Why this one is in the canon, and how to start it well.
Look at that reflection, it's beautiful, and you actually need it to complete the level Rocket Knight Adventures (Mega Drive, Konami, 1993)
Every named code, glitch, and easter egg above traces back to one of these sources. SharkVault editorial AI is grounded in human-curated facts files; nothing on this page is invented.
The cheat-device scene grabbed it immediately. Game Genie owners found invincibility codes, stage-select entries, infinite-life strings that let them brute-force the US version’s punishing Hard difficulty—one hit kills, zero continues, no margin cite. Action Replay carts added health refills and rocket-charge modifiers. The cult following grew through rental circuits and word-of-mouth; Konami greenlit two 1994 sequels (one SNES, one Genesis, both titled Sparkster—platform assignments disputed in retrospectives), but the original Genesis entry remains the template. It proved Konami could build a new mascot IP from scratch, that momentum-based platforming didn’t need frictionless speed to feel fast, and that a rocket-pack opossum could carry a cartridge as confidently as any hedgehog or plumber. Thirty years later, speedrunners still optimize wall-bounce chains and the Game Genie code lists still circulate—because Rocket Knight Adventures earned its canon slot the hard way, one charged dash at a time.
Master the rocket charge. Hold attack to rev the jet pack, release to launch horizontally. This move is your gap-closer, damage dealer, and stage-skipper rolled into one. Short taps give controlled bursts; full charges cross the screen.
Grip walls and ceilings with your tail. Press jump near any surface and Sparkster latches on. From there, charge a rocket launch in any direction—up, down, diagonal. Ceiling grips let you bypass entire ground sections.
Sword spin is your safe option. Tap attack without charging for a quick melee swing. Reflects projectiles, kills most minor enemies in one hit. Rocket charge has startup vulnerability; sword spin doesn’t.
Collect gems for health. Small gems restore one pip, large gems refill chunks. Your health bar runs 4–6 hits depending on difficulty—don’t skip pickups. Gems also build your score multiplier toward extra lives.
Expect forced-scrolling and vehicle segments early. Stage 1-2 drops you on an auto-scrolling mine cart; Stage 2 has a rocket-propelled climb. These aren’t traditional platforming—focus on dodging patterns, not exploration.
Save rocket fuel for vertical gaps and boss phases. The jet pack meter refills when grounded but drains fast in flight. Don’t waste charges on horizontal ground you can walk—reserve fuel for climbing shafts and emergency repositioning during multi-phase boss fights.
Check your difficulty setting. Japanese/Easy mode gives more health and continues; Hard mode cuts your life bar and tightens enemy patterns. If Stage 1’s pigbot mini-boss is two-shotting you, you’re on Hard—restart on Easy to learn the mechanics first.
Charge the jet pack on solid ground before vertical sections. Sparkster’s rocket meter refills faster standing still than mid-air; top it off before launch sequences or you’ll fall short of platforms and eat damage from respawning enemies below.
The sword reflects projectiles at full charge. Hold attack until Sparkster glows, then release—the swing deflects enemy shots back at their source. Works on most ranged pig troops and several mid-boss attacks; timing the charge beats dodging in tight corridors.
Diagonal rocket launches cover more distance than vertical. Aim 45° up-forward instead of straight up when crossing large gaps. The arc carries you farther horizontally and lets you steer mid-flight to adjust for moving platforms or surprise hazards.
Grab walls with your tail by holding toward them after a rocket boost. Sparkster auto-clings to any vertical surface if you’re touching it when momentum stops. Pause on sheer walls, wait out enemy patterns, or set up a second boost without returning to solid ground.
Boss patterns telegraph with sound cues before animation. The Giant Pigbot’s drill-arm and Axle Gear’s dash attacks both trigger distinct audio stings a half-second early—listen for the cue, not the sprite, especially in the rotating-gravity arena where visual tracking breaks down.
Lava pool reflections in Stage 6 are actual hitboxes, not cosmetic. The mirrored flames beneath you deal contact damage; you’re navigating two hazard layers simultaneously. Jump timing matters vertically and in the reflection plane.
Mash attack during rocket-ride auto-scrollers. The mine cart and missile segments let you swing while the game controls movement—constant slashing destroys incoming obstacles earlier and racks up point items that would otherwise scroll past untouched.
The walls players actually hit, and the way through each.
Stage 3 (Airship) — Axle Gear mid-boss
Axle Gear blocks frontal sword strikes and counters with a dash-slash that takes two health bars. Stand at mid-range to bait his rocket charge, then jump and air-dash over him as he commits. He slams into the wall behind you, stunned for 1–2 seconds. Land behind him, get three sword swings in before he recovers, repeat. Rocketing into him triggers a parry and recoil damage — don’t.
Stage 5 (Lava Pools) — Rotating gravity room
The mirrored chamber flips gravity every few seconds and kills more players than any boss. Stop moving the instant the screen shakes (or the controller rumbles, if enabled). Let gravity pull Sparkster to the new floor — he’ll land safely. The spike patterns mirror top-to-bottom; if you were safe standing still before the flip, you’re safe after. Trying to rocket-correct mid-flip is what puts you into the spikes.
Stage 6 (Pig Star) — Giant Pigbot phase 2
When the cockpit opens and fires spread shots, rocketing straight up into the pilot puts you in the bullet spread. Stay grounded on the left or right platform edge. The spread has a consistent gap at 45° angles. Charge your rocket to level 2 (hold B for ~1.5 seconds until Sparkster glows), then release diagonally through the gap. You’ll hit the cockpit, bounce off, and land with i-frames intact. Three charged hits ends the phase.
Stage 4 (Mine Cart) — Crab Rangoon grab
The crab’s claw-grab is inescapable once it connects — don’t mash. The tell: he rears back and both claws glow red for half a second. Rocket-dash horizontally away from center mass as soon as you see red. He’ll snap at empty space. Charge a level-1 rocket and hit his face during the whiff recovery. If you’re already grabbed, you’re eating the damage — focus on the next opening.

15 of 56 verified codes, free to read. The rest are in the Code Vault.
PH5A-BJTLPH5A-BNTLPH5A-BTTLPH5A-BATLRHPT-A6Y49D0T-B97CFFC01E:00FFAKWA-AA46AM4T-AA4LLL9A-EJEAAX4T-AA4LFFC040:003FFFFB0C:0009ATNA-CA64RENA-C6Y8GameShark Labs · SharkVault Founding Membership
Unlock the full guide
9 more sections + all 56 codes in the Code Vault : boss strategies, glitches, easter eggs, and the complete archive. Founding Members get every GTA drop through launch day.
Only 64 days until GTA VI. lock in $1.99/mo for life before the founding rate closes (then $2.99/mo).
Surfaced from external sources, newest first. Not editorially endorsed.