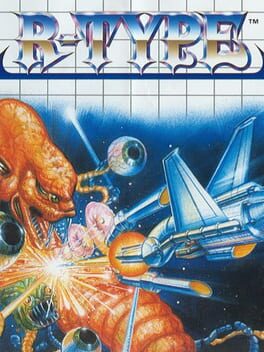
1988 · Irem · shoot-em-up · Sega
21 sources · 29 facts · verified 3mo ago · how this was made
Why this one is in the canon, and how to start it well.
I love R-Type and I love myself enough to know that I am NEVER beating an R-Type game without infinite continues.
Every named code, glitch, and easter egg above traces back to one of these sources. SharkVault editorial AI is grounded in human-curated facts files; nothing on this page is invented.
For cheat-device owners, R-Type on the Master System became essential. The game’s instant-death difficulty and stingy continue system (a button-hold trick at the Game Over screen was the only mercy) made infinite-lives codes the difference between practice and punishment. Action Replay and Pro Action Replay cartridges carried the same two-address infinite-lives string (00CE-0103), and the SMS homebrew scene later documented a SUMITA-name level-select and sound-test exploit that opened the entire campaign for training cite. R-Type didn’t just allow codes—it demanded them for everyone outside the 1CC elite, and the Master System port’s technical achievement made it the version where that code culture took deepest root on 8-bit hardware.
Grab the Force pod immediately. The first wave drops a power-up capsule—shoot it until it cycles to red (Force), then collect. This indestructible orb attaches to your ship’s nose or tail and absorbs enemy fire while dealing contact damage.
Learn Force positioning early. Tap the fire button to detach the Force and send it forward; tap again to recall it to your tail. Most players keep it front-mounted for the first two stages, but detaching lets you block bullets from two directions or park it as a stationary turret.
Charge your beam. Hold fire to build the Wave Cannon—a screen-clearing blast that pierces everything. Release when the charge indicator flashes. Timing this around boss phases and dense formations is the difference between survival and death.
Hug the terrain in Stage 1. The battleship segment scrolls over and under you. Stay low to avoid turret crossfire, but watch for the rising/falling deck sections—getting crushed between ship and screen edge is instant death.
Memorize the first boss pattern. The giant battleship core fires in fixed three-shot bursts. Position between volleys, charge your beam during the gaps, and aim for the red core when it opens. Two charged shots end the fight.
Don’t chase power-ups into danger. Capsules persist for several seconds. Let the screen scroll them into safe collection zones rather than flying into bullet walls.
Charge shots pierce multiple enemies. Hold fire to charge the Force beam — a full charge punches through enemy formations and destroys most small projectiles. Release timing matters: partial charges deal less damage and don’t clear bullets.
The Force pod blocks bullets from one direction. Attach it to your nose or tail depending on threat angle. Detaching mid-stage to sweep enemies while your ship stays safe is core strategy, but retrieval under fire is dangerous — practice the rhythm.
Memorize enemy spawn points, not patterns. R-Type stages are fixed layouts, not procedural. Knowing where the next wave appears lets you pre-position the Force or charge a shot before threats materialize. Death teaches these lessons; write them down.
Hug terrain to bait enemy fire away from choke points. Many corridor sections have ceiling/floor hazards. Flying close to one surface draws turret fire into walls, leaving the opposite lane clearer. The Master System port’s reduced sprite count makes this more forgiving than the arcade original.
Ground-crawling enemies die to low shots; don’t waste the Force. Stage 3’s insect swarms and Stage 5’s walking tanks sit below your default firing line. Tap fire low or detach the Force to sweep the floor while you handle aerial threats.
Boss weak points flash when vulnerable. R-Type telegraphs damage windows with sprite flicker. The Stage 1 battleship’s core, the Stage 4 giant warship’s eye — all blink when exposed. Wasting charged shots on armored phases costs time you don’t have.
Respawning mid-stage strips your Force. You return with the basic pea-shooter. Stages 3 onward are nearly impossible from a naked restart — treat each life like a 1CC attempt. The SMS port has no mercy continues.
The walls players actually hit, and the way through each.
Stage 3 Boss (Red Dobkeratops) — The massive biomechanical serpent winding through the vertical corridor punishes players who haven’t internalized Force attachment rhythm. Tail segments need charged shots, but the head’s sweeping pattern causes most deaths. Detach your Force pod and park it mid-screen as a stationary turret while you dodge in the lower third — the pod absorbs most projectiles. When the head dips low, reattach and pump charged shots directly into the mouth hitbox. SMS players report this fight runs 40–50% longer than the arcade version due to reduced firepower.
Stage 4 Mid-Boss Gauntlet — Three consecutive mini-bosses (turret walls, vertical-shaft crawler, ceiling-mounted cannons) with zero breathing room between encounters. The SMS port’s slower scrolling actually helps — memorize turret spawn points in the first wave and pre-position your Force pod at head height. For the crawler, hug the bottom and let your trailing options handle adds. Save your charge shot for the final cannon cluster; most players burn it too early.
Stage 5’s Forced Scrolling Maze — Narrow vertical passages with organic walls that pulse and close demand pixel-perfect navigation, and the SMS version has tighter hitboxes than the arcade. The critical mistake is rushing. Move in quarter-screen increments, wait for the wall animation to fully open, then advance. Your hitbox is smaller than it looks — you can scrape top and bottom edges safely. Detach your Force and send it ahead as a probe; if it gets crushed, you know the timing window closed.
Stage 6 Final Approach — The pre-boss corridor with respawning ground turrets and ceiling-mounted laser batteries kills more players than Bydo itself. Turrets regenerate on a fixed timer, so destroying them is pointless. Fly high, charged-shot the batteries in rhythm (they fire in pairs), and ignore everything below centerline. The SMS port adds an extra battery cluster not present in other versions — it appears right before the boss door. Slow down and charge-shot it from maximum range.
All 4 verified codes for R-Type, free to read.
00CE-0B0100CC-040900CE-010300CE-D8FFGameShark Labs · SharkVault Founding Membership
Unlock the full guide
9 more sections : boss strategies, glitches, easter eggs, and the complete archive. Founding Members get every GTA drop through launch day.
Only 64 days until GTA VI. lock in $1.99/mo for life before the founding rate closes (then $2.99/mo).
Surfaced from external sources, newest first. Not editorially endorsed.