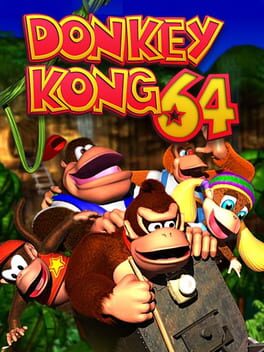
1999 · Rare · platformer · Nintendo
Why this one is in the canon, and how to start it well.
Compilation of rare footage of the famously unsettling-looking Donkey Kong 64 decoration at the Nintendo booth at E3 1999.
The cheat-device scene exploded around DK64 precisely because of that collectible overload. GameShark codes for infinite health, ammo, coins, and Crystal Coconuts turned the marathon into a victory lap. Banana multipliers, character-swap codes, and level-select entries let players bypass the color-coded gating without grinding every banana chain. Action Replay and CodeBreaker releases followed with similar arsenals. The game’s reputation as “too much game” made codes feel less like shortcuts and more like mercy—a way to experience Rare’s spectacle without the 30-hour slog. DK64 didn’t invent the collect-a-thon, but it pushed the formula so far that the cheat-code safety valve became part of the experience.
Hit Cranky’s lab and Funky’s armory in DK Isles first. Cranky teaches basic moves; Funky unlocks your starting weapon. The game gates progress behind both and won’t spell it out—explore the hub until you find their shops.
Clear Kong Battle arena completely before moving on. This tutorial zone is consequence-free practice: shoot enemies, grab collectibles, learn weapon range. The Kasplat drops a blueprint—kill it, take it. Blueprints unlock time extensions from Snide later.
Swap Kongs at DK barrel pads, not tag barrels. DK barrels (wooden, red “DK” logo) swap for free. Tag barrels cost coins and appear in levels. Early on you’re locked to DK until you rescue the others—don’t hunt for swaps that don’t exist yet.
Chase Golden Bananas that free new Kongs first. Jungle Japes has caged Kongs visible from the start—Diddy’s in a building, Tiny’s behind a gate. Freeing them expands your toolset immediately. Ignore side-collectibles (colored bananas, fairies) until you have at least three Kongs active.
Buy moves from Cranky before entering new worlds. Each Kong has a progressive moveset sold across multiple worlds. Skip Cranky in Jungle Japes and you’ll backtrack when a Golden Banana requires Simian Slam or an instrument upgrade. Check his lab every time the world number ticks up.
Ignore Wrinkly Kong’s hint system—it’s vague and costs coins. If stuck, cycle through all five Kongs in the current area first; most puzzles are Kong-specific and the game doesn’t signal which character to use.
Expect backtracking. DK64’s structure is non-linear but ability-gated. You’ll revisit Jungle Japes with late-game moves to reach previously inaccessible Golden Bananas. Grab what’s obvious on first visits, move on, return later with new tools.
Switch Kongs at every tag barrel. Collectibles are color-coded; backtracking across a seven-zone world because you missed Chunky’s switch costs minutes. Scan each room for pads, doors, and switches that belong to other Kongs before you leave.
Buy Cranky’s movement potions first. Diddy’s Jetbarrel, Tiny’s Ponytail Twirl, and Lanky’s float crack open entire sections of levels you already cleared. Prioritize them over combat upgrades—the exploration payoff is immediate.
Homing ammo turns combat into cleanup. Once Funky sells you homing ammunition, Kremling encounters stop being fights. Save standard ammo for switches and targets; homing rounds handle everything else.
You don’t need every Golden Banana. The final door requires 100, but each world holds more than that. If a banana locks behind a minigame you can’t stand—Beaver Bother, the racing challenges—skip it and grab easier ones elsewhere.
Instrument pads open two-way doors. Play your instrument on a music pad and the barrier opens—but you can walk back through before it closes to access both sides. Grab items on the “locked” side without finishing the puzzle.
Tag barrel warps cut minutes per world. Activate a tag barrel once and you can warp to it from any other barrel in the level. Use this to skip long backtrack sequences when switching Kongs for color-coded collectibles.
Banana Medals unlock at 75 per Kong, per world. Chasing all 100 regular bananas for a single Kong is overkill. Stop at 75 unless you’re completing the set—the medal unlocks either way.
The walls players actually hit, and the way through each.
Angry Aztec Temple — Tiny Kong’s Lava Room
The five-Kong rotating room with rising lava stops players cold. You don’t need to rush. Each Kong has 30+ seconds before the lava becomes fatal, and the room resets if you exit and re-enter. Memorize the barrel sequence (Diddy → Lanky → Tiny → Chunky → DK) and clear each segment methodically. Tiny’s section demands the Ponytail Twirl hover—hold Z after jumping to extend every platform gap. If you’re still drowning, grab the lava-immunity potion from Cranky’s Lab first; it trivializes the gauntlet.
Frantic Factory — Chunky’s Toy Monster Boss
The Mad Jack fight punishes players who chase. Wait in the center arena and let Jack telegraph his landing with the red floor panels. The moment he lands, spring up and ground-pound his switch. Three hits per phase, four phases total. The camera betrays you here; manually center it with C-Up between jumps. If you’re taking damage, you’re moving too early. Let him commit to the landing animation before you launch.
Hideout Helm — Blueprint Turn-In Requirements
The final world locks if you haven’t collected enough Blueprints from earlier Kasplat enemies (the colored-hair Kremlings). Each Kong needs their color-coded Blueprint from every world to progress past certain Helm barriers. If you’re stuck at a Kong-specific door, backtrack to previous worlds and hunt your missing Kasplats—they respawn if you failed the fight. The DK Isles lobby map shows Blueprint completion per Kong. Lanky’s Kasplats are easy to miss in Fungi Forest (the night-cycle barn) and Creepy Castle (the crypt under the drawbridge).
Crystal Caves — Donkey’s Cabin Coin Puzzle
The spinning cabin coin-grab demands a counterintuitive strategy: ignore the coins rotating toward you. Stand near the door and collect only the coins on the far wall as the room spins them into reach. The camera disorientation is intentional—lock onto the opposite side and strafe. You need 50 coins in 60 seconds; chasing the “close” coins wastes time on repositioning. One clean lap focusing on far-wall grabs nets 55–60 coins.
15 of 253 verified codes, free to read. The rest are in the Code Vault.
8066D220 0011806E1E5B 00028066D221 0001D0014DC4 0000D07ECD10 0000D07ECD58 0000D07ECD60 0000D0014DCC 0000D07ECD16 0000D0014DD4 0000D07ECD1C 0000D0014DDC 0000D07ECD22 0000D0014DC5 0000D07ECD11 0000GameShark Labs · SharkVault Founding Membership
Unlock the full guide
9 more sections + all 253 codes in the Code Vault : boss strategies, glitches, easter eggs, and the complete archive. Founding Members get every GTA drop through launch day.
Only 64 days until GTA VI. lock in $1.99/mo for life before the founding rate closes (then $2.99/mo).
Surfaced from external sources, newest first. Not editorially endorsed.· 14 more in this feed.· 2 placed beside the sections they relate to above.