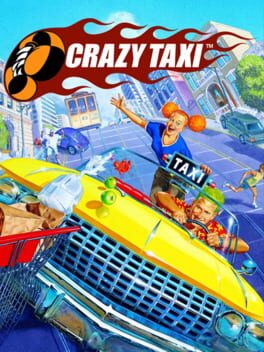
2000 · Hitmaker · racing · Sega
Why this one is in the canon, and how to start it well.
The cheat-code scene around Crazy Taxi was unusual for a post-arcade racer: most players chased character unlocks and the elusive “Crazy Box” challenge solutions rather than traditional invincibility or time-freeze codes. GameShark and Action Replay releases focused on timer manipulation, fare-value multipliers, and license-unlock shortcuts—the game’s structure made infinite-time codes the most sought-after entry, letting players explore the map’s hidden jumps and rooftop routes without the constant countdown pressure. Speedrunners and score-chasers treated the game as a routing puzzle, and the community-driven optimization culture (documented exhaustively on GameFAQs) mirrored the cheat-device experimentation happening in parallel. Crazy Taxi proved arcade design could thrive on home hardware and that three-minute sessions could generate the same obsessive replay loop as 40-hour RPGs.
Pick Axel in Arcade Mode. His cab has the best all-around acceleration and handling for new drivers. Gena’s top speed won’t help if you’re bouncing off walls.
Master the Crazy Dash immediately. Shift into Drive, then snap into Reverse and back to Drive while holding the gas. Your cab launches forward with a speed boost—essential for every pickup and tight timer.
Ignore traffic laws completely. Drive on sidewalks, plow through crosswalks, jump off ramps. The game rewards reckless speed over safe driving. Pedestrians dive out of the way; you can’t hit them.
Chain fares for Crazy Combos. Drop off a passenger and immediately grab the next one nearby without stopping. Combos multiply your earnings and add precious seconds to the clock.
Learn the Crazy Drift. Tap the brake while turning to slide around tight corners without losing momentum. Drifting keeps speed up and shaves seconds off every route.
Prioritize red and yellow destination markers. Red circles mean big money but tight timers—only grab them if you know a shortcut. Green circles are low-risk training wheels.
Use the Crazy Hop (gas + brake simultaneously) to clear obstacles and traffic. The hop is slower than the Dash but gets you over cars blocking narrow streets.
Master the Crazy Dash and Crazy Drift early. Tap the gas immediately after a full stop to launch forward with a speed boost; combine with the Drift (gas + brake simultaneously) to whip around corners without losing momentum. These two techniques are the difference between $5 fares and $50 combos.
Prioritize red and orange fares over green. Destination color indicates distance and potential payout — red is long-haul money, green is pocket change. In Arcade Mode’s three/five/ten-minute sprints, two big fares beat five short hops every time.
Learn the shortcut geography, not the street grid. Crazy Taxi rewards reckless lines through parks, off piers, and over building rooftops. The minimap arrow points to destinations, but the fastest route is almost never the road — look for stairs, slopes, and gaps you can launch across.
Chain fares without returning to street level. When you drop a customer, the next nearest fare highlights immediately. Slam the Crazy Dash and grab them before the timer ticks down — consecutive pickups without downtime multiply your cash-per-second rate and keep Offspring’s “All I Want” from looping into awkward silence.
Use the Crazy Hop (gas + brake + gear shift) to clear obstacles and correct bad angles mid-flight. Overshoot a drop-off or clip a building corner, the Hop lets you adjust trajectory without a full stop-and-reverse. Essential for the waterfront’s tight dock turns.
Ignore traffic laws, respect physics. Sideswiping cars costs time but not health; head-on collisions into walls kill all momentum. Treat pedestrians and sedans as speed bumps, treat lamp posts and storefronts as brick walls.
Original Mode’s open timer rewards exploration; Arcade Mode demands route memorization. Use Original to learn landmark positions and test shortcut lines, then apply that knowledge to Arcade’s ticking clock for leaderboard runs.
The walls players actually hit, and the way through each.
Can’t Hit $5,000 in Arcade Mode (3-Minute)
Most players stall around $3,000–4,000 because they route one fare at a time. The unlock requires aggressive chaining: drop a passenger, scan for the next pickup before the tip counter finishes. Green destinations (medium distance) are your bread-and-butter — reds eat too much clock for the payout, yellows don’t build multiplier momentum. Church → Tower Records → Fila is a high-density triangle; memorize it. Use Crazy Dash (Drive + Reverse tap, then Drive + Accelerate) off every drop to close gaps faster. Players who white-knuckle the timer and skip the $200 yellows consistently break $5k by the 2:30 mark.
Crazy Box 1-S: Can’t Land the Crazy Jump
The balloon-pop jump onto the raised freeway demands a running start from the back of the starting zone, not the painted line. Accelerate straight, no Drift input, and hit the ramp dead-center at full speed. Most failures come from drifting into the approach or starting too close to the ramp itself. The game wants 60+ mph at launch; anything slower clips the freeway guardrail. If you’re consistently undershooting, you’re braking or turning during the run-up. Lock the stick forward, full throttle, no corrections.
Original Map: Getting Lost After the First Few Fares
Crazy Taxi has no minimap and no GPS arrow — navigation is pure landmark memory. The hill district (residential, near the cable car) and the waterfront (piers, arcade) are visually distinct; use them as cardinal points. When a customer wants the church, it’s always uphill west from the starting taxi stand. Tower Records sits bayside east. After 10–12 fares you’ll internalize the major veins, but early confusion is universal. Stick to green destinations for the first dozen runs; they’re short enough that wrong turns don’t kill the fare, and you’ll build the mental map through repetition. The game expects you to learn by driving, not by studying.
Crazy Box 2-S: Crazy Balloons (Time Pressure)
The balloon chain through the city has almost zero margin — players typically fail by overshooting turns or losing speed on corrections. The route is linear but demands Drift cancels (tap Brake + opposite direction to snap straight out of a slide) rather than full drifts. Most balloons sit on the racing line; trust the layout. If you’re hunting for balloons off the main road, you’ve already lost seconds you can’t recover.
GameShark Labs · SharkVault Founding Membership
Unlock the full guide
9 more sections : boss strategies, glitches, easter eggs, and the complete archive. Founding Members get every GTA drop through launch day.
Only 64 days until GTA VI. lock in $1.99/mo for life before the founding rate closes (then $2.99/mo).
Surfaced from external sources, newest first. Not editorially endorsed.· 21 more in this feed.